Cup-and-Ring Stone (removed): OS Grid Reference – NZ 1475 6350
Archaeology & History
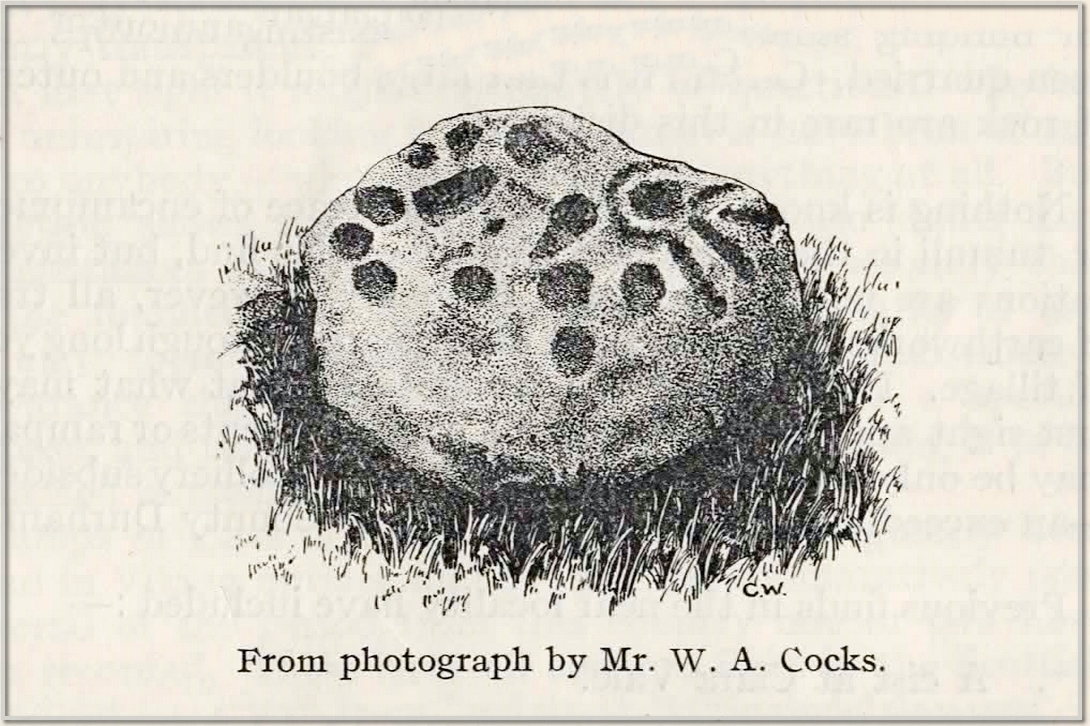
This carving presently lives in what Beckensall & Laurie (1998) described as “the stone store” at the Museum of Antiquities at the University of Newcastle-upon-Tyne, but it was discovered in some walling close to the road on the south-side of Ryton by a Mr William Cocks in 1934. The carved rock is relatively small—measuring “roughly two feet five inches, by one foot ten inches, by one foot three inches in thickness”—and was obviously not in its original position, but would have lived relatively close to the walling into which was placed. Mr Cocks told that,
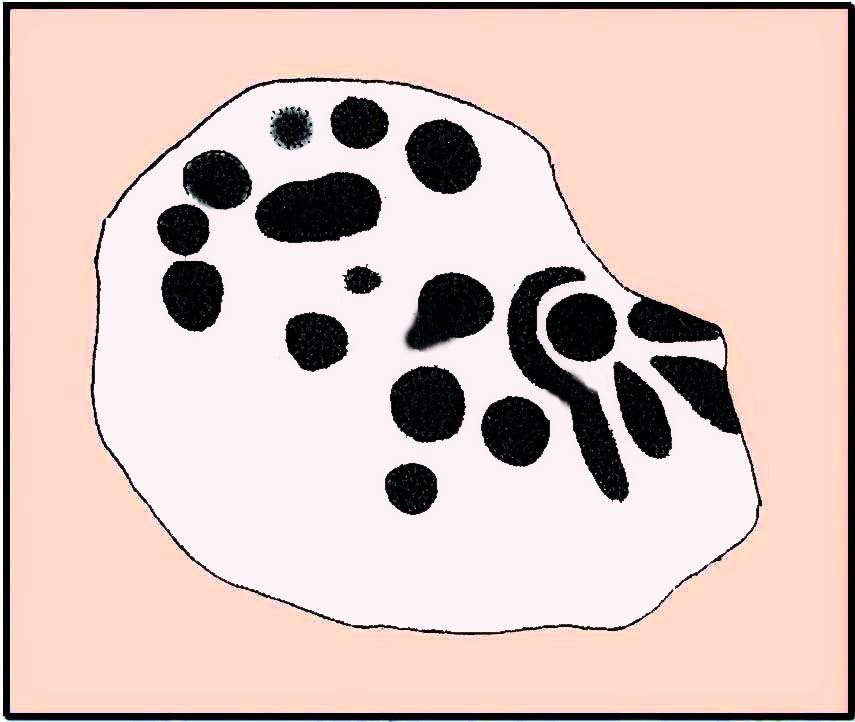
1934 sketch of the carvingModified Beckensall sketch
“the stone bears one “cup and ring” with four radial ducts, the latter being in an exceedingly fine state of preservation. There are also ten plain cups of circular form; one cup with a deep conical duct; and one large cup which appears to have been formed by uniting two circular cups. All show the “pocking” or tool marks of manufacture, and these are especially noticeable in the radial ducts.”
The cup-marked Ryton (1) stone was found some 250 yards to the west and the Ryton (3) petroglyph was less than half-a-mile north, making it likely that other types of prehistoric remains once existed in this locale.
References:
Beckensall, Stan, Northumberland’s Prehistoric Rock Carvings – A Mystery Explained, Pendulum: Rothbury 1983.
Beckensall, Stan & Laurie, Tim, Prehistoric Rock Art of County Durham, Swaledale and Wensleydale, County Durham Books 1998.
Cocks, W.A., “The Ryton ‘Cup and Ring’ Marked Rock,” in Proceedings Society of Antiquaries Newcastle-upon-Tyne, volume 6, no.8, 1934.
Your best starting point is from the Great Skirtful of Stones giant cairn. From here follow the fencing that runs down the slope to your left (south-east) for roughly 160 yards (148m) – past the Great Skirtful Ring – until you reach the gate. Go through it and keep walking down the same fence-line for 300 yards then walk south onto the moorland proper (there are no paths here). You’ll pass over several undulations in the heather (some of these are the edges of ancient trackways) and 55-60 yards south from the fencing you’ll walk over and into this overgrown prehistoric ring. It’s very difficult to see when the vegetation is deep, so persevere!
Archaeology & History
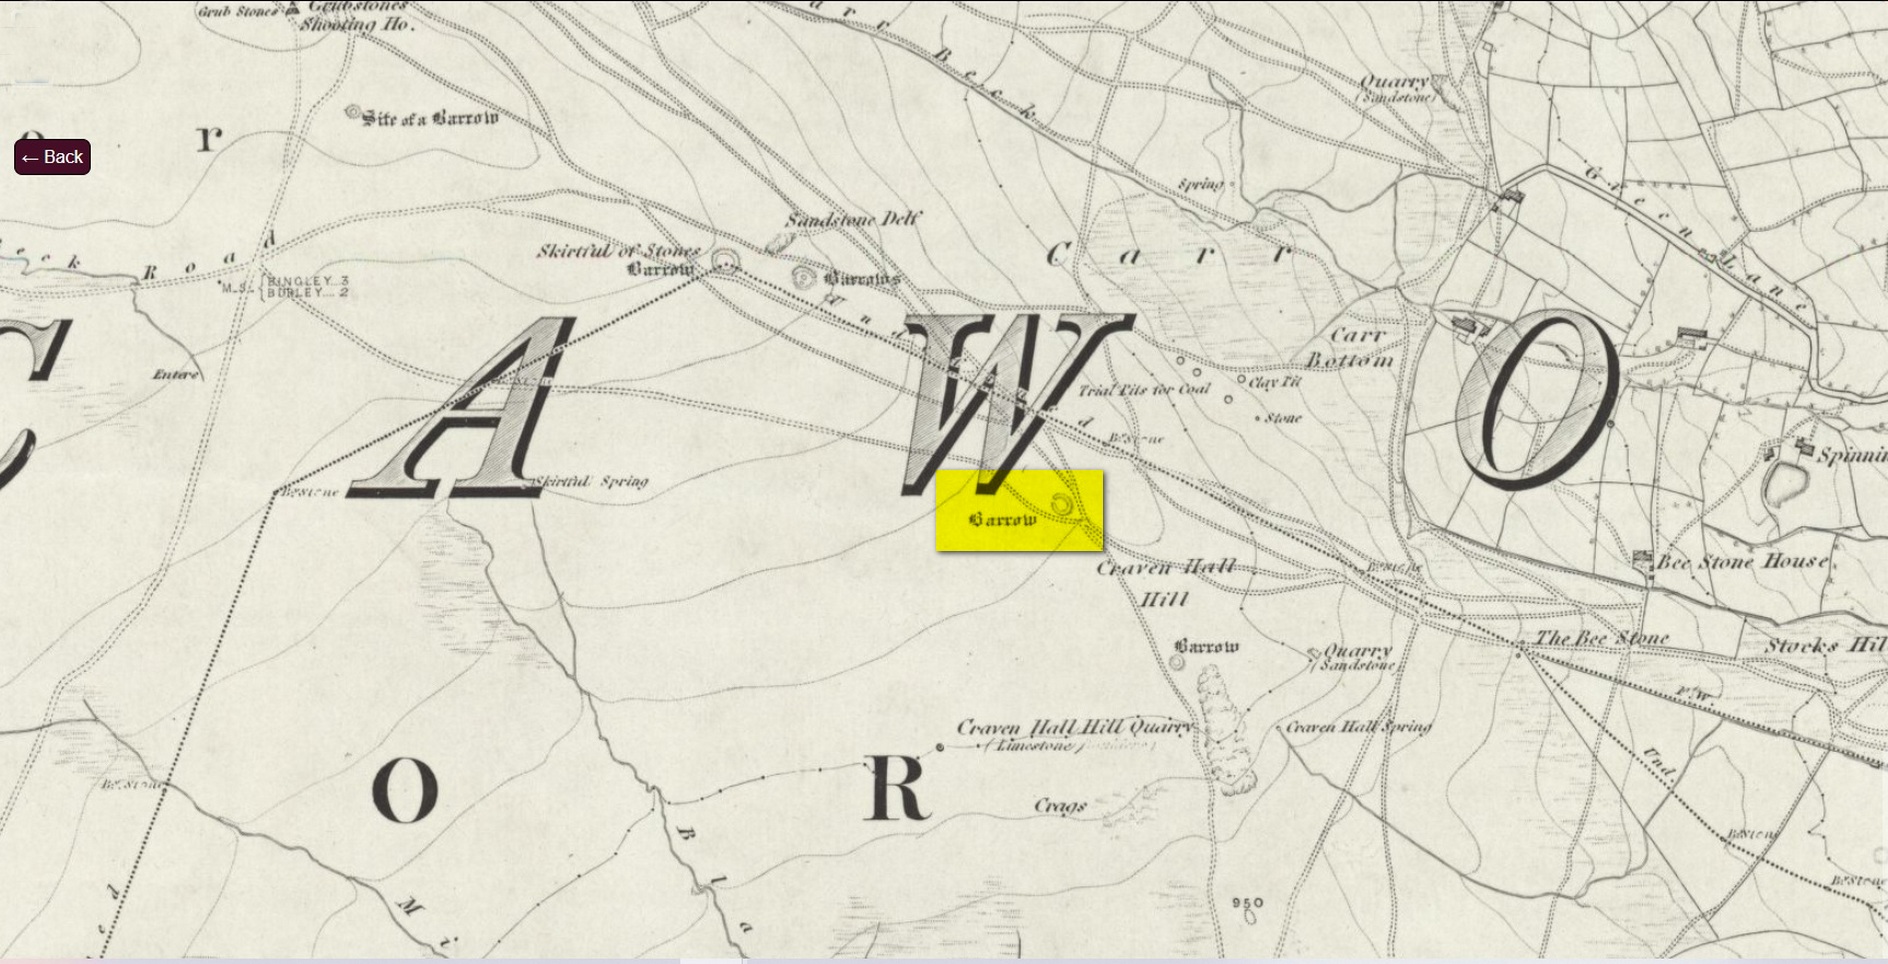
Site shown on 1851 map
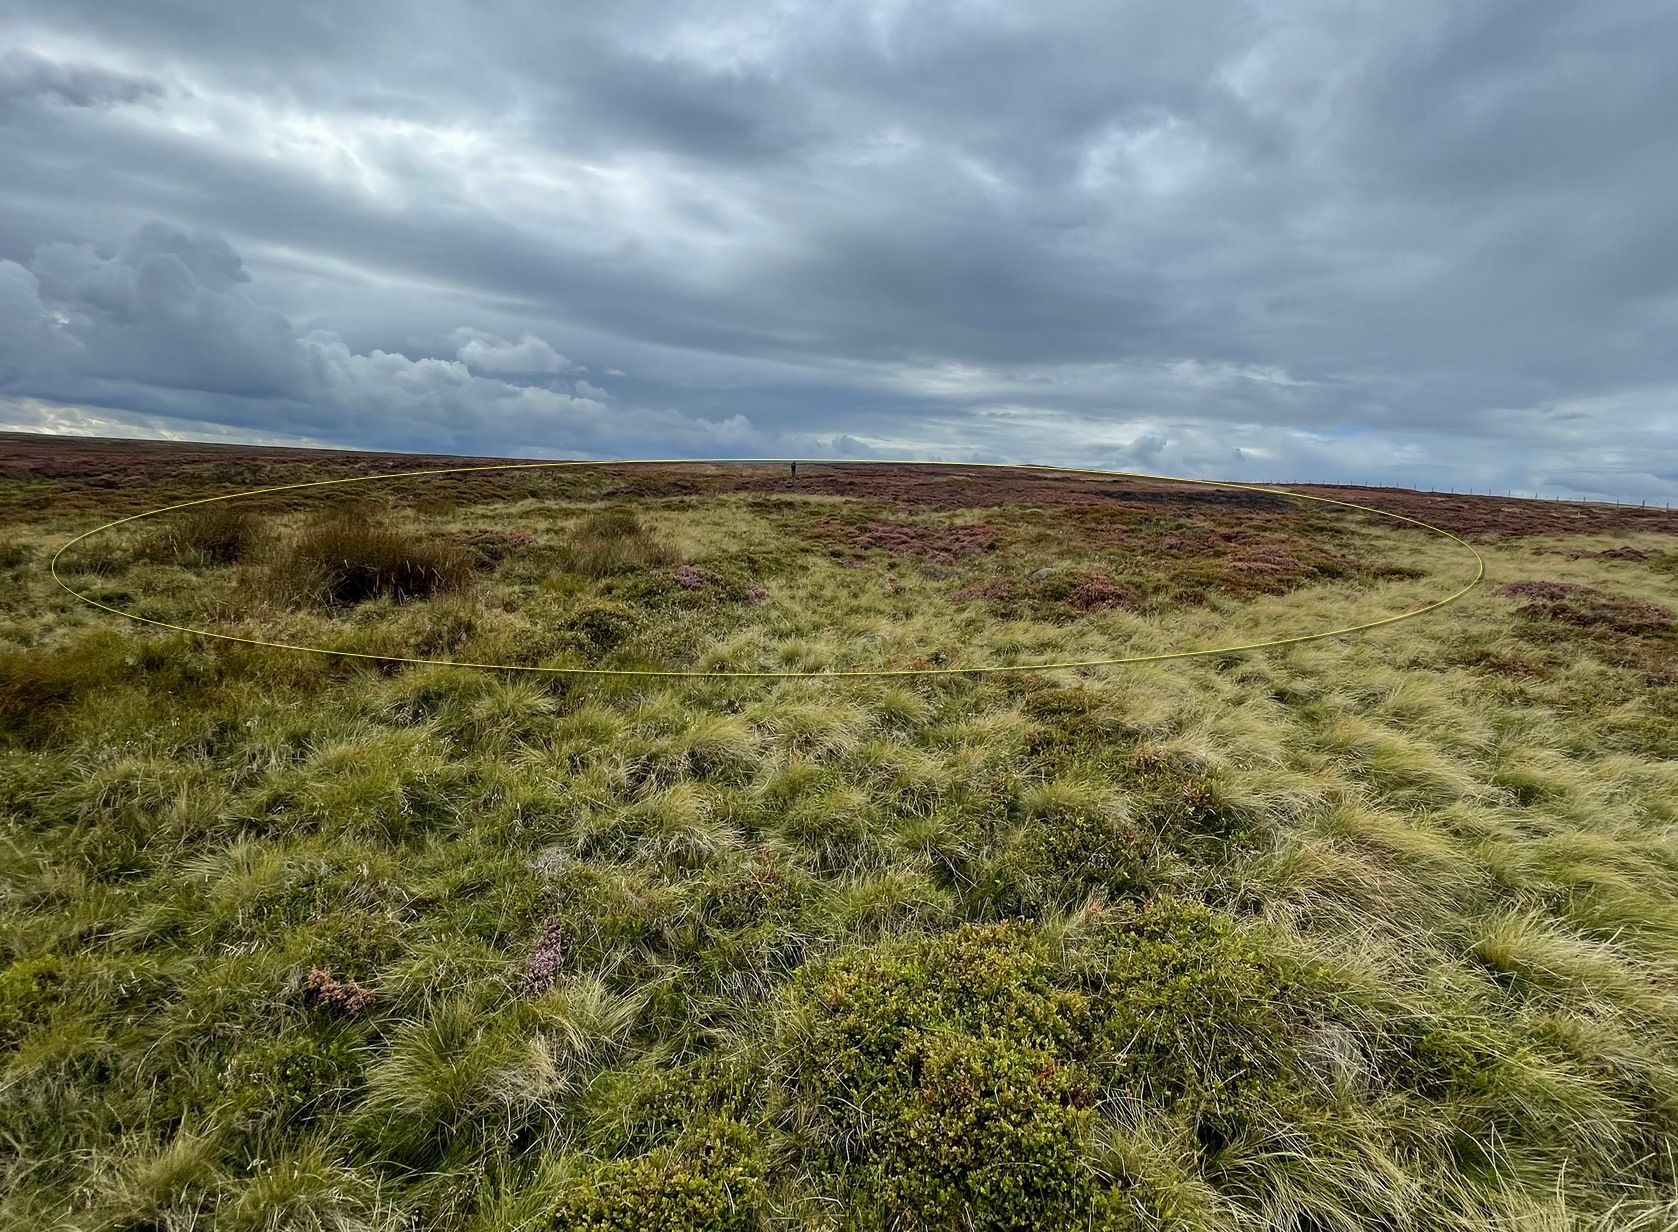
This is an interesting site. Marked on the 1851 Ordnance Survey map as a “barrow” (right), it is shown with trackways on either side of it to the north and south, and with an opening or entrance on its northwestern side. Yet since that date, very little archaeological attention has been given to it and the site remains unexcavated, despite its location being repeated on all subsequent maps since then. The designation of the site as a barrow or burial site, without being excavated, was educated guesswork at the time as the place seems to be what we today define as a ring cairn. And whilst this seems likely, there are some oddities here.
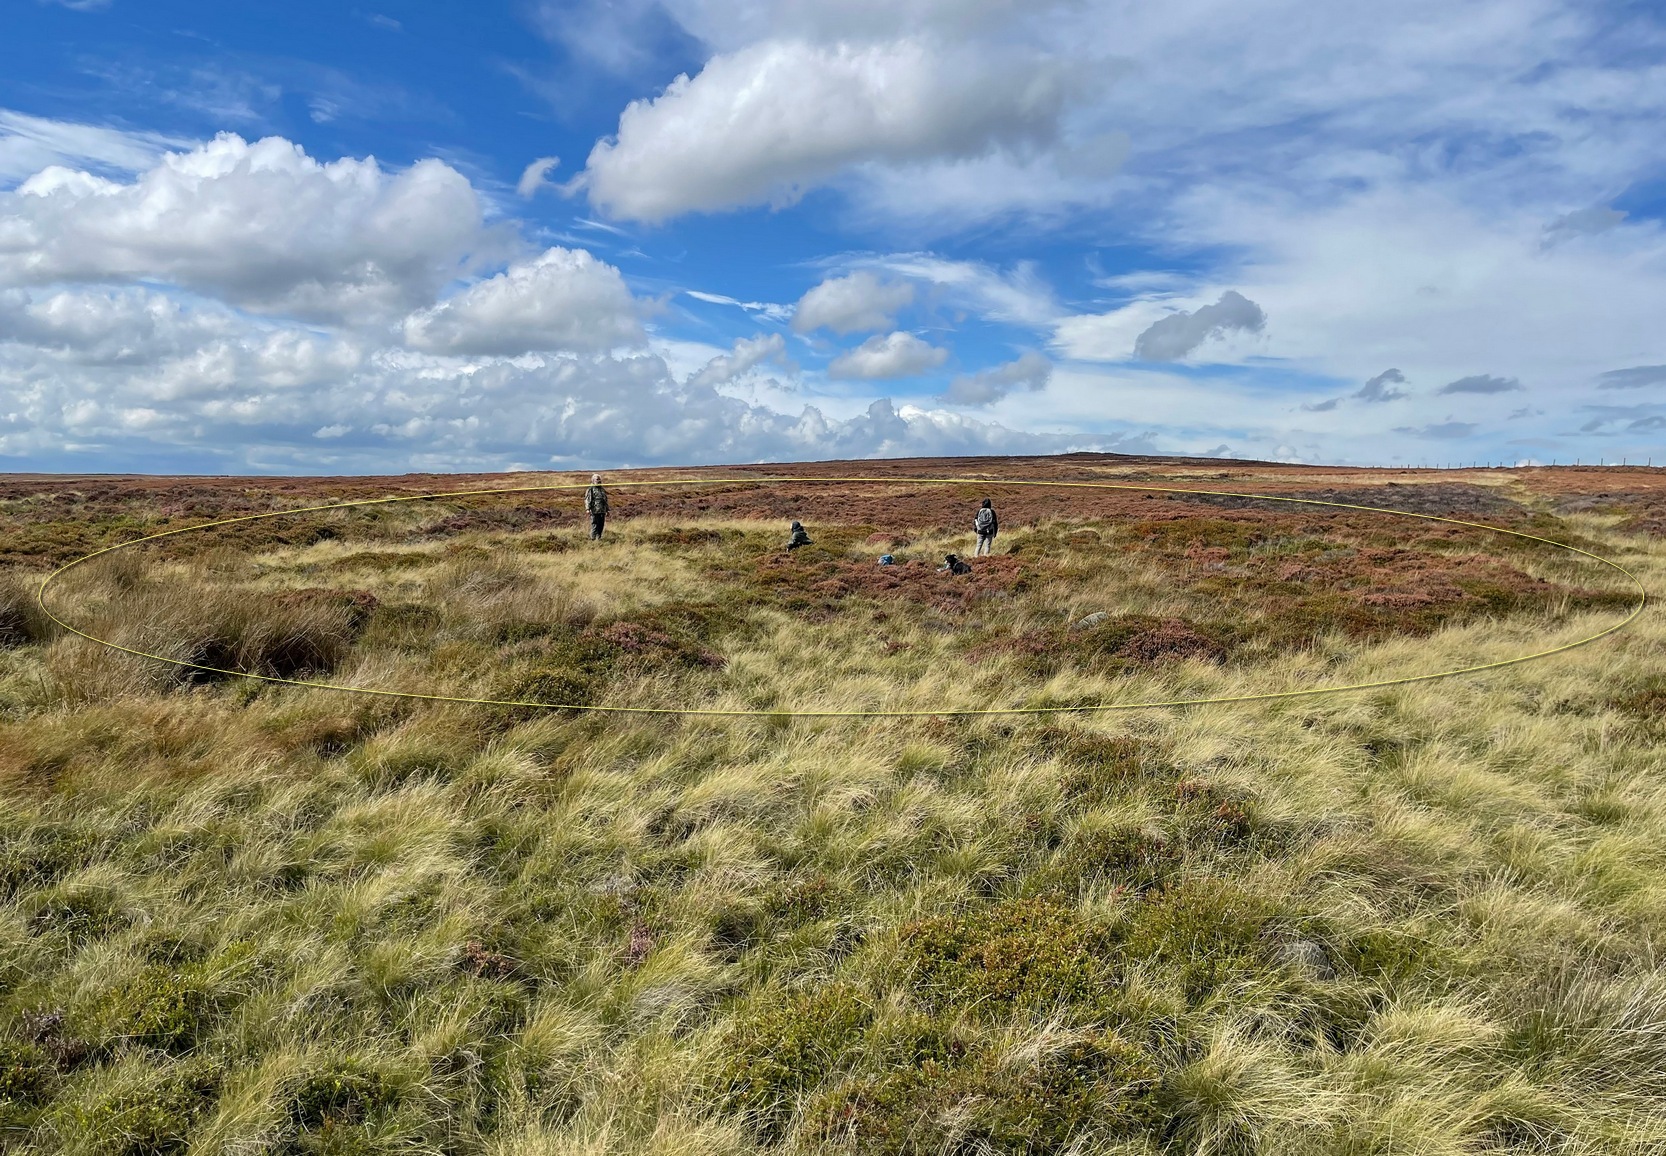
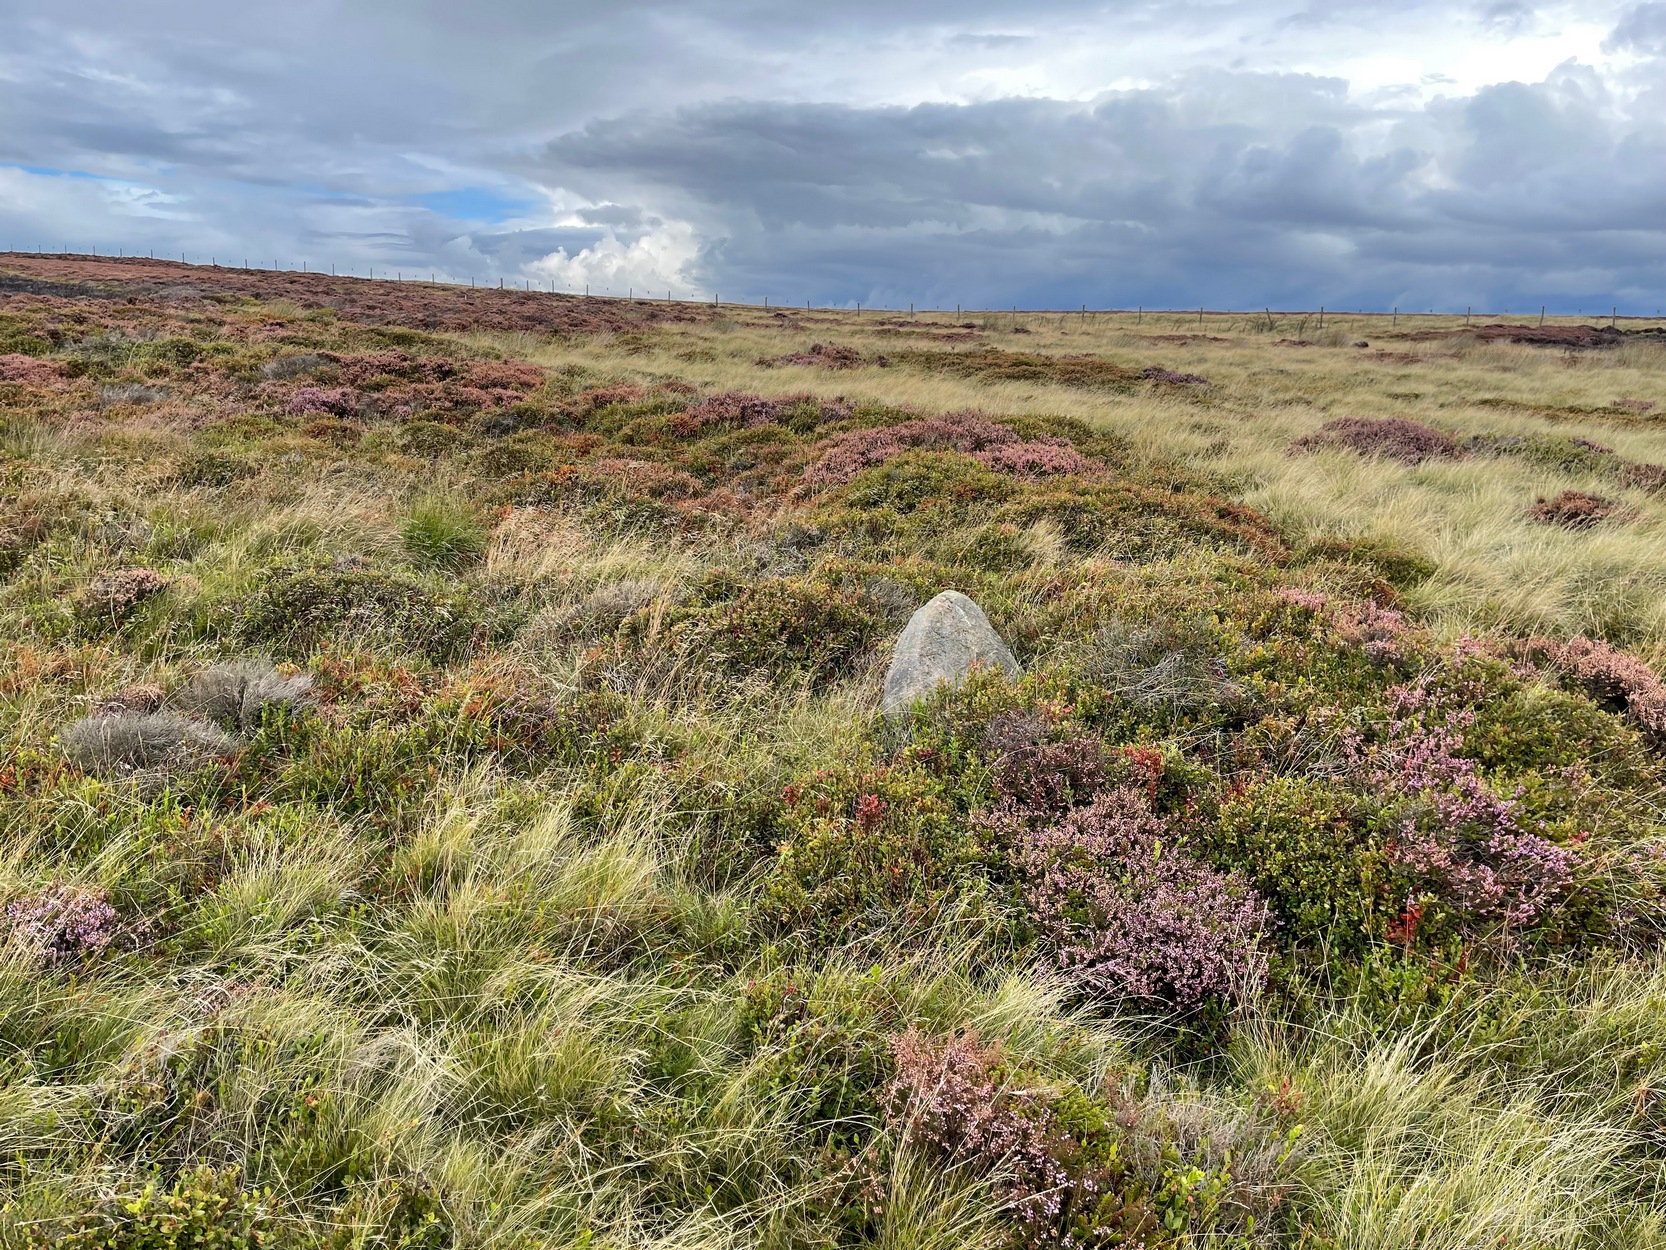
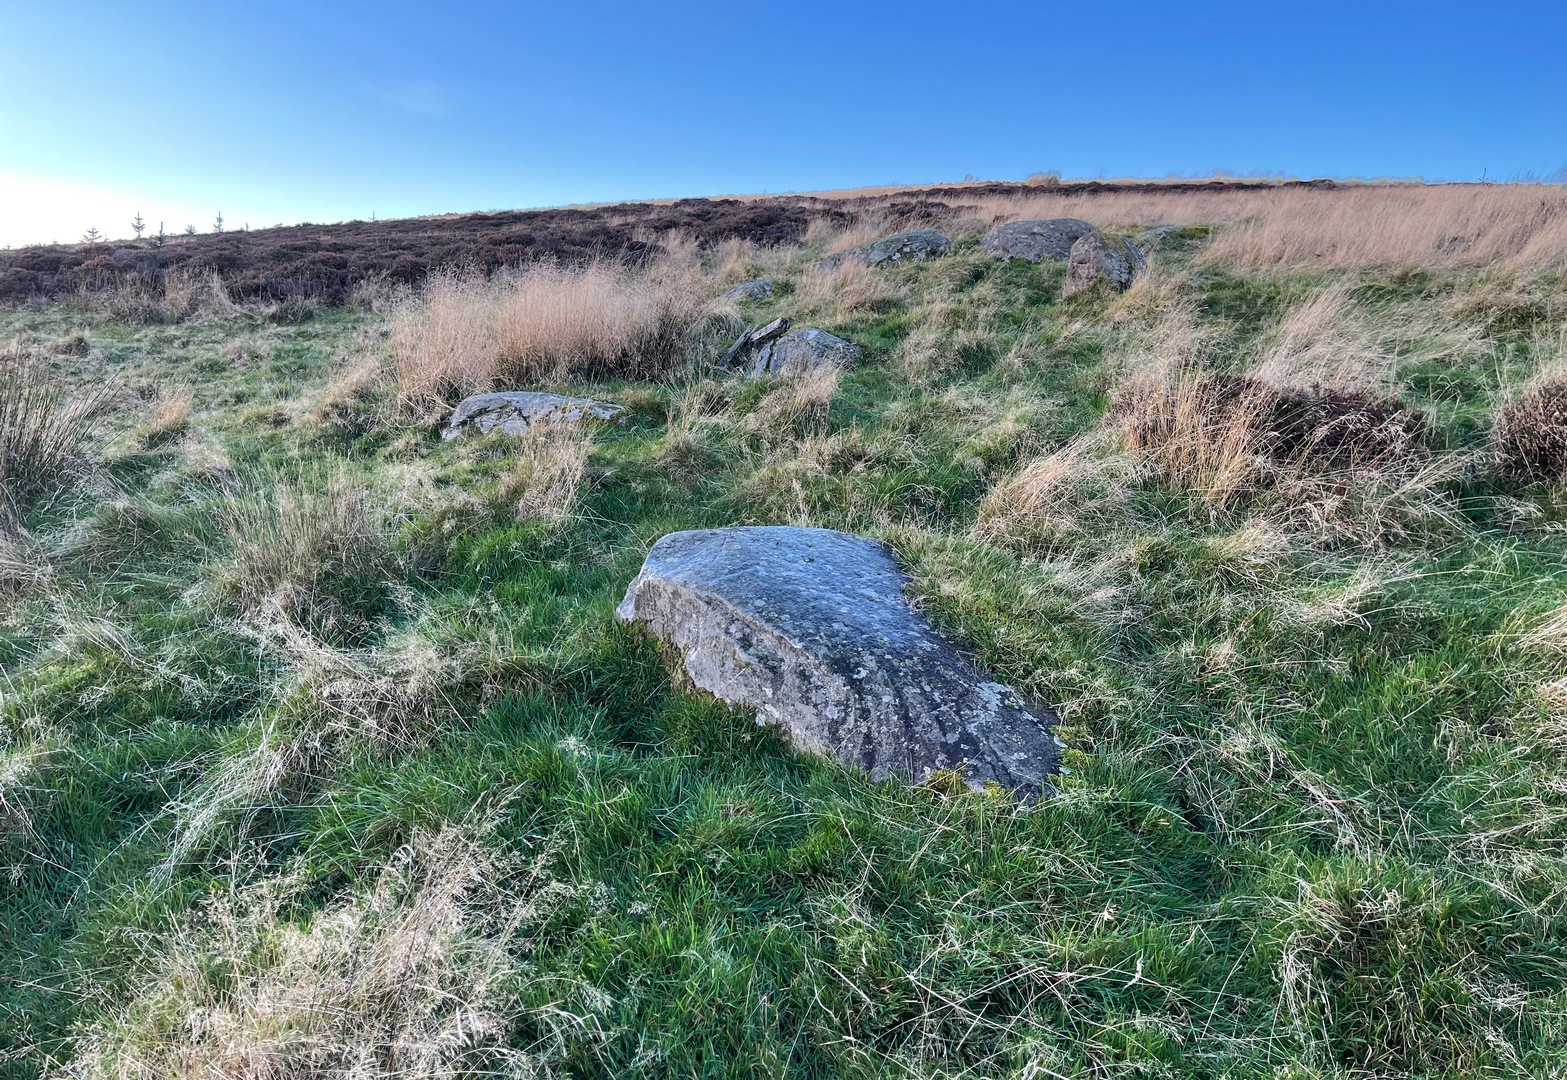
Measuring roughly 25 yards (SE – NW) by 21 yards (NE – SW), this overgrown oval ‘ring’ is a similar architectural structure to the more famous Roms Law circle more than half-a-mile northwest of here—but bigger! And, unlilke Roms Law, this overgrown circle seems to have been untouched for many centuries. The oval surrounding ‘ring’ itself is composed of thousands of small packing stones between, seemingly, a number of much larger upright stones, reaching a maximum height of more than three feet high at the northernmost edge. The ‘ring’ ostensibly looks like a wide surrounding wall which measures two yards across all round the structure.
Track running into the ringRaised line into the ring
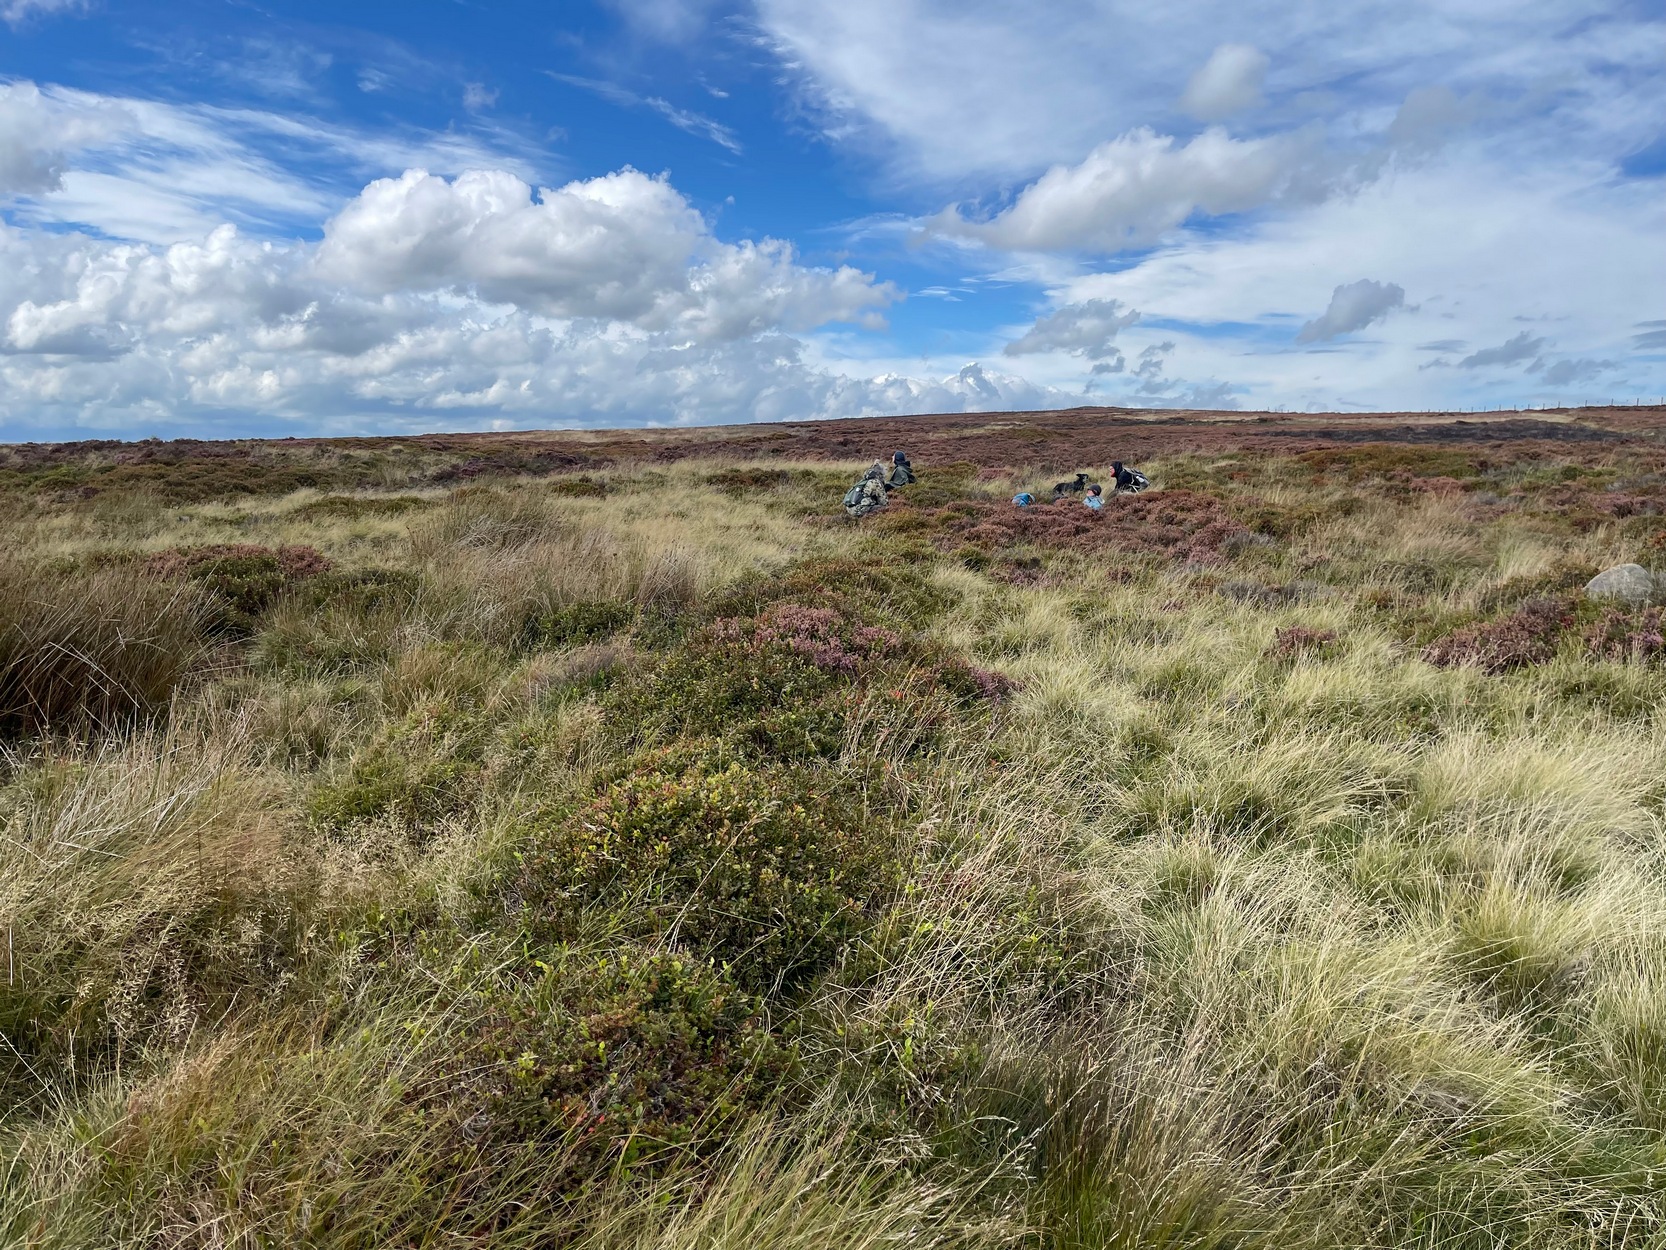
Internally, there seems little evidence of a burial — although our recent visits here, as the photos indicate, took place when the moorland vegetation was deep and covered almost the entire site. The outline of the site is obviously visible, even in deep heather, but the smaller details remain hidden. But in addition to the main ring, another very distinct ingredient here is the existence of an extended length of man-made parallel walling, probably a trackway, that runs into the circle from the southeast all the way through the circle and out the other side and then continuing northwest heading roughly towards the Great Skirtful giant cairn on the horizon 500 yards to the northwest.
Stone at NE arc of walling
Due to the landscape being so overgrown, it’s difficult to ascertain where this ‘trackway’ begins and ends. Added to this, we find that there are additional ‘trackways’ that run roughly parallel to the one that runs through the circle—and these ‘trackways’ are very old indeed, some of them likely have their origins way back in prehistory. The one that runs through the middle of this ring cairn may be a ceremonial pathway along which, perhaps, our ancestors carried their dead. If we follow it out from here and keep walking along the track 300 yards to the southeast, we eventually run right to the edge of the Craven Hall (3) circle. Parallel to this is another ancient trackway that runs northwest to the edge of the Roms Law circle. It seems very much as if we have ceremonial trackways linking sites to each other: ancestral pathways, so to speak.
Have a gander at this when you’re next in the area. There are many other sites nearby that are off the archaeological radar. In recent years, a number of northern antiquarians wandering over this landscape are finding more and more ancient remains: walling, circles, cairns, trackways. It’s a superb arena—but sadly, most of it is hidden beneath deep moorland vegetation.
References:
Faull, M.L. & Moorhouse, S.A. (eds.), West Yorkshire: An Archaeological Guide to AD 1500– volume 1, WYMCC: Wakefield 1981.
Acknowledgements:Huge thanks for use of the Ordnance Survey map in this site profile, reproduced with the kind permission of the National Library of Scotland.
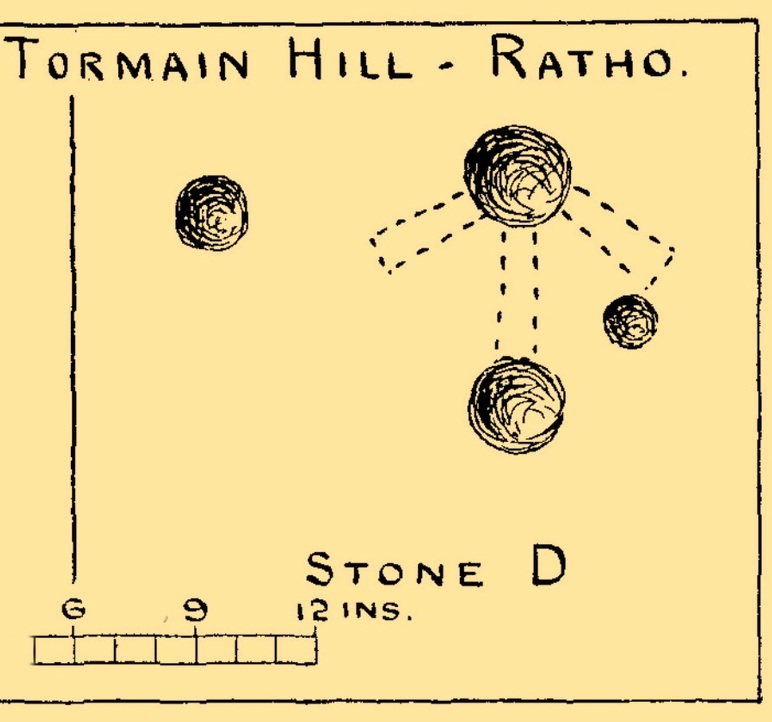
Take the same directions as if you’re visiting the impressive Tormain (1) carving. About ten yards before you reach it, just at the top of the hill itself, almost the first flat stone you come across is the one you’re after. You’ll find it easily enough.
Archaeology & History
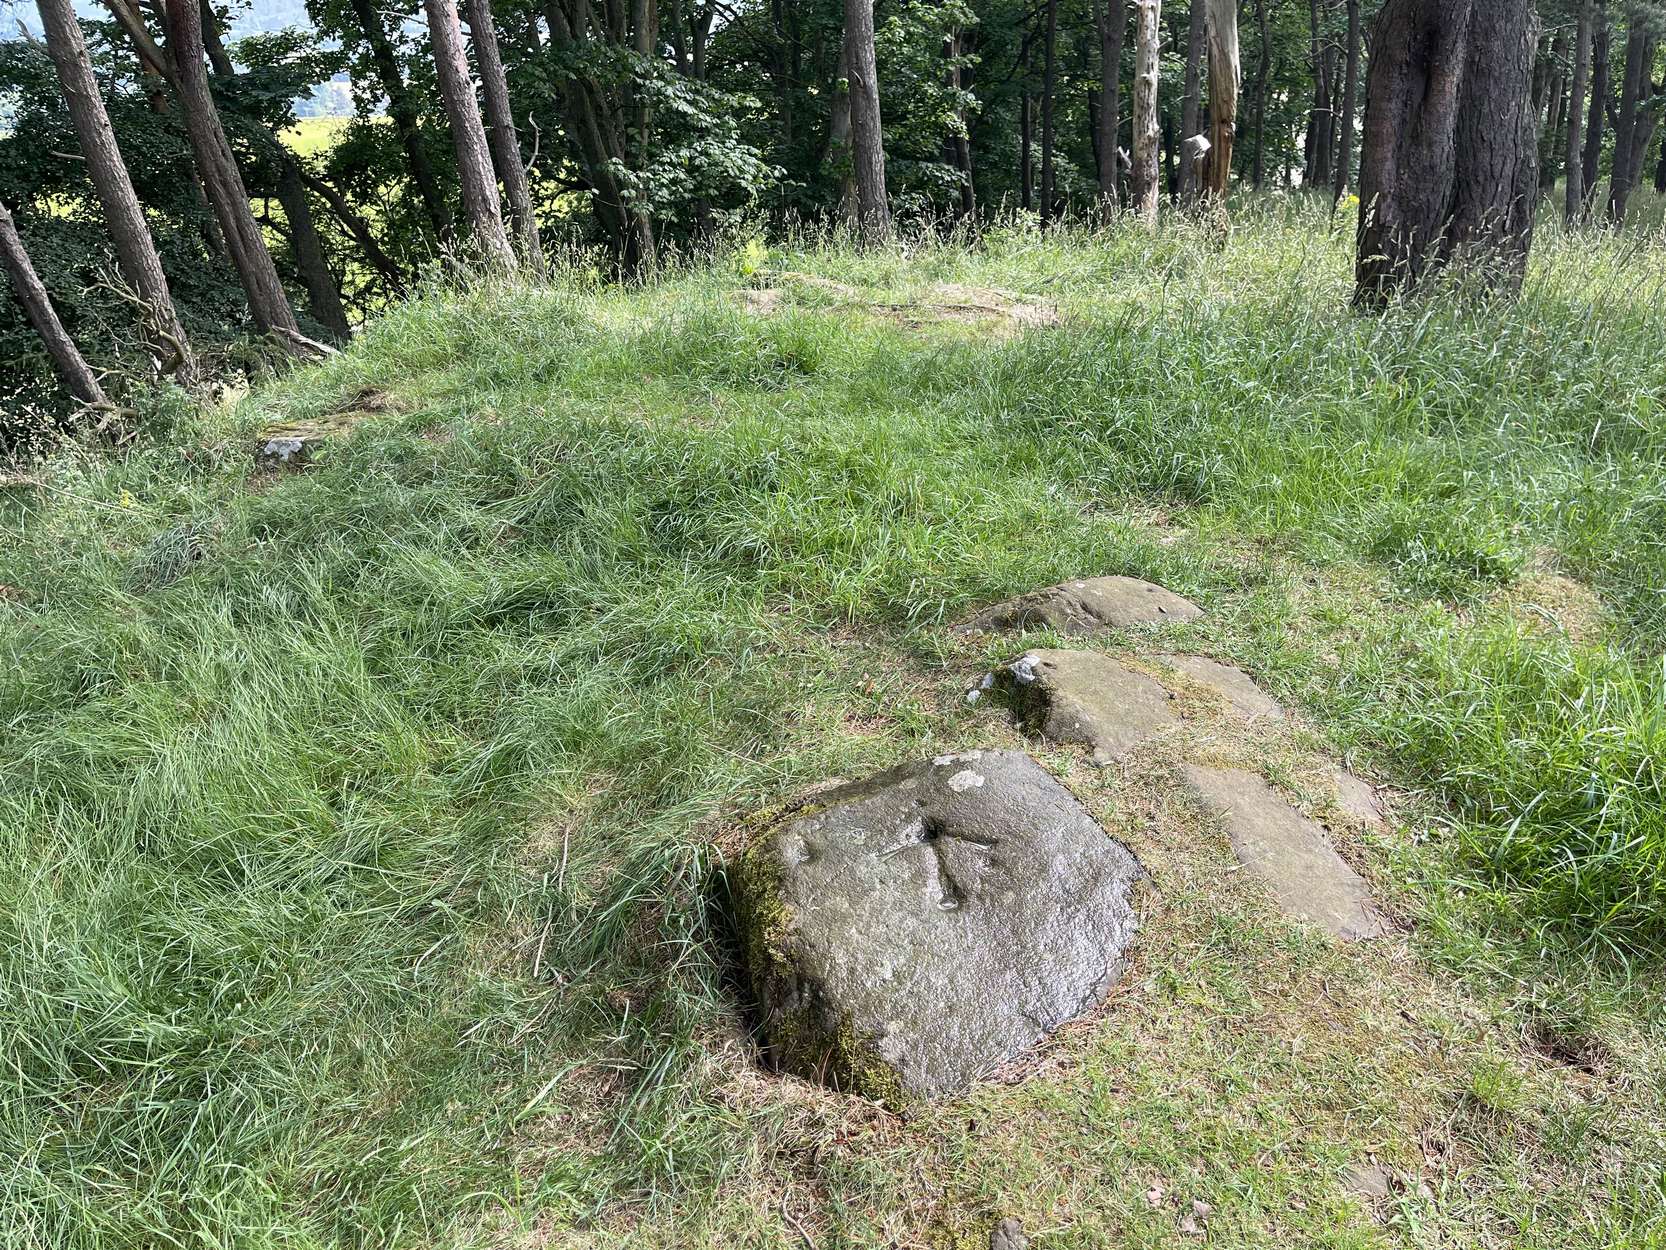
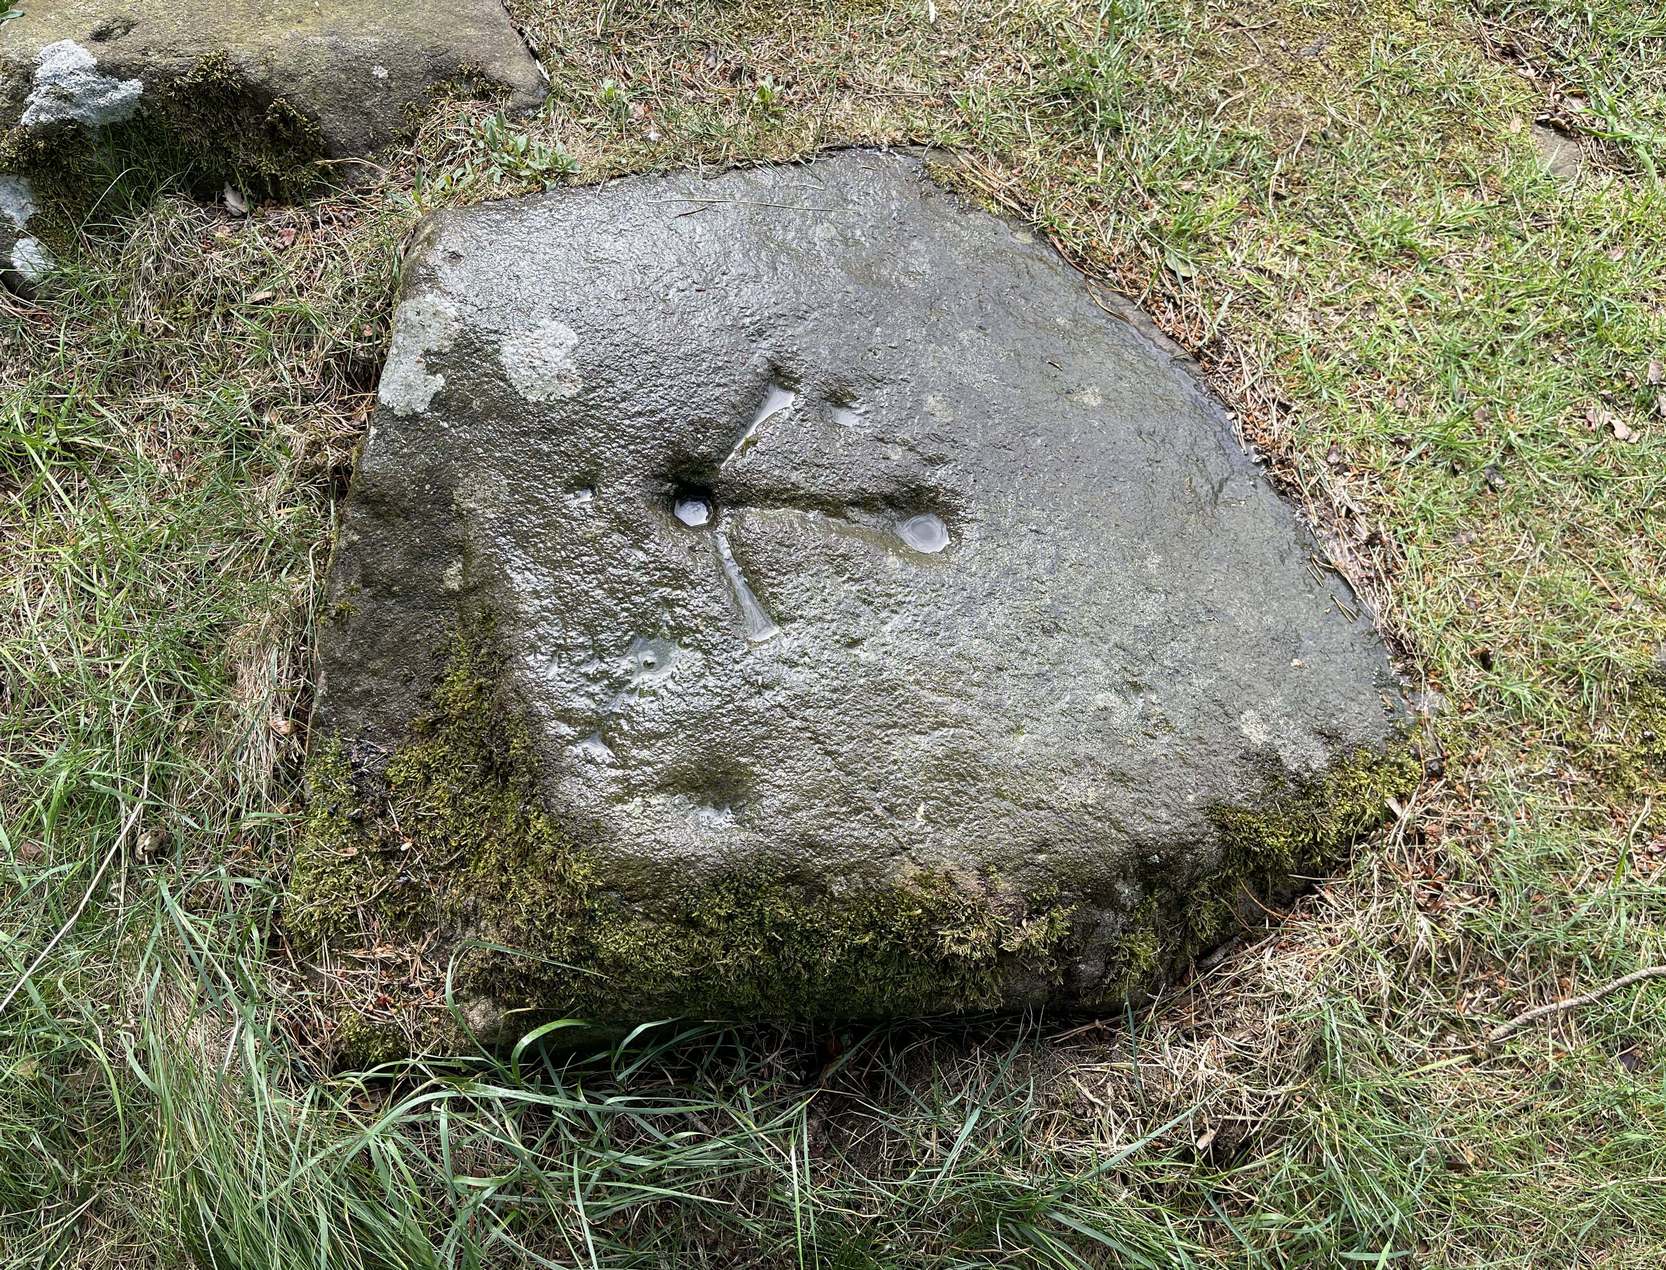
This is a notable design by virtue of the Ordnance survey lads marking it with an unusually large benchmark, utilizing at least one of the prehistoric cup-marks on their much more modern symbol. You can clearly see it in all the photos. The stone itself may have had a section of it cut or split from a once larger piece, probably in the 19th century when a lot of quarrying was being undertaken round here.
This carving was first described, albeit briefly, in John Smith’s (1874) piece on the nearby Witch’s Stone, where he told:
Allen’s 1882 sketch
“there is a group of three cup-like hollows near the highest summit of the hill; this last has, however, been altered in our own day by the officials of the Government Ordnance Survey combining them into one figure, by drawing from cup to cup their well-known and characteristic mark of the Queen’s ‘broad arrow.’”
To be honest, there’s not much more that can be said of it. A few years later when Romilly Allen (1882) surveyed all the Tormain stones, he simply wrote that,
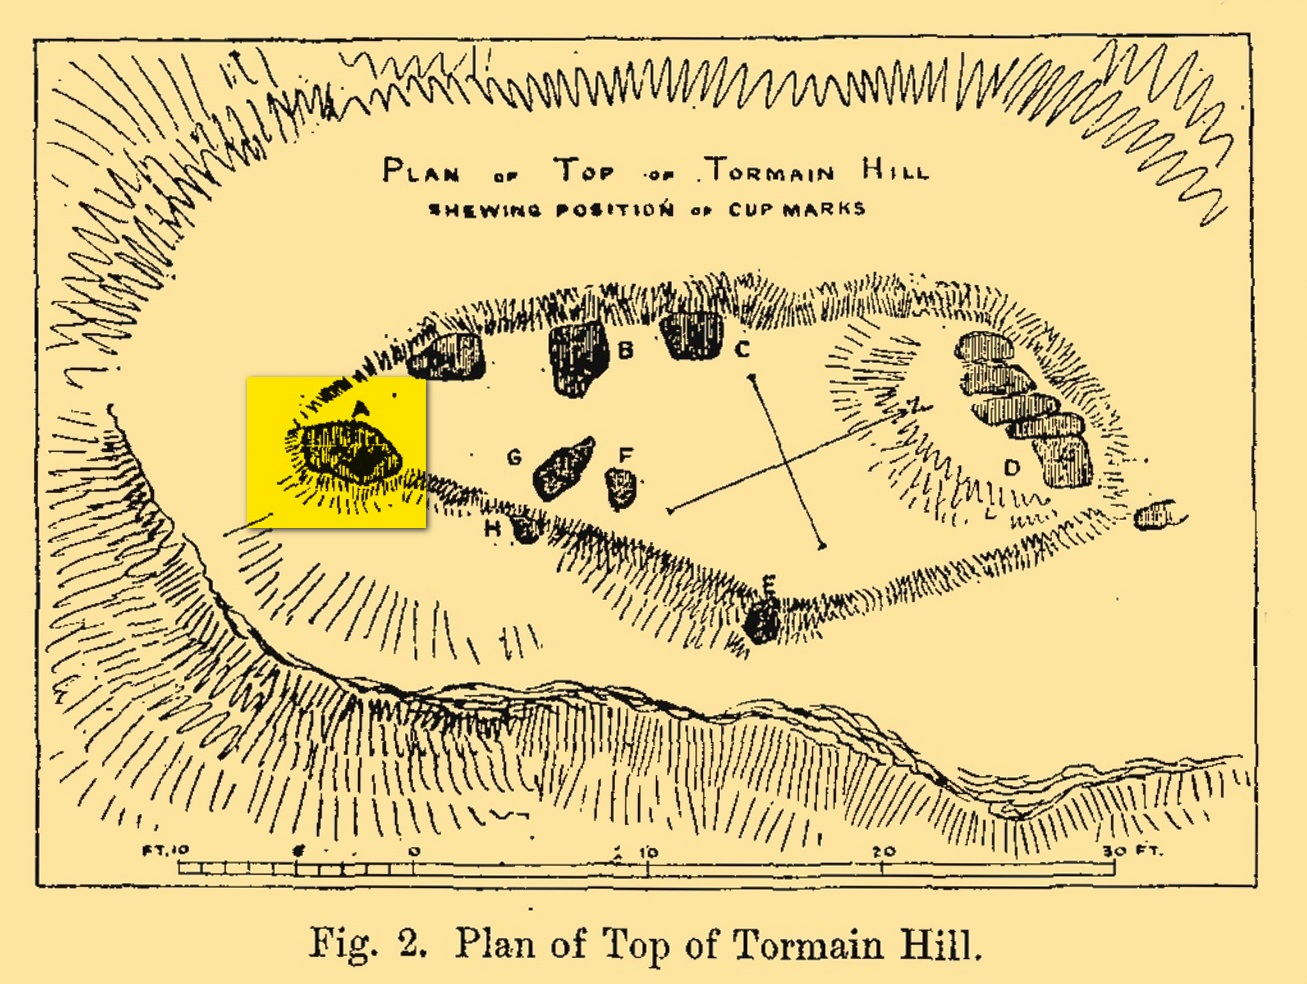
“Stone D…lies 30 feet from stone A, and is the most northerly of the group; it is also the highest as regards level, and has an Ordnance bench mark cut on it… Round the bench mark will be found four cups, varying in diameter from 1 to 2½ inches.”
Not all of the cup-marks on this stone are prehistoric, as is obvious when you look at them close-up. Two, perhaps three of them are OK, with at least one of those that are attached to the Ordnance Survey mark widened and deepened when they came here in the 19th century.
Morris, Ronald W.B., “The Cup-and-Ring and Similar Early Sculptures of Scotland; Part 2 – The Rest of Scotland except Kintyre,” in Transactions of the Ancient Monuments Society, volume 16, 1969.
Morris, Ronald W.B., The Prehistoric Rock Art of Southern Scotland, BAR: Oxford 1981.
Royal Commission Ancient & Historical Monuments of Scotland, Inventory of Monuments and Constructions in the Counties of Midlothian and West Lothian, HMSO: Edinburgh 1929.
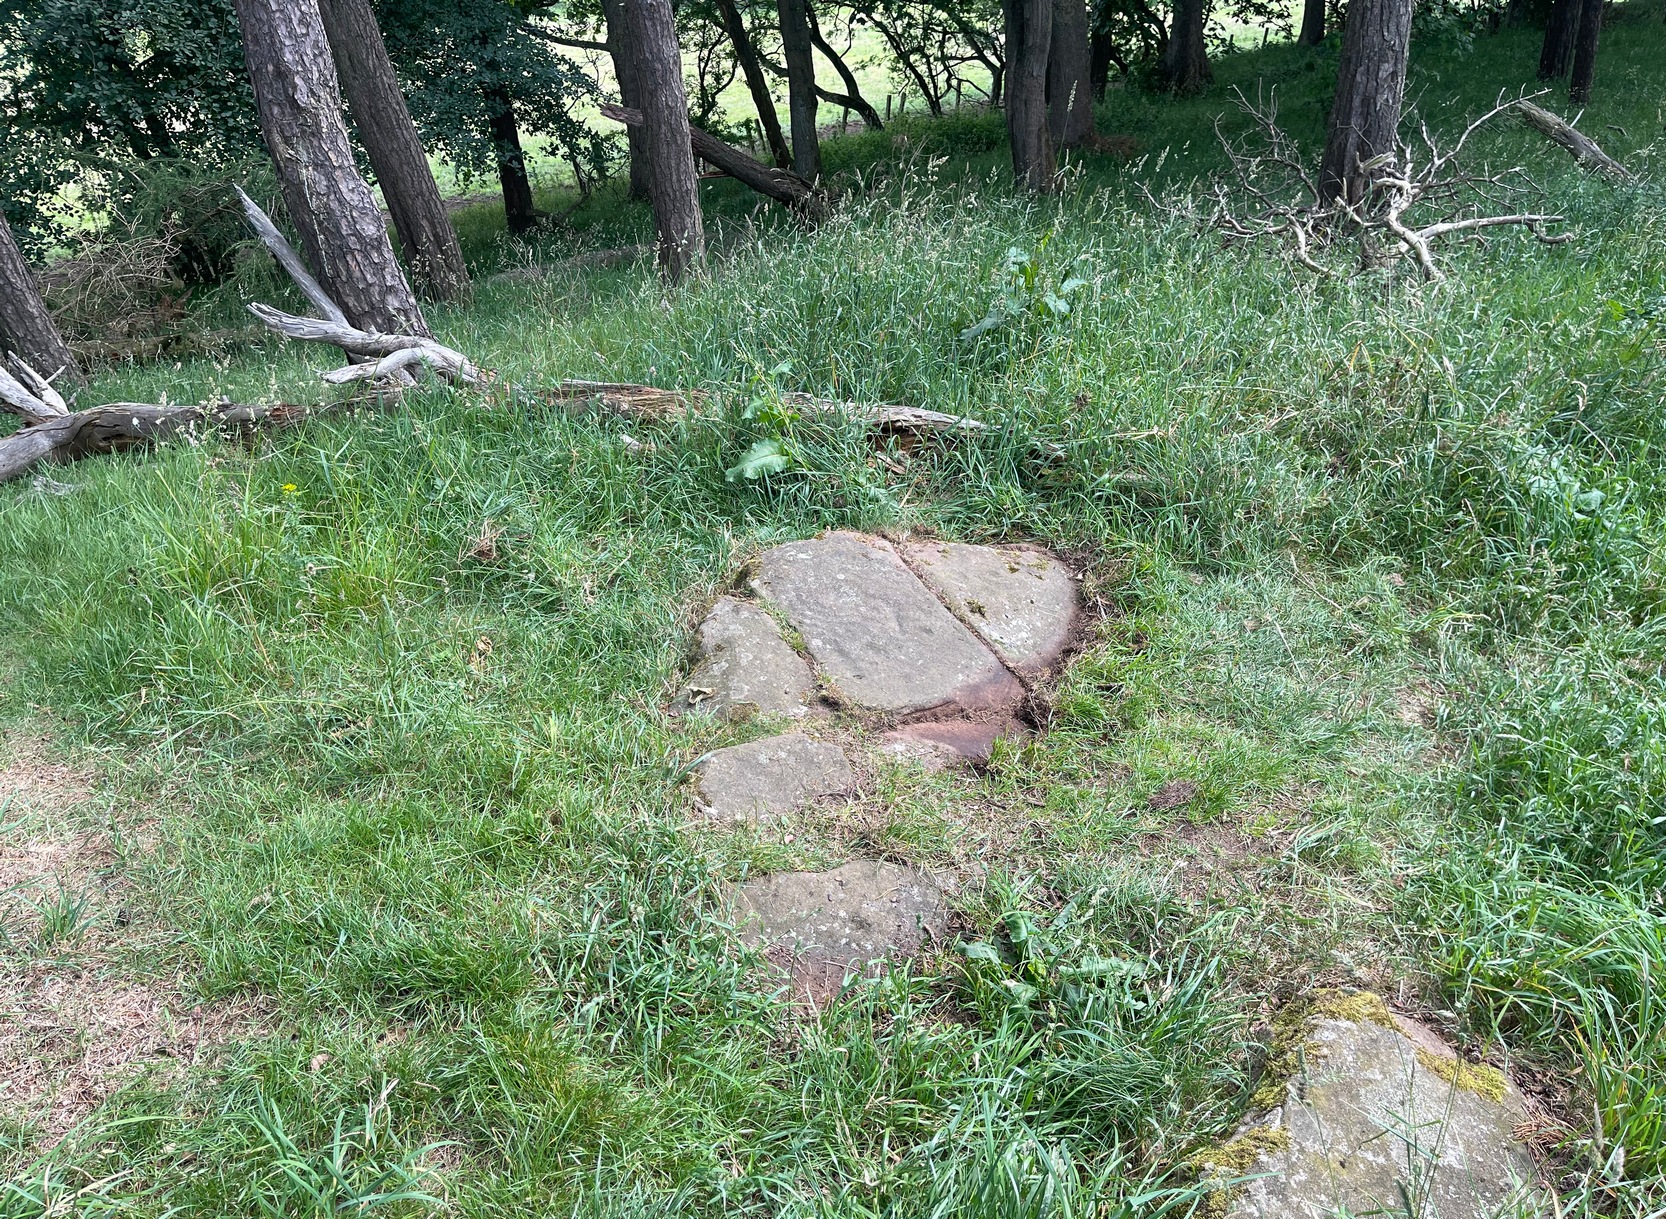
Best approached from Ratho village, head up Main Street towards Bonnington Mains. Shortly after the last road in the village (Halicroft Park, on the right) a small line of trees appears on the left and about 250 yards on a footpath takes you therein. Follow this for 250 yards (it runs parallel to the road) and the path then slopes uphill alongside the field. Go all the way to the top (roughly 500 yards) where the small copse of trees crowns the summit. On the ground there are a number of both small and medium-sized flat earthfast stones. You need to walk to the one at the end, just where the hill begins to slope back down. You’ll find it!
Archaeology & History
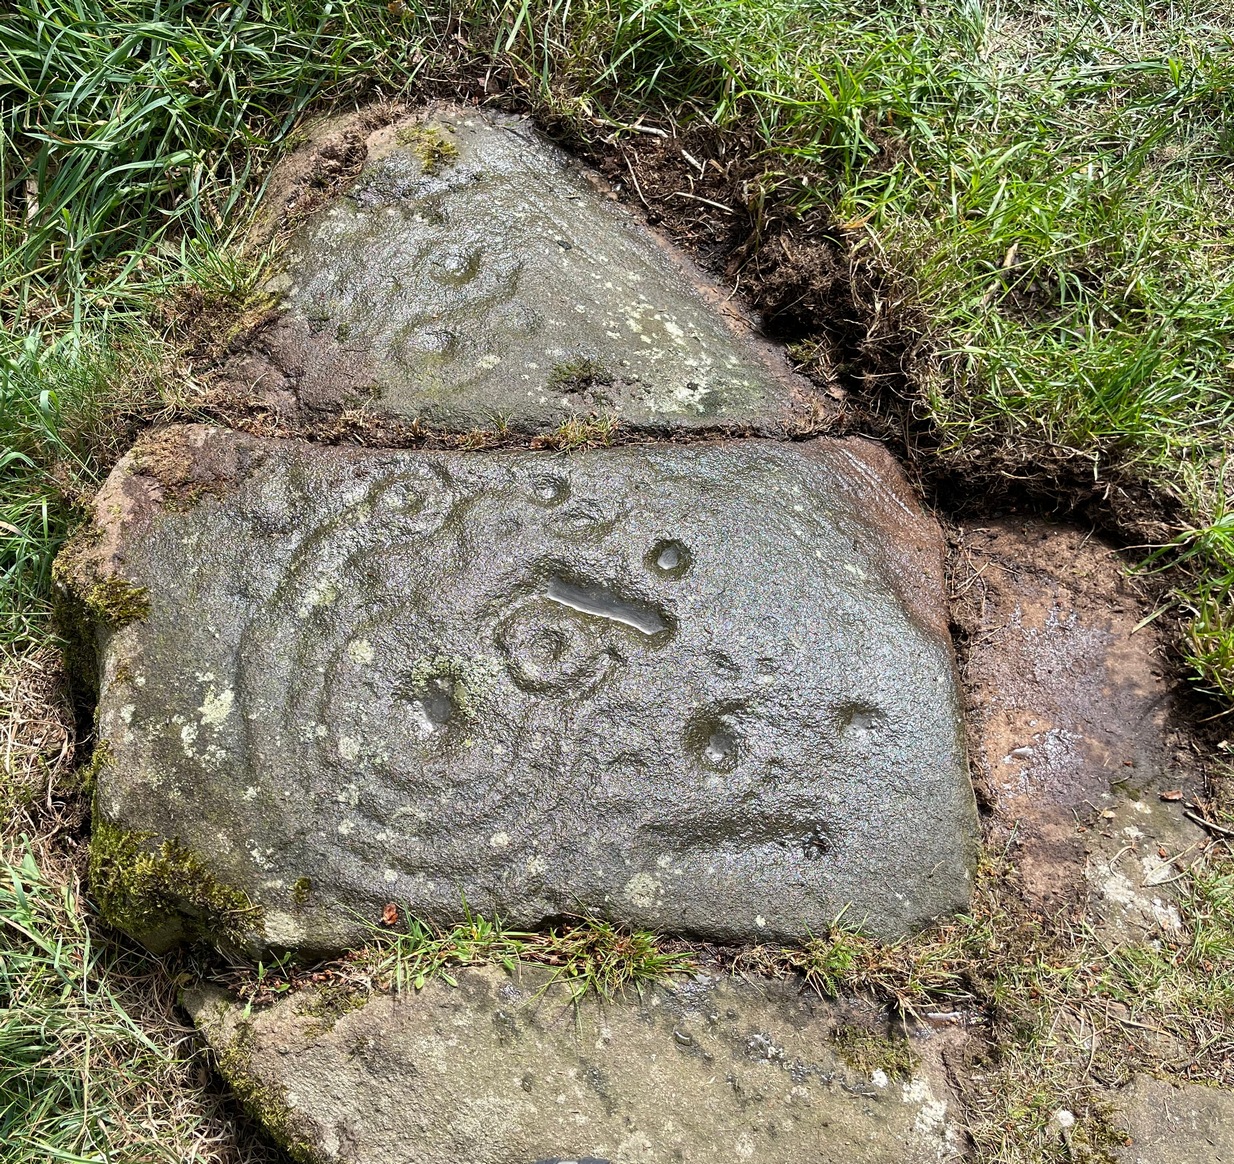
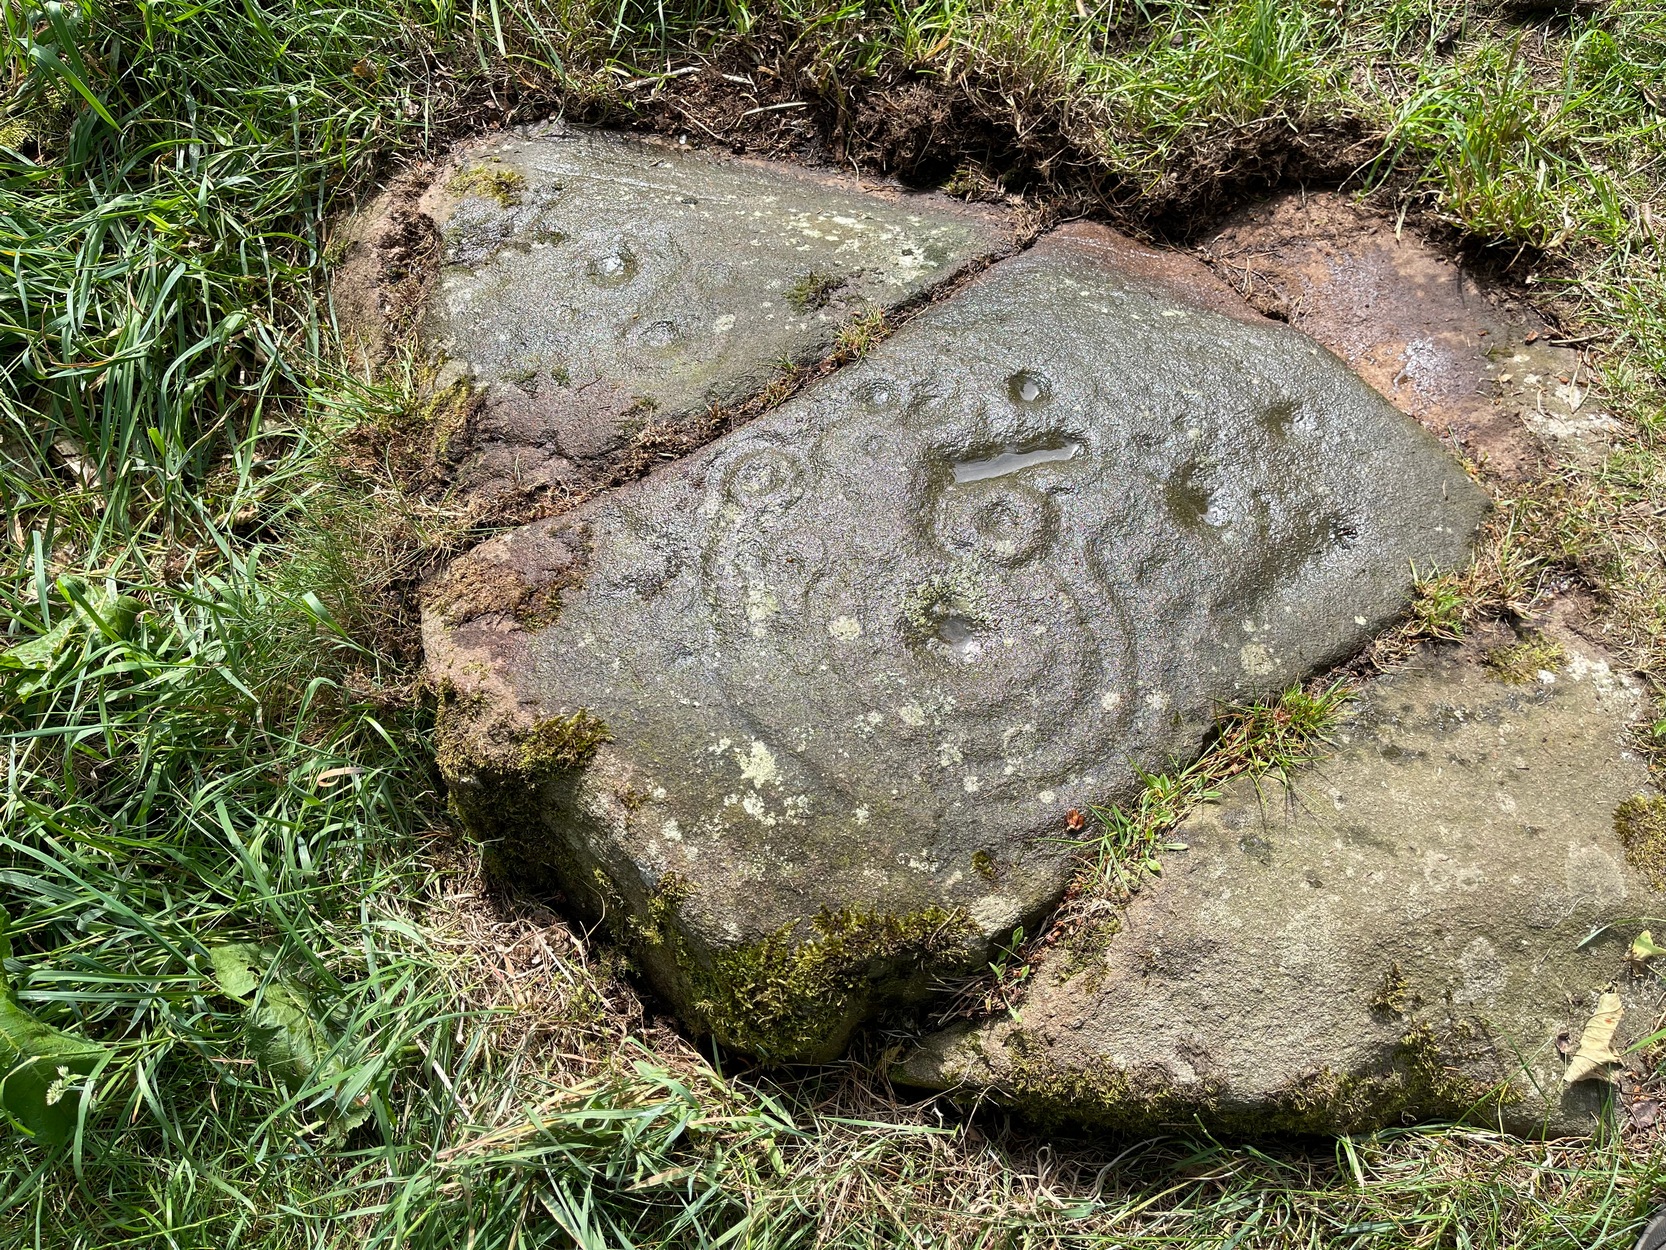
Tormain Hill, or the hill of stones (Harris 1996), has an interesting cluster of petroglyphs on its top, with this one in particular being the most impressive. It’s the southernmost stone in what’s been designated as a cluster of eight carvings—although we need to be slightly sceptical of one or two of them. Not this one though!
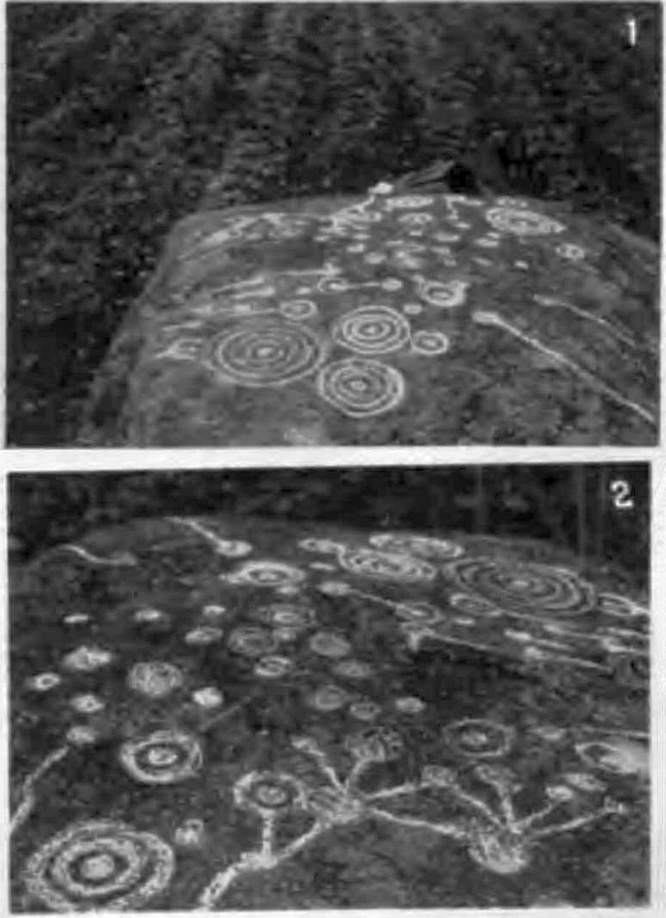
Regarded by Ron Morris (1981) as being “one of the best cup-and-ring designs in Scotland”, it was first mentioned by John Smith (1874) who visited the site with the local farmer James Melvin, who’d discovered the carving some years earlier. Initially he only noticed cup-markings, but when he visited the place with the pioneering rock art researcher Sir James Simpson, upon “removing the shallow soil or turf from the rock on the summit of Tormain Hill” this impressive multiple-ringed design came to light: “one cup (and) four concentric circles .”
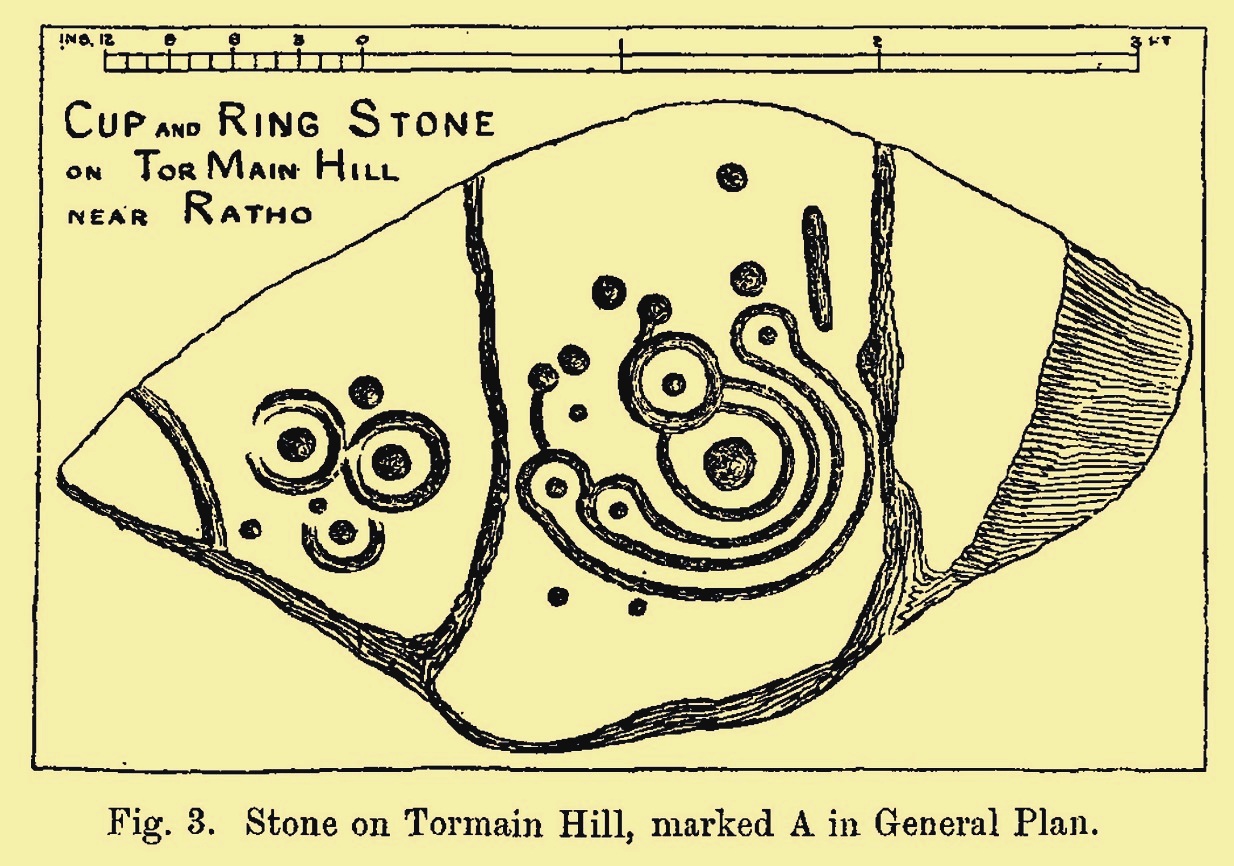
A few years later another rock art pioneer, J. Romilly Allen (1882) visited Tormain and found quite a bit more upon this hill. This particular carving, he told,
Allen’s 1882 sketchTormain ‘A’ site (Allen 1882)
“is much the finest and most remarkable in every way. It is the most southerly of the whole group, and is a piece of natural rock projecting from the side of the hill about 9 inches above the turf, and measures 4 feet 3 inches long by 2 feet 3 inches wide. Its upper surface is flat, of oval shape, and slopes slightly towards the hill. It is intersected by two parallel cracks of natural formation. The sculptures consist of twenty cups varying in diameter from three quarters of an inch to 2 inches in diameter. Seven of the cups are surrounded by a single ring, and one by four concentric circles. These latter are not complete, but form loops round terminal cups. Three of the cups with single rings are arranged in the form of a triangle. In addition to the cups and rings are two long grooves, one cutting off the corner of the stone, and the other parallel to one of the natural cracks.”
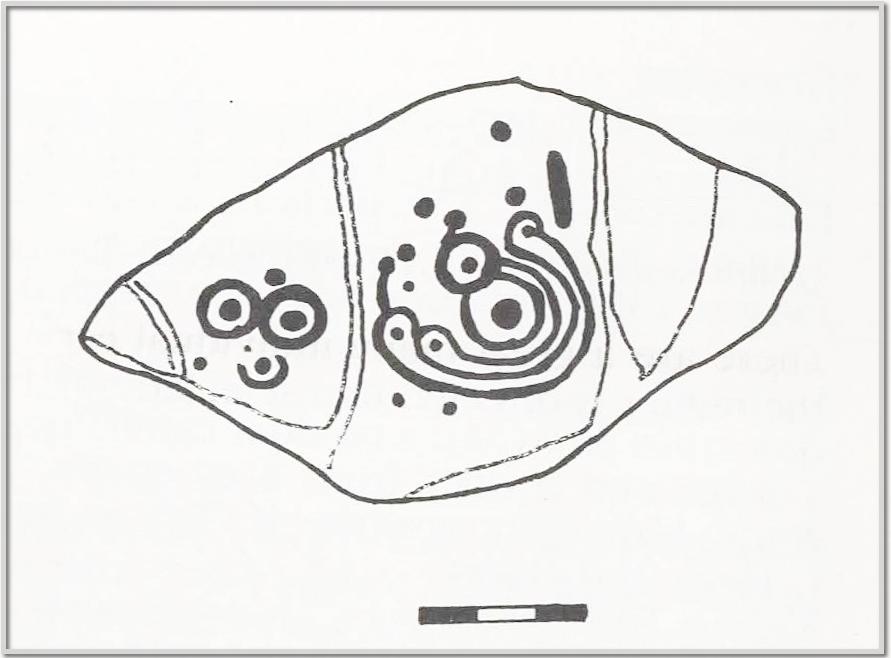
Beckensall’s 1986 version
More then forty years later the Royal Commission (1929) dudes visited the Tormain stones. It had become so overgrown by then that only two of the eight carved stones were visible: “but a search beneath the turf revealed the other sculpturings,” they told. It would seem that they chose a bit of a grey day when they came here as they told how the carving appeared “so much worn that the concentric rings are, in particular, difficult to follow.” So they did a rubbing of the stone—a common practice of rock art students over the last century or two. In doing so they were able to discern the following:
“The boulder is fractured in two places by natural agencies, but it shows traces of twenty cup-marks, varying from little more than half-an-inch to fully two inches in diameter, and there are two separate gutters. Seven at least of the cups are surrounded by single rings, and in two instances the rings are connected by shallow gutters to simple cup-marks. The largest cup-mark on the stone is encircled by one complete ring with three additional concentric arcs linking up four of the other rings. Another group consists of three cups, each surrounded by a ring, which are closely set in the form of a triangle, with three other smaller cup-marks in close proximity.”
Impressive stuff! In more recent times the site has gained the attention of fellow rock art explorers like Kaledon Naddair, Stan Beckensall and others—but we’re still none the wiser what it means!
Its position in the landscape was probably an important element. Pinus sylvestris (the ley-hunter’s favourite tree) grows spaciously, as it is wont, atop of the hill and, in bygone centuries, would have been much more prevalent before farming enveloped the land hereabouts. It was likely clear of trees on top of Tormain when the stone was carved, giving uninterrupted 360° views of the hills, high and low, as far as the eye can see. The legendary prehistoric Cairnpapple Hill stood out due west from the carving and other notable hilltops in the Pentlands would have had mythic relevance. Sadly, all oral tradition has long long faded and so whatever narratives that were told here have long ago been lost. It strikes me as a tribal gathering place: a moot hill perhaps. The bullaun stone adjacent to this fine carving would be a receptacle for paints, herbs, elixirs to be macerated and used by the people….
Check it out. Have a feel of the place. But spend a few hours here and listen to the wind…
Beckensall, Stan, Rock Carvings of Northern Britain, Shire: Princess Risborough 1986.
Beckensall, Stan, British Prehistoric Rock Art, Tempus: Stroud 1999.
Feachem, Richard, Guide to Prehistoric Scotland, Batsford 1977.
Hadingham Evan, Ancient Carvings in Britain: A Mystery, Garnstone: London 1974.
Harris, Stuart, The Place-Names of Edinburgh: Their Origins and History, Gordon Wright: Edinburgh 1996.
MacLean, Adam, The Standing Stones of the Lothians, Megalithic Research Publications: Edinburgh 1977.
Morris, Ronald W.B., “The Cup-and-Ring and Similar Early Sculptures of Scotland; Part 2 – The Rest of Scotland except Kintyre,” in Transactions of the Ancient Monuments Society, volume 16, 1969.
Morris, Ronald W.B., The Prehistoric Rock Art of Southern Scotland, BAR: Oxford 1981.
Royal Commission Ancient & Historical Monuments of Scotland, Inventory of Monuments and Constructions in the Counties of Midlothian and West Lothian, HMSO: Edinburgh 1929.
Cup-and-Ring Stone (destroyed): OS Grid Reference – V 838 896
Archaeology & History
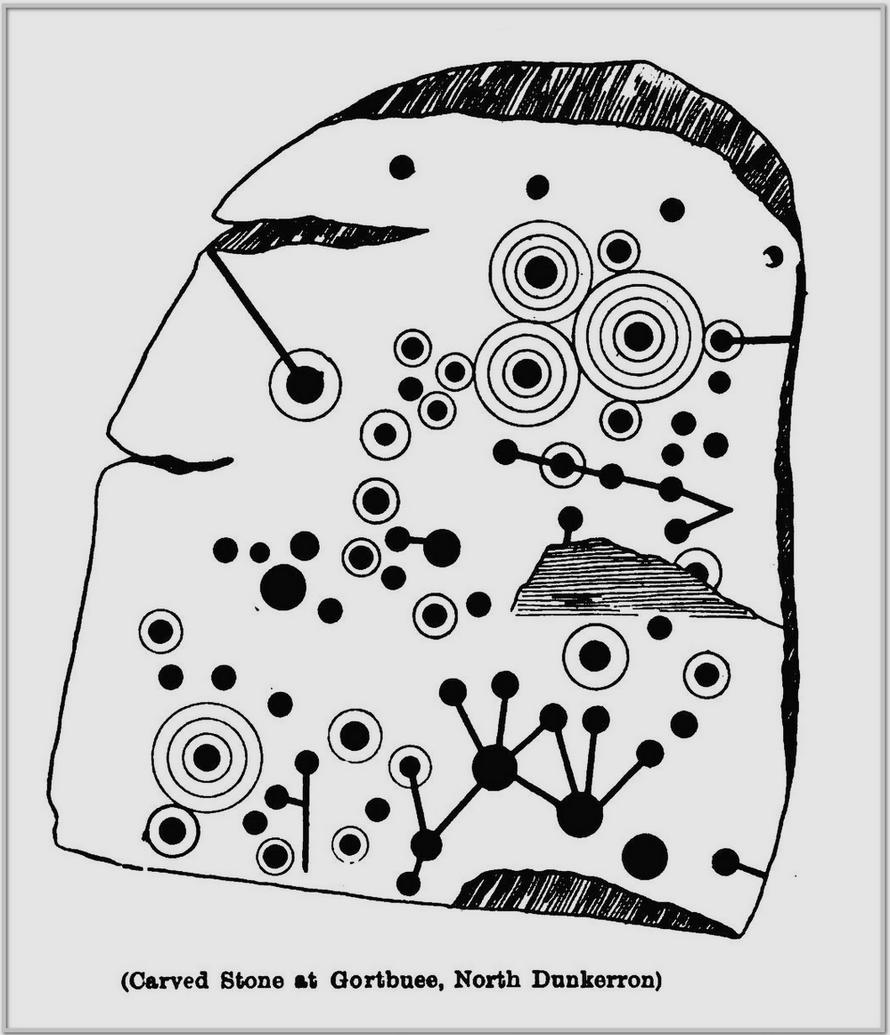
o’Connell’s 1939 sketch
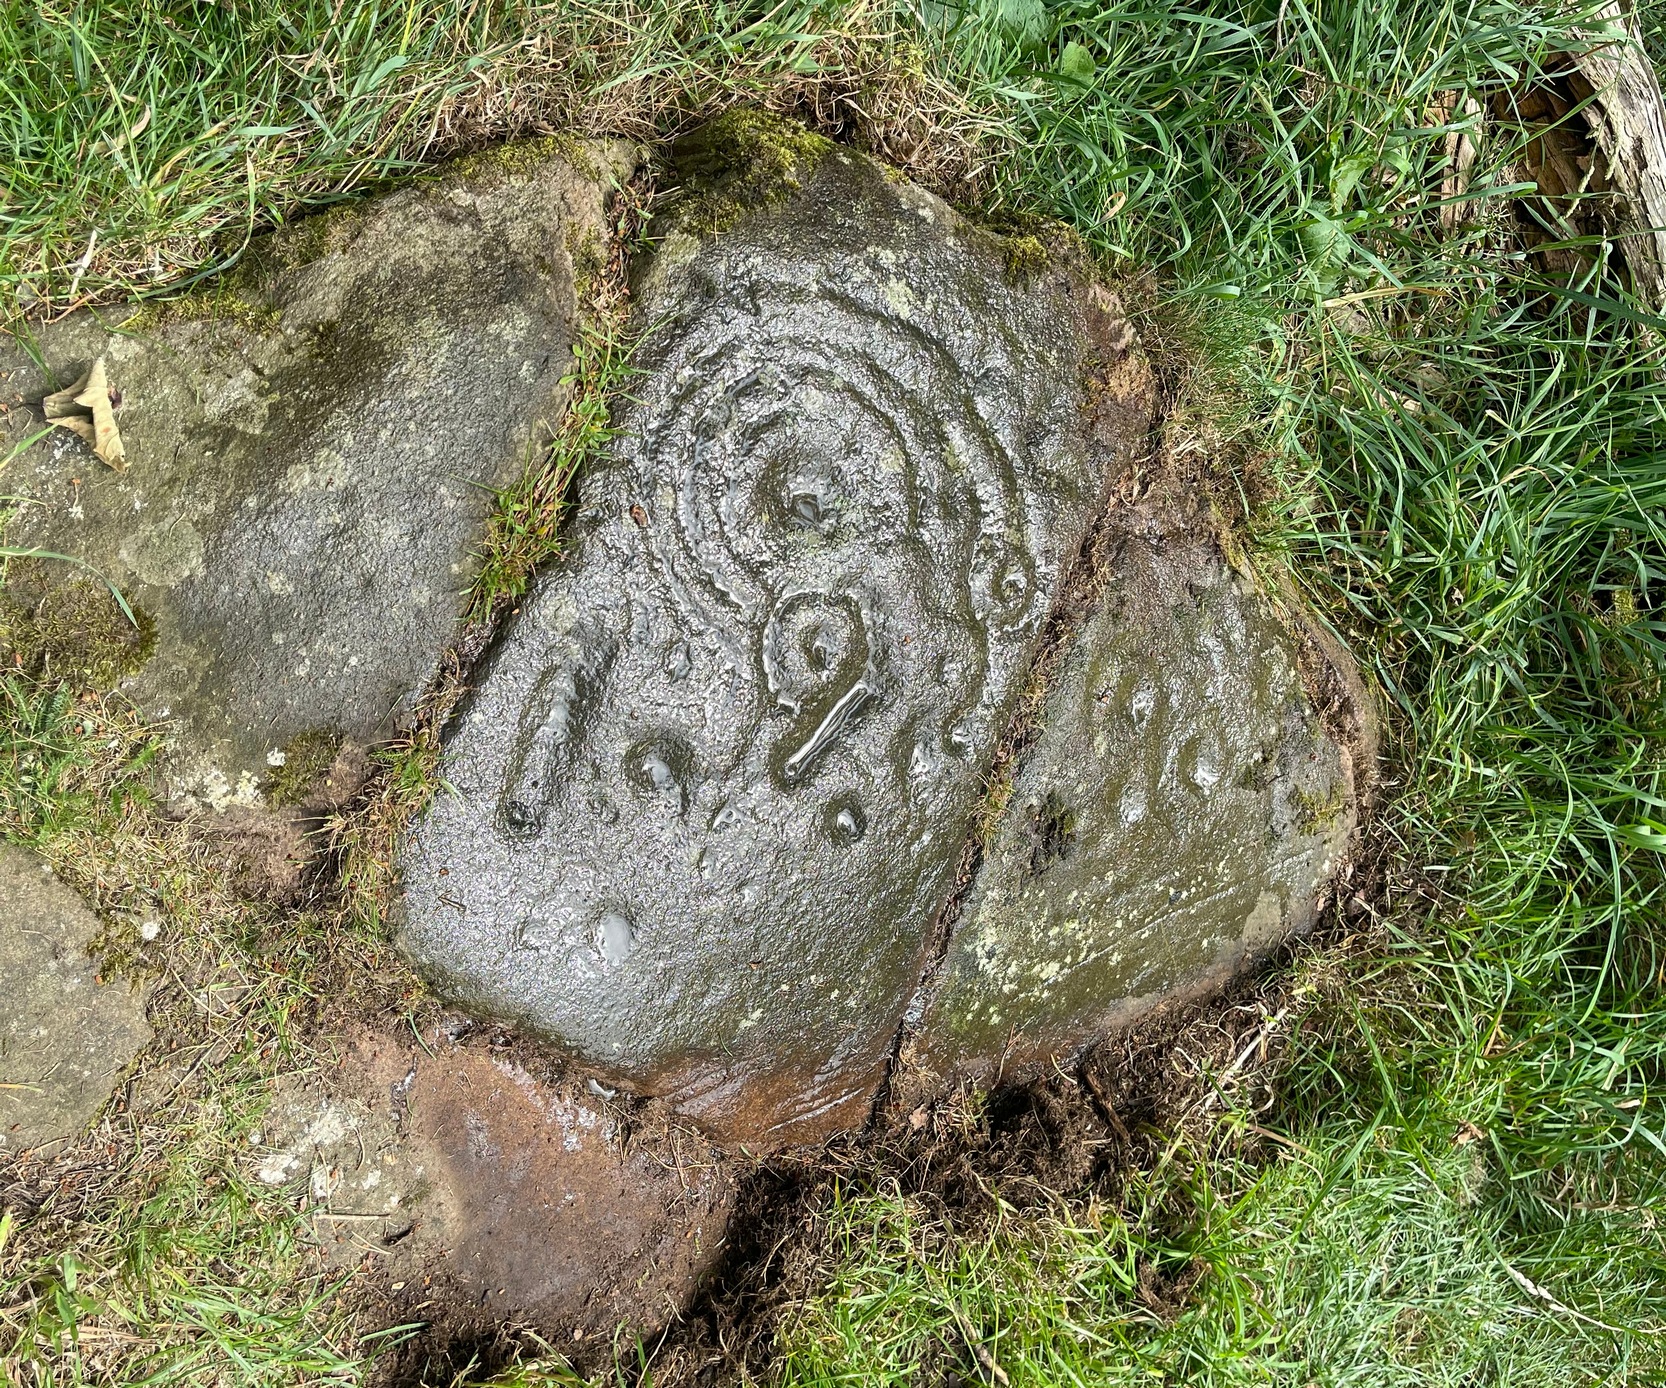
In 1939 when D.B. o’ Connell wrote about this impressive cup-and-ring stone, he told that, with the exception of the Caherlehillan petroglyph (at V 569 837), this was “by far the most extensively decorated stone” that he’d seen in Kerry. He would therefore have been appalled to hear that it was subsequently destroyed in the 1950s and some remaining fragments of the stone “were used to line a well”! (o’ Sullivan & Sheehan 1996) Not good. There had already been an attempt to destroy the stone at the end of the 19th century, but that was prevented. Thankfully we had some early pioneer antiquarians who left us with information and sketches of this once great carving.
It was first described in John Cooke’s (1906) fine essay on the prehistoric antiquities scattering this part of Kerry. According to him, a certain “Dr. Digby is due the credit of having discovered this stone” a few years prior to him writing his essay. He told that:
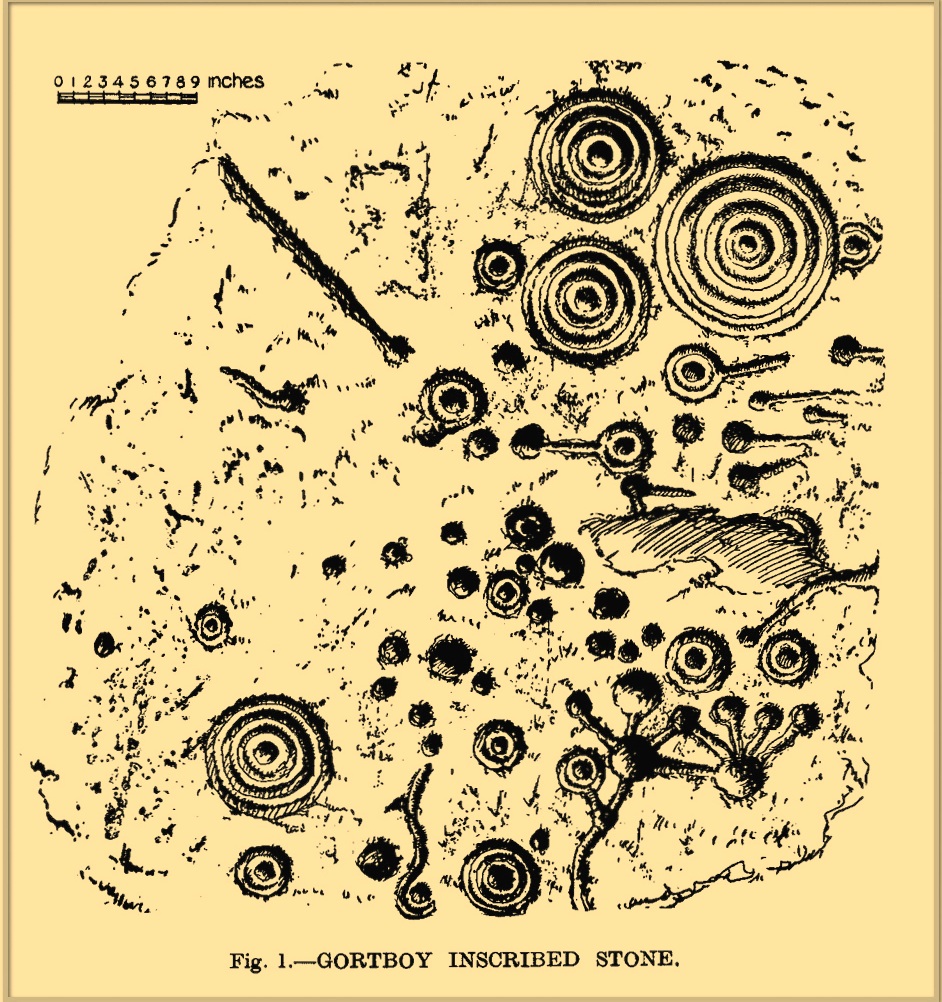
Cooke’s 1906 sketch
“In one of the fields is a huge boulder, or rather earth-fast rock, somewhat rectangular in shape, of the purple grit of this district, and lying north and south. It measures 7 feet 8 inches long, 5 feet 8 inches broad at the south end, and 4 feet 6 inches at north end, the heights respectively being 2 feet 6 inches, and 2 feet 3 inches. A section from north to south would show a slight curve, as the rock is a few inches higher in the middle than at either end. The greater portion of this massive rock is covered with an extraordinary number of cup-markings, and cups with concentric circles. There are connecting channels everywhere, and the whole, though apparently intricate and unmeaning at first, yet shows, on examination, evidence of intention and design. It is much worn and weathered, and the north end has no markings. It is difficult to take a good rubbing of it, and still more difficult to sketch the markings, as the more it is examined, the more work does it show.”
This last comment applies to many petroglyphs. Mr Cooke continued:
“A peculiar feature of the ornament consists in the groups on the top left-hand corner, not unlike the tentacles and cupules of a cuttlefish. The dumb-bell-shaped ornament is found on other stones, but the truncheon-shaped figures on the right below are, I think, exceptional.”
A discrepancy arose a few years later when Miss C. Hussey (1909) told how the carving had been discovered by a certain “Captain Magill, who some years afterwards saved it from destruction.” She told how,
“One day, when shooting in the neighbourhood, he saw some men breaking it with crowbars, etc., merely to clear the field of stones, and his daughter, who first showed it to me, said she believed that before he reached the spot, some four feet or more had been broken off the broader (south) end.”
So whether it was him or Dr Digby, we may never quite know. As for the design, Miss Hussey told us:
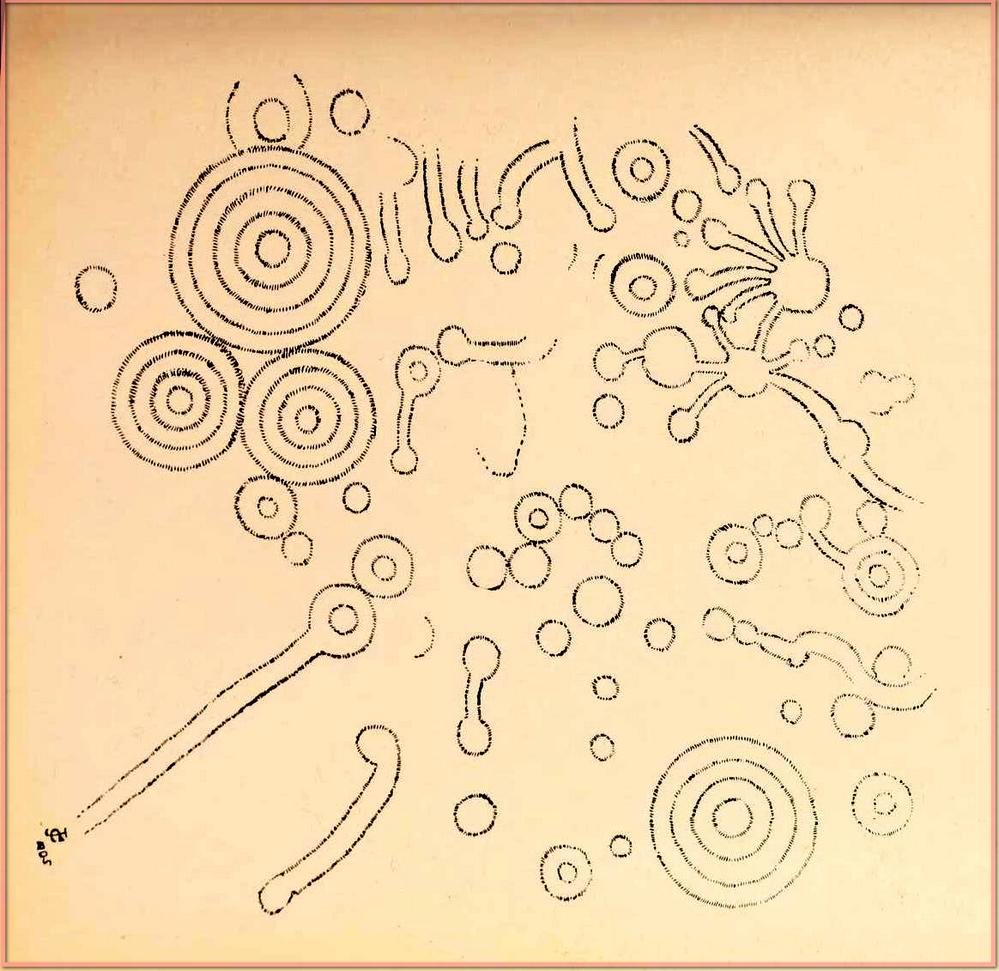
Miss Hussey’s sketcho’Connell’s 1939 photos
“The stone itself is a large block of sandstone, some four feet in height, and six feet wide. The entire length at present is nine feet, but the flat carved top only measures seven feet four inches in length, as the northern side slopes gradually instead of being upright like the others. The largest circle on the stone is twelve inches in diameter, and the cups and hollows vary in size down to about an inch across. It was difficult to be certain whether some hollows were cups or merely natural inequalities in the stone, but I have only given those which seemed to be unmistakably the work of man” in this sketch.
In o’ Connell’s (1939) description he echoed what our earlier writers had said, and thankfully gave us a couple of photos of the carving, highlighting the design in chalk so we could see it clearer. It’s such a pity that it’s no longer with us…
References:
Cooke, John, “Antiquarian Remains in the Beaufort District, County Kerry,” in Proceedings of Royal Irish Academy, volume 26, 1906.
Hadingham Evan, Ancient Carvings in Britain: A Mystery, Garnstone: London 1974.
Hussey, C., “Gortbuee Cup and Circle Stone,” in Kerry Archaeological Magazine, volume 1, 1909.
o’ Connell, D.B., “Notes on Three Inscribed Stones in County Kerry,” in Journal Cork Historical & Archaeological Society, volume 44, 1939.
o’ Sullivan, Ann & Sheehan, John, The Iveragh Peninsula: An Archaeological Survey of South Kerry, Cork University Press 1996.
Acknowledgements:Huge thanks for use of the Ordnance Survey map in this site profile, reproduced with the kind permission of the National Library of Scotland.
In o’ Sullivan & Sheehan’s (1996) magnum opus, they reported the discovery of a decent cup-and-ring stone “during road-widening operations in the 1970s,” a short distance west of the river Staigue. It was “seen to have rock art motifs on it, but it has since been covered over.” Its design was apparently similar to a complex carving at found Liss (V 608 617), just 300 yards or so to the south.
References:
o’ Sullivan, Ann & Sheehan, John, The Iveragh Peninsula: An Archaeological Survey of South Kerry, Cork University Press 1996.
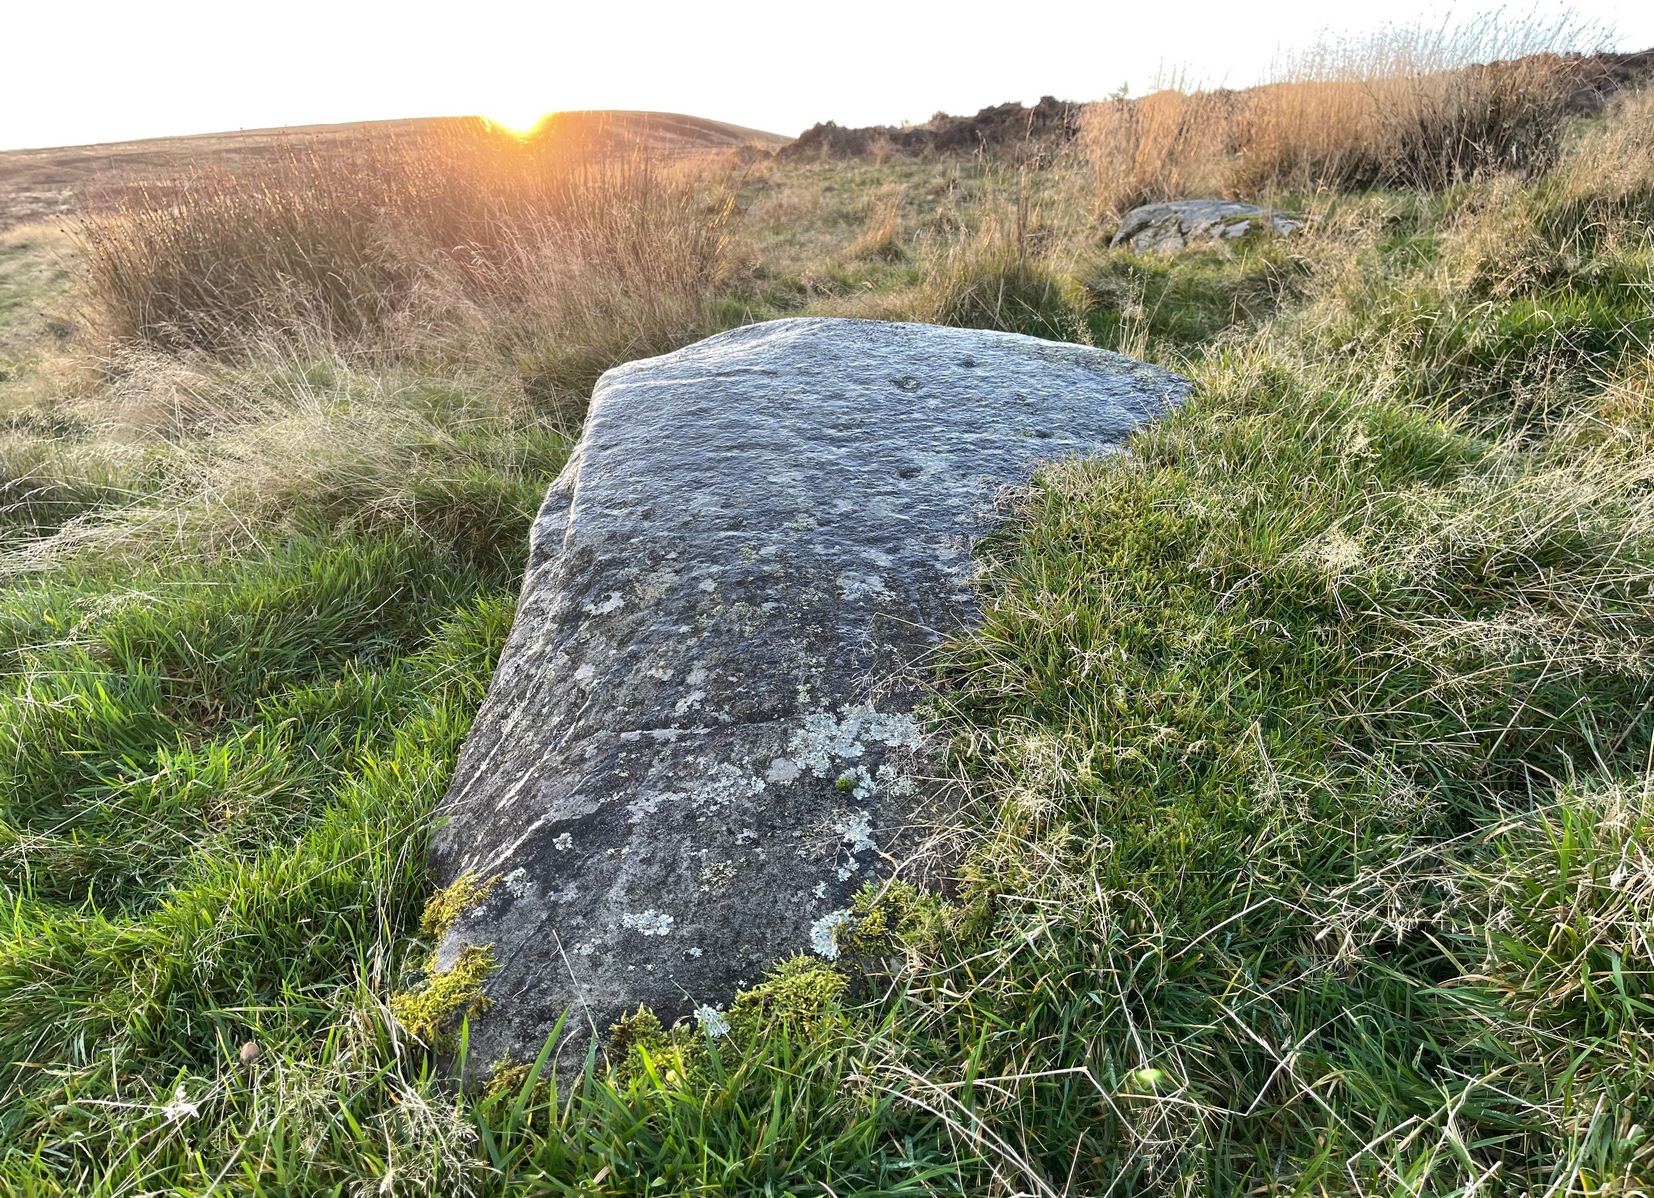
If you can make your way to the Stroness (2) carving, then walk down the slope for less than 50 yards past quite a few other earthfast stones, you’ll eventually run into the stone shown here in the photos. You’ll find it easily enough.
Archaeology & History
This carving was found when I was heading down the hillside to meet up with my antiquarian colleague 500 yards lower down. The sun was just setting, so visibility wasn’t good, but as I rushed from stone to stone feeling each one in the hope of finding a carving, this one gave my fingers that distinct feedback of a cup-marking; then another; and what seemed like another. I had a small amount of water left in a bottle and quickly sprayed it over the surface of the stone and saw that there were indeed a number of cups on it. Two or three certainly – but possibly as many as five. I laid on the wet ground and looked across its even surface from several angles and caught what seemed to be a very faint semi-circle around one of the cups. But I wasn’t sure it was real. However, on a number of quick photos I took, several of them do appear to show such an arc around one of the cups. But I’m very cautious about it. Only when we (or you) go back up and have a look at it in good light will we be able to affirm or discount it.
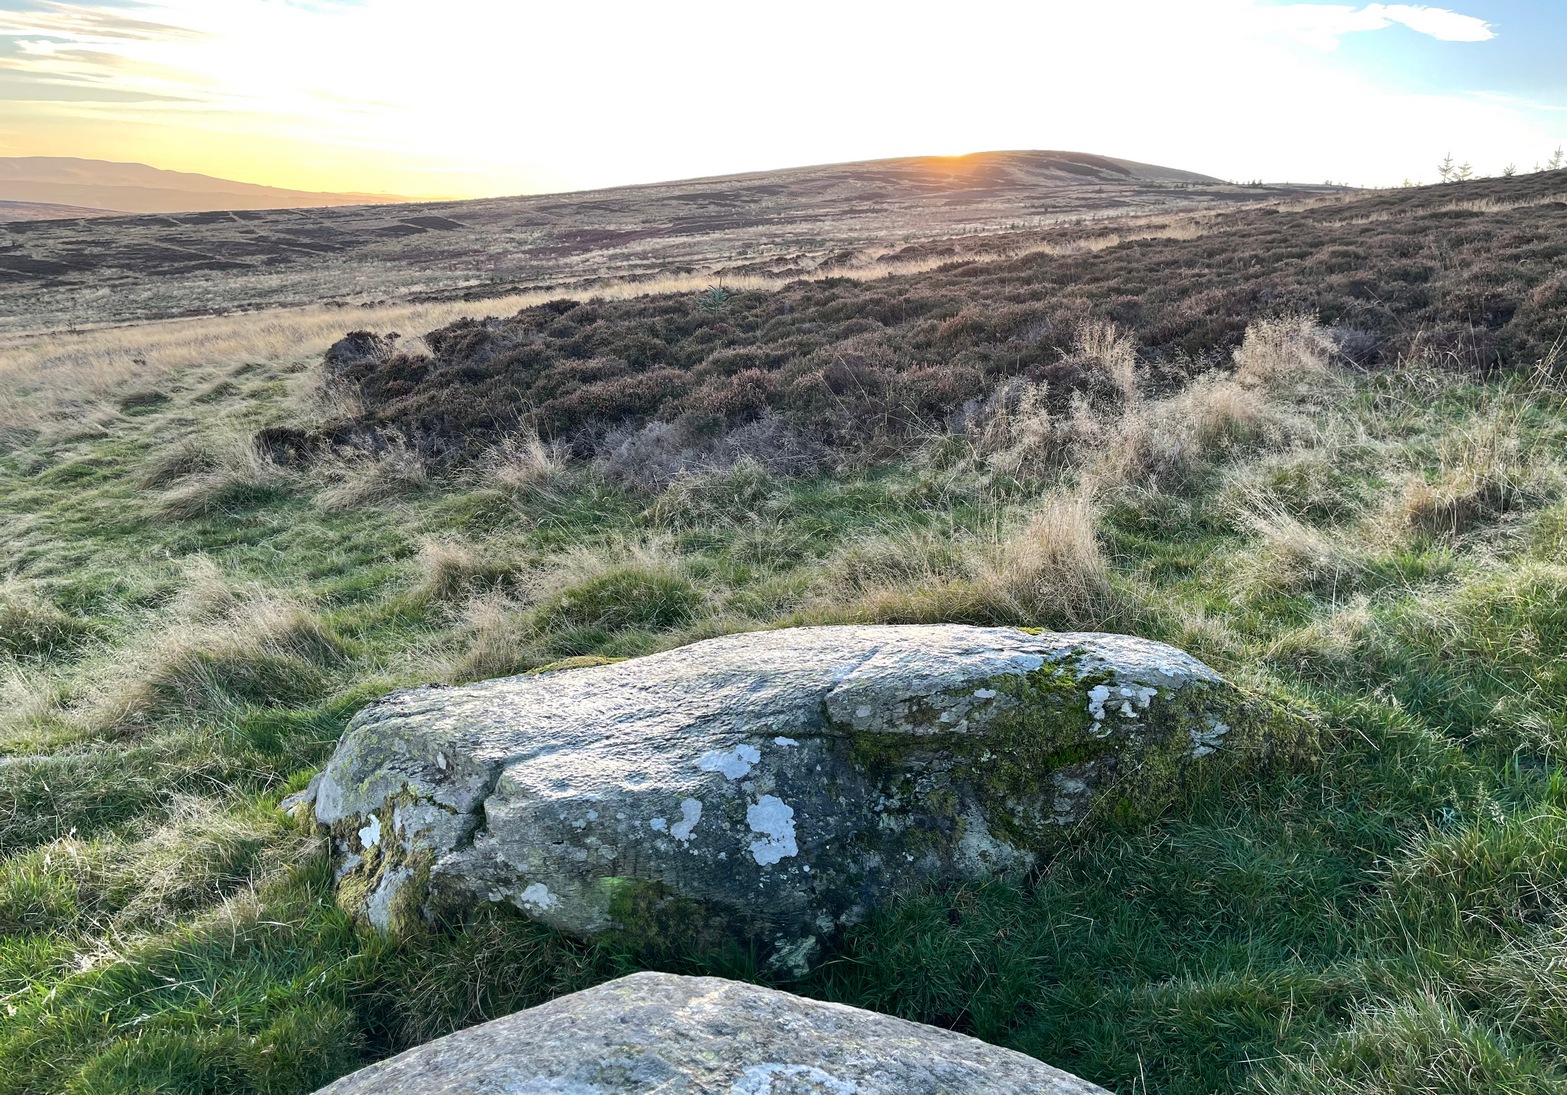
One additional feature that needs mentioning is a small low arc of walling just above this stone. It’s man-made, it’s very old, but I couldn’t work out what it might be: hut circle, cairn (there’s one further up the hill), enclosure walling. I’m not sure, but it needs to be looked at when we have a full day.
The minor road that runs roughly north-south between the hamlets of Fowlis Wester and Buchanty is probably your best bet. Nearly 2 miles north of the village up the tiny winding lane, where the moorland at the roadside finishes and the fields begin – is where to take the track, left, up onto the hillside. But after just 75 yards, go left over the rickety-gate and follow the walling until your reach the burn. Follow this up all the way to its source (it’s boggy as hell) and, once you’re there, walk due north for 250 yards until you reach a cluster of rocks. Look around!
Archaeology & History
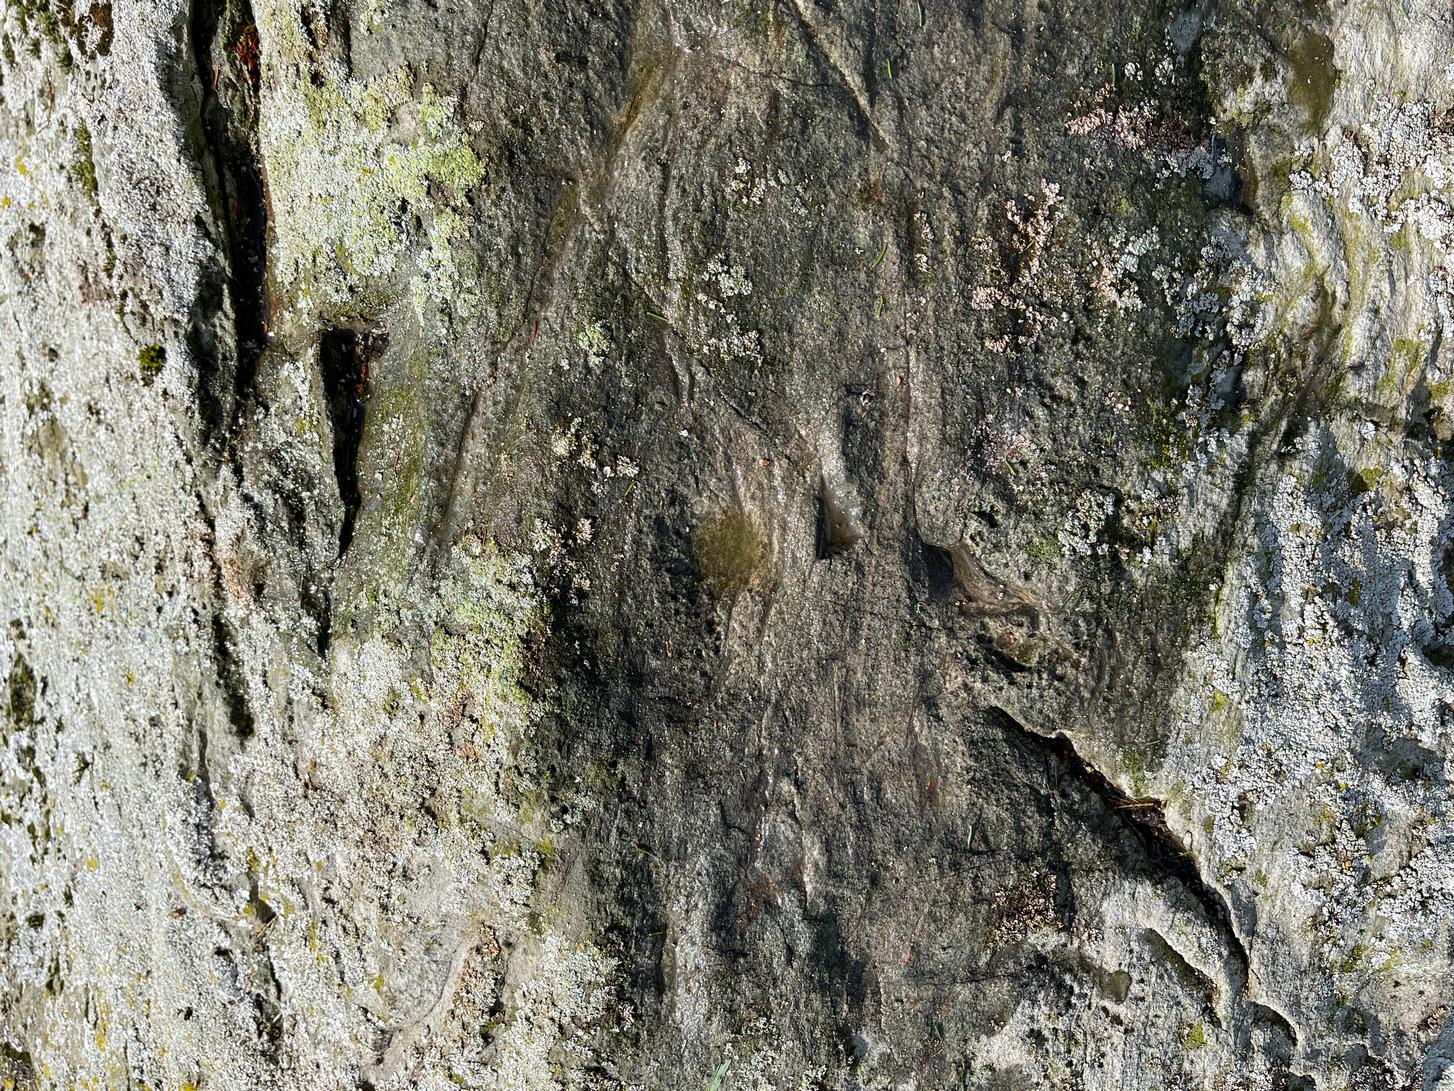
It’s a long way to come to see such a simplistic design —but for the real petroglyph researchers among you, it’s worth it the trek. It’s had scant attention. George Currie (2004) seems to have been the only person to mention this stone, giving the standard bland description typifying archaeology. He wrote:
“SE-facing slope, 1.2m long pointed rock aligned E-W; three shallow cups, 30-40 x 6-10mm.”
Inspiring stuff, ey?! Anyhow… As usual, there’s more to it than that. If we assume that the carving described above is the same one I visited yesterday (Mr Currie’s grid-ref is slightly different), even despite the poor daylight, it was obvious there was more than three cup-marks on this.
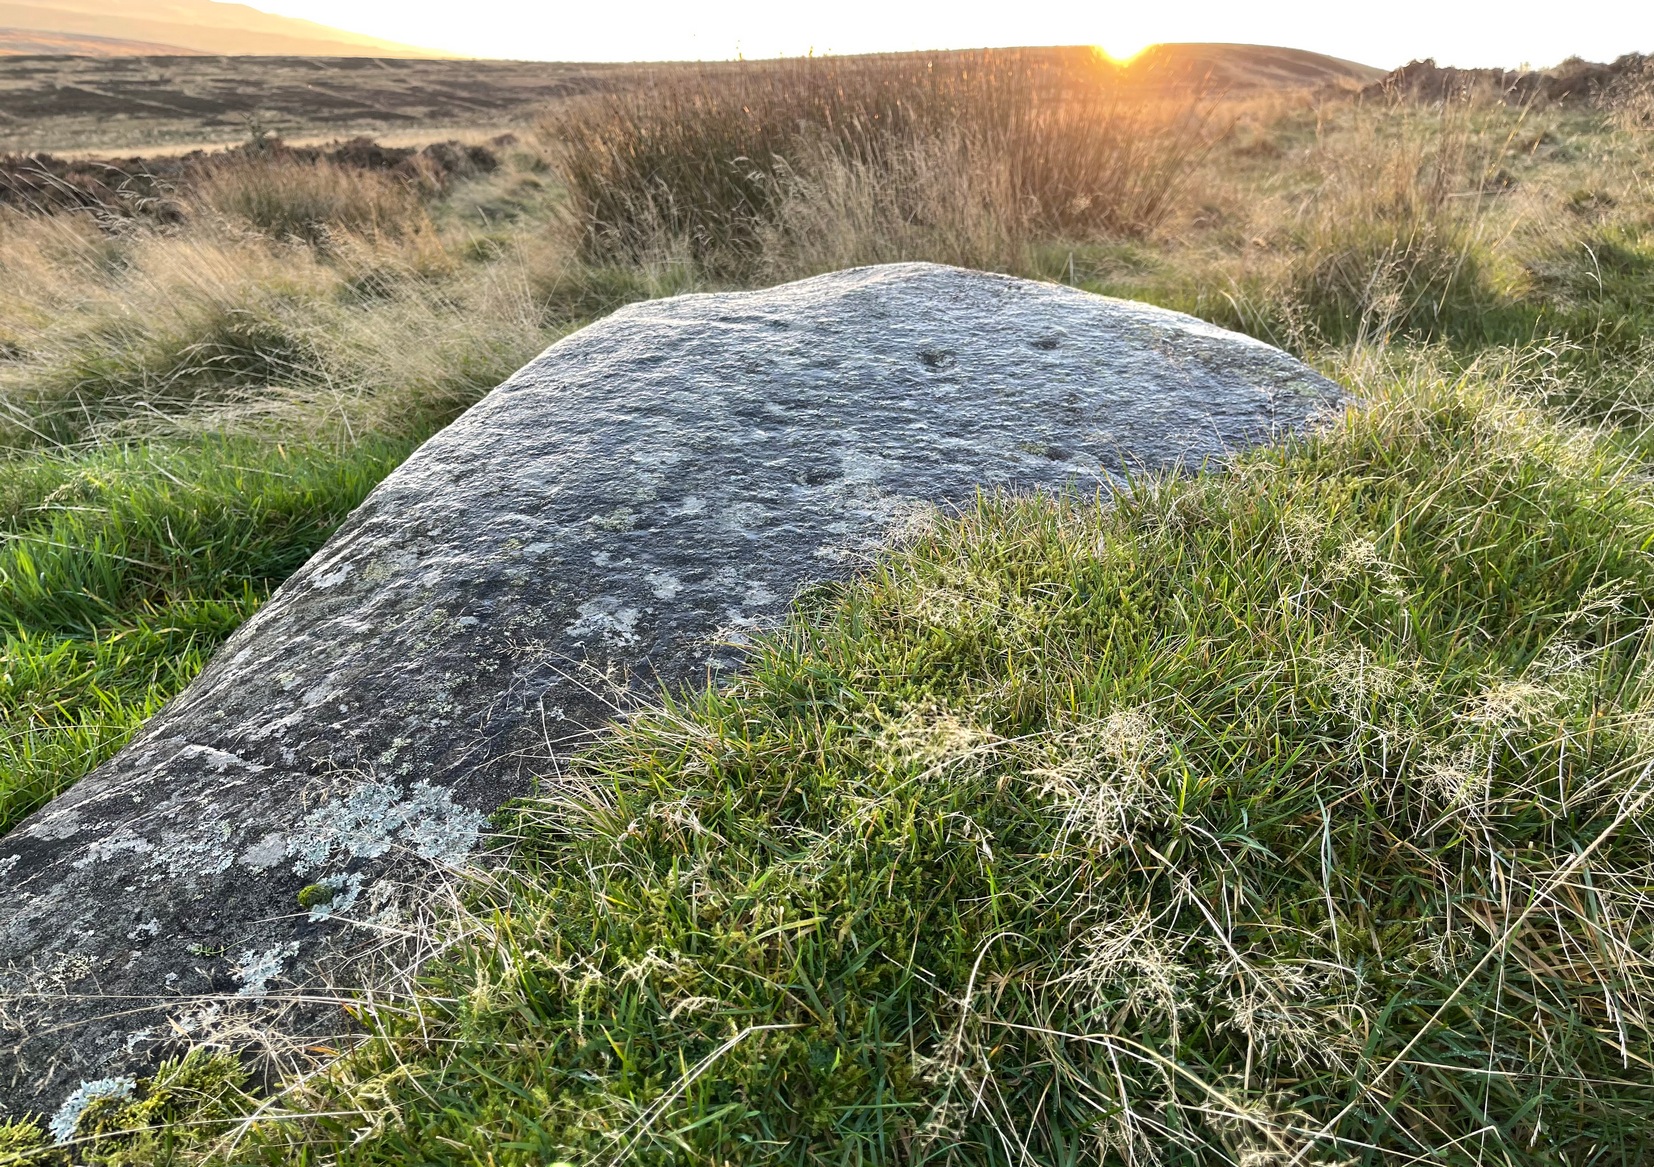
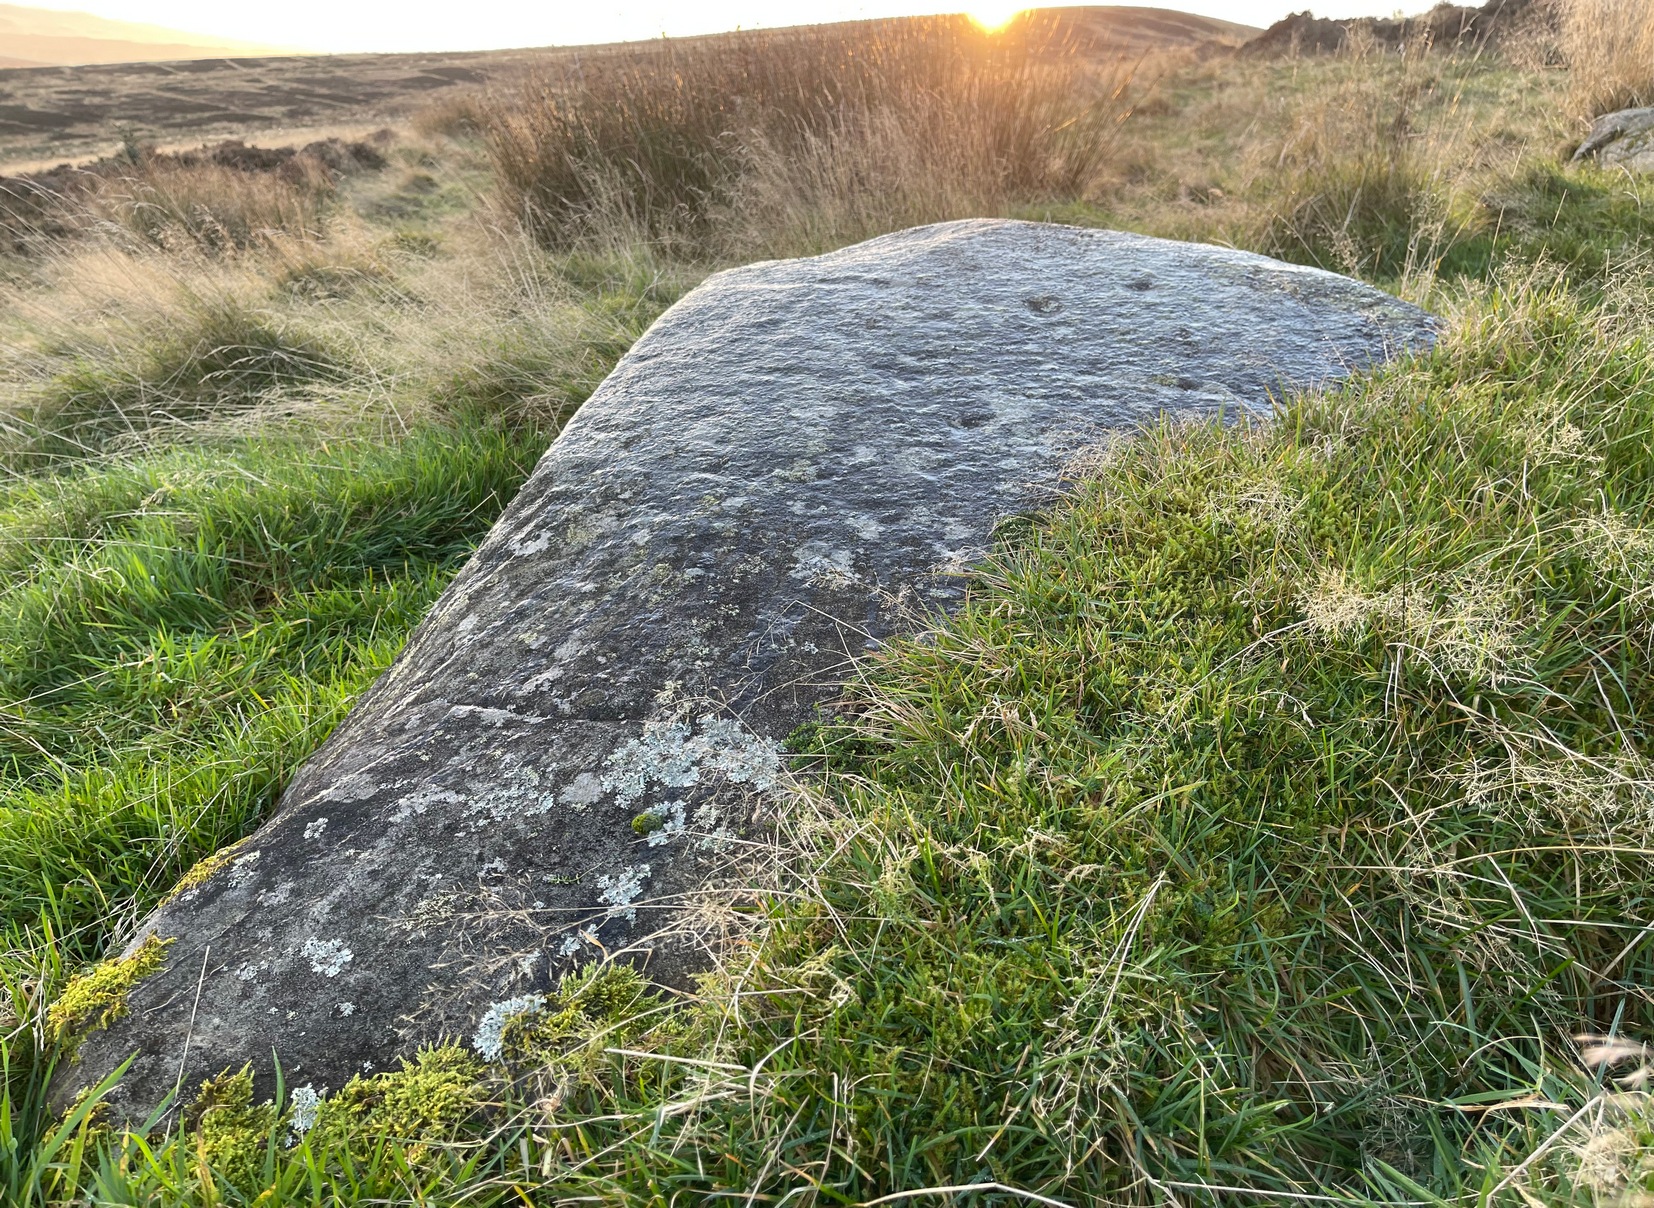
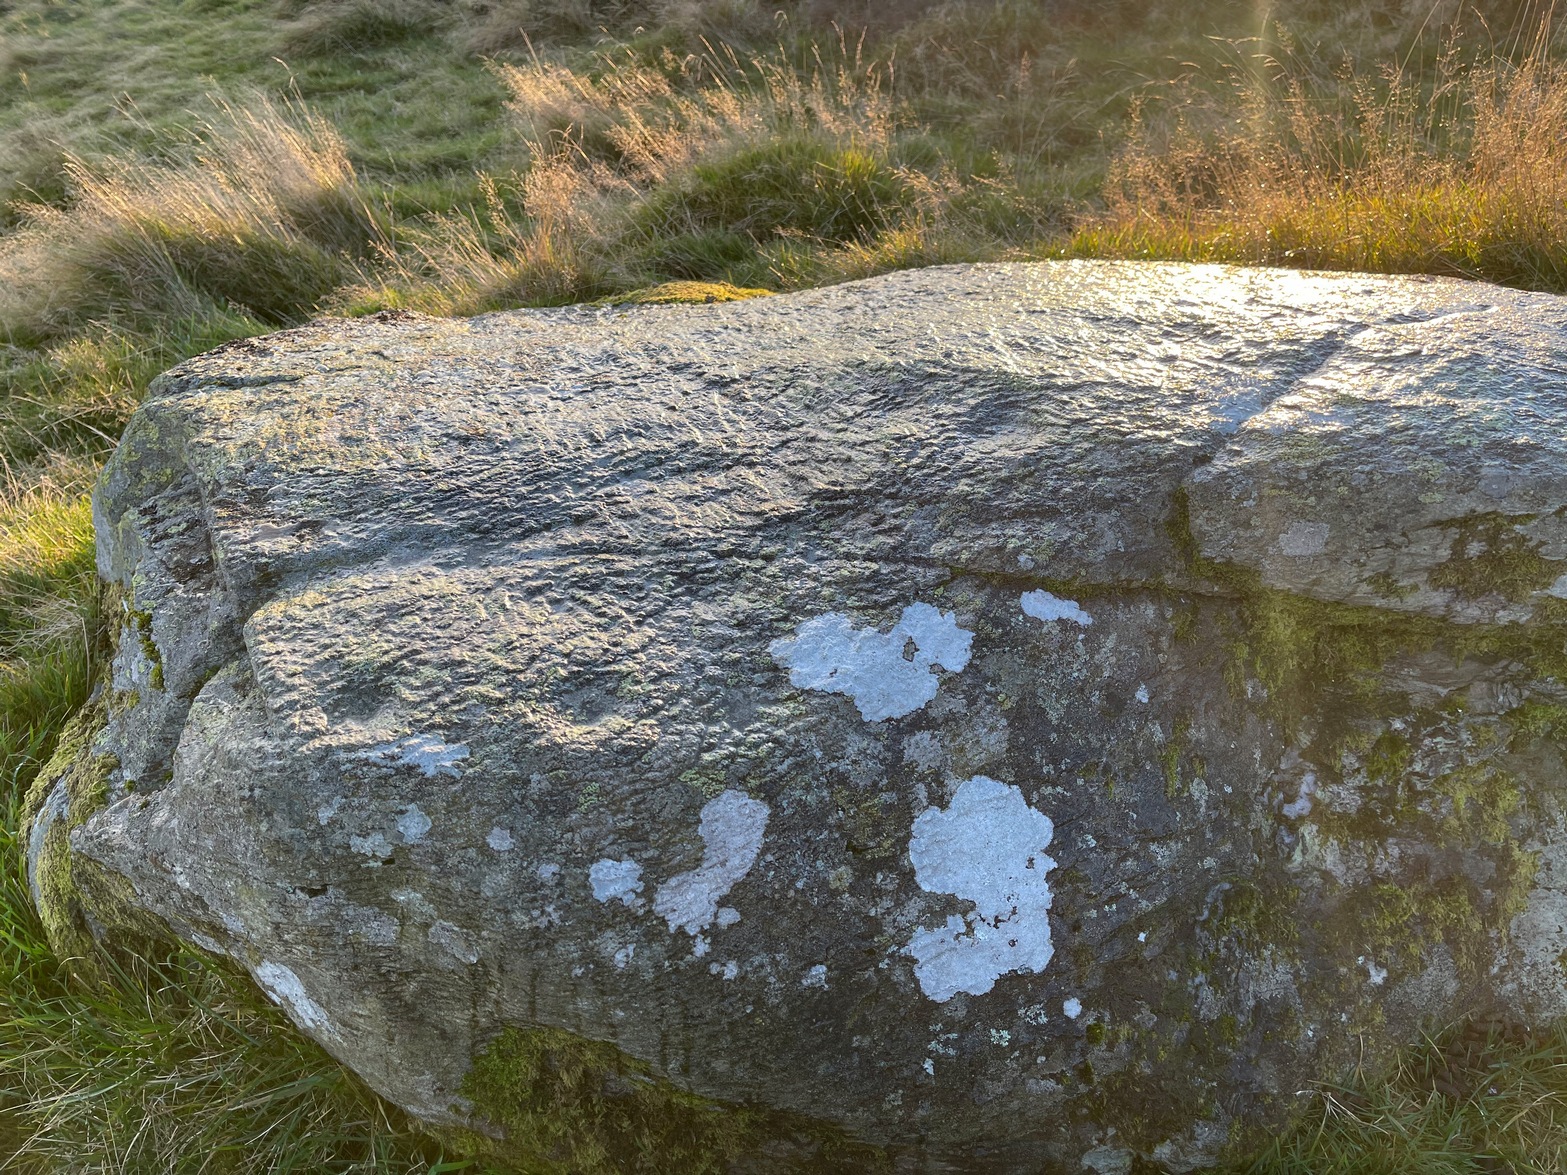
Lower cups & upper cups
Cups on top
When I got to this stone, the evening sun was literally touching the horizon and so the light cutting across half the rock highlighted very little indeed. I was rushing, trying to fondle and see as much as I could before the darkening sky clouded everything, and as I almost frenetically sprayed showers of water across its surface, the two or three cups that I could see near the crown of the stone suddenly doubled in number. Two cups along one edge became three; whilst the sloping surface above these that had one cup suddenly seemed to have a companion. On the highest part of this gently sloping stone, the form of one of the two distinct cup-marks that first caught my eye seemed to slowly morph into one of the carved “footprint” designs, akin to those clustered on the Ardoch (2) carving 1½ miles south-west of here. However, this element needs looking at again, as it may have been a curious playful trick between stone and light showing me something that wasn’t there! Things like that happen with stones.
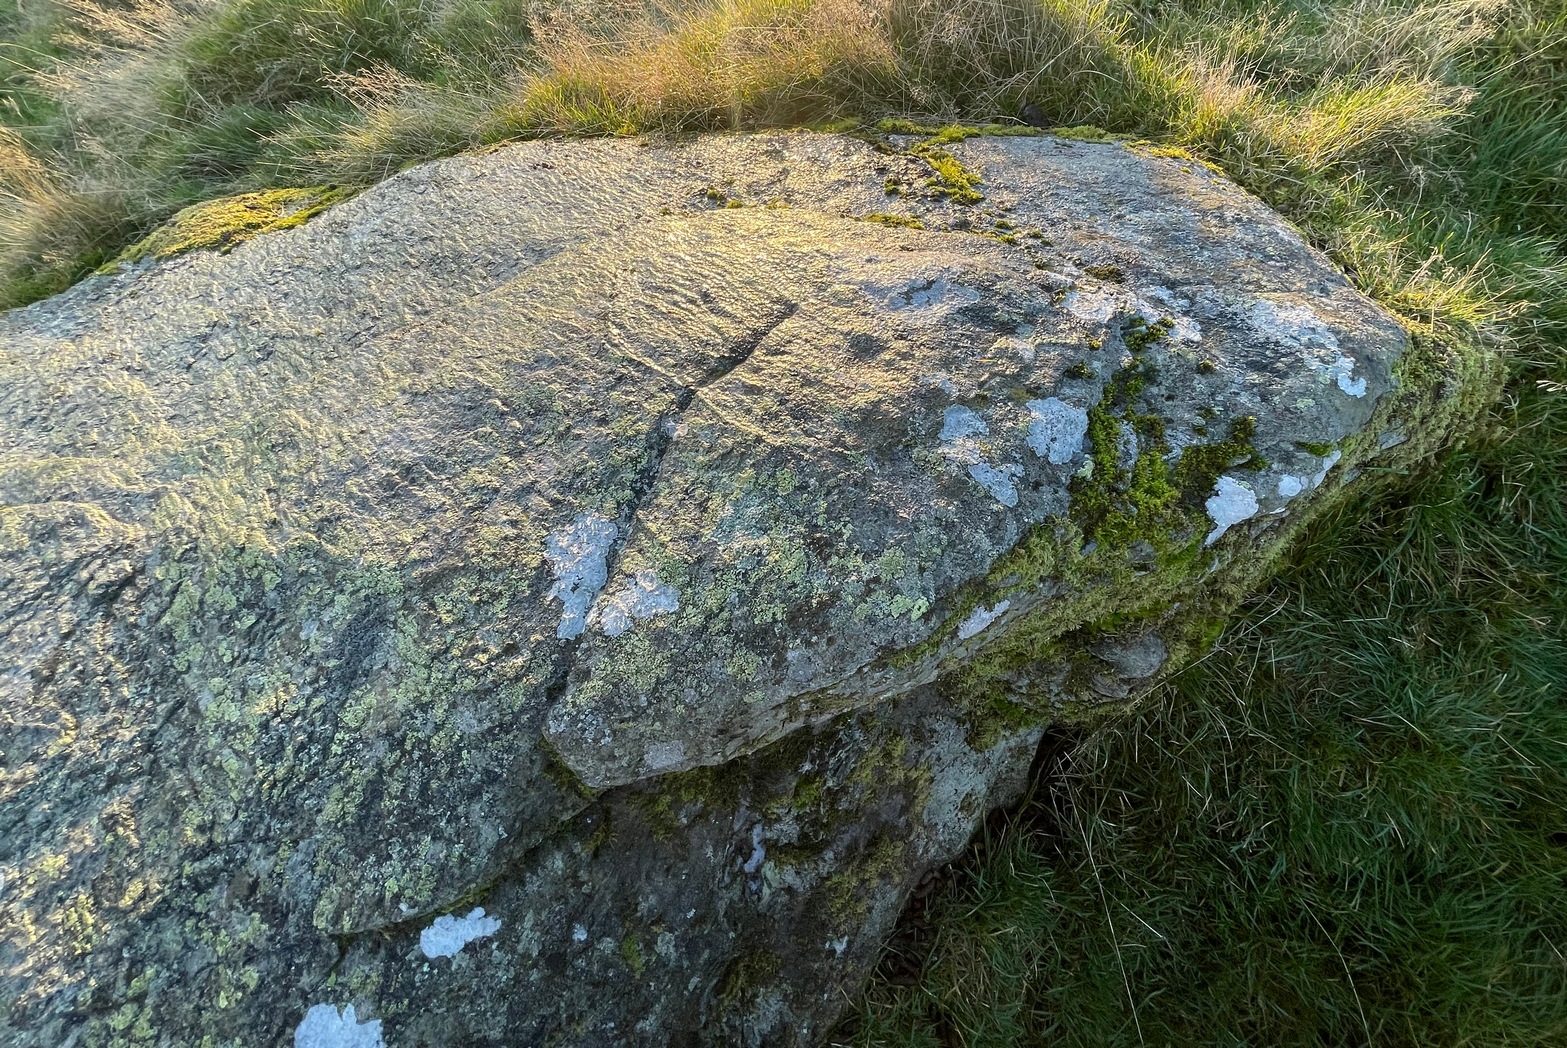
Altogether there are at least six cup-marks on here, but perhaps as many as eight. Obviously, if we (or you) visit the site when the light is much better, an even larger design might emerge from this old rock.
I spent perhaps just five minutes here, before heading back down to meet my companion 500 yards below in the midst of the boggy moorland. Usually a carving gets my fondles for a an hour or two, but conditions weren’t good for us to form a healthy relationship. And so, as I headed downhill, another unrecorded cup-marked stone appeared beneath my rushing feet (Stroness [3] carving)— and I spoke with that for only a couple of minutes. We need to come back up here and zigzag to find other companions that lay sleeping, forgotten for countless centuries…
References:
Currie, George, ‘Buchanty Hill (Fowlis Wester parish): Cup-marked Rocks’, in Discovery & Excavation Scotland, volume 5, 2004.
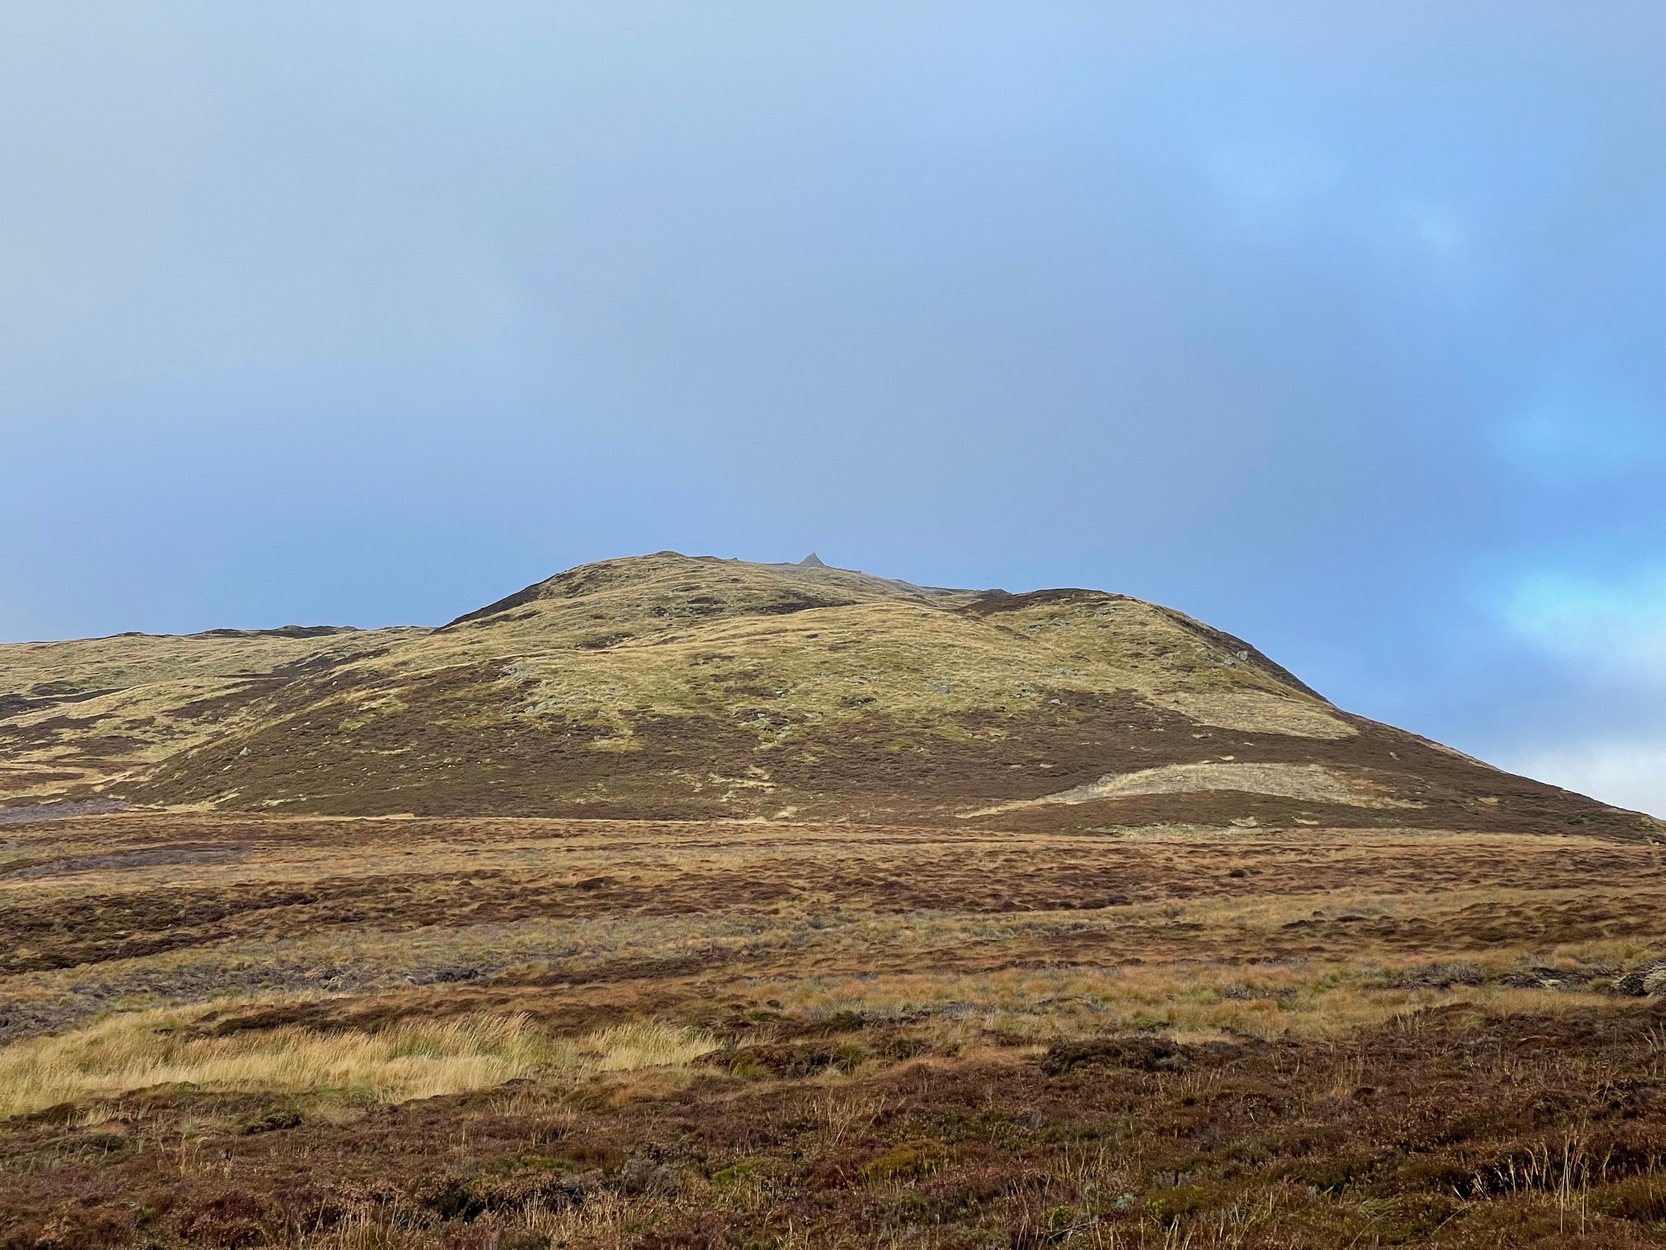
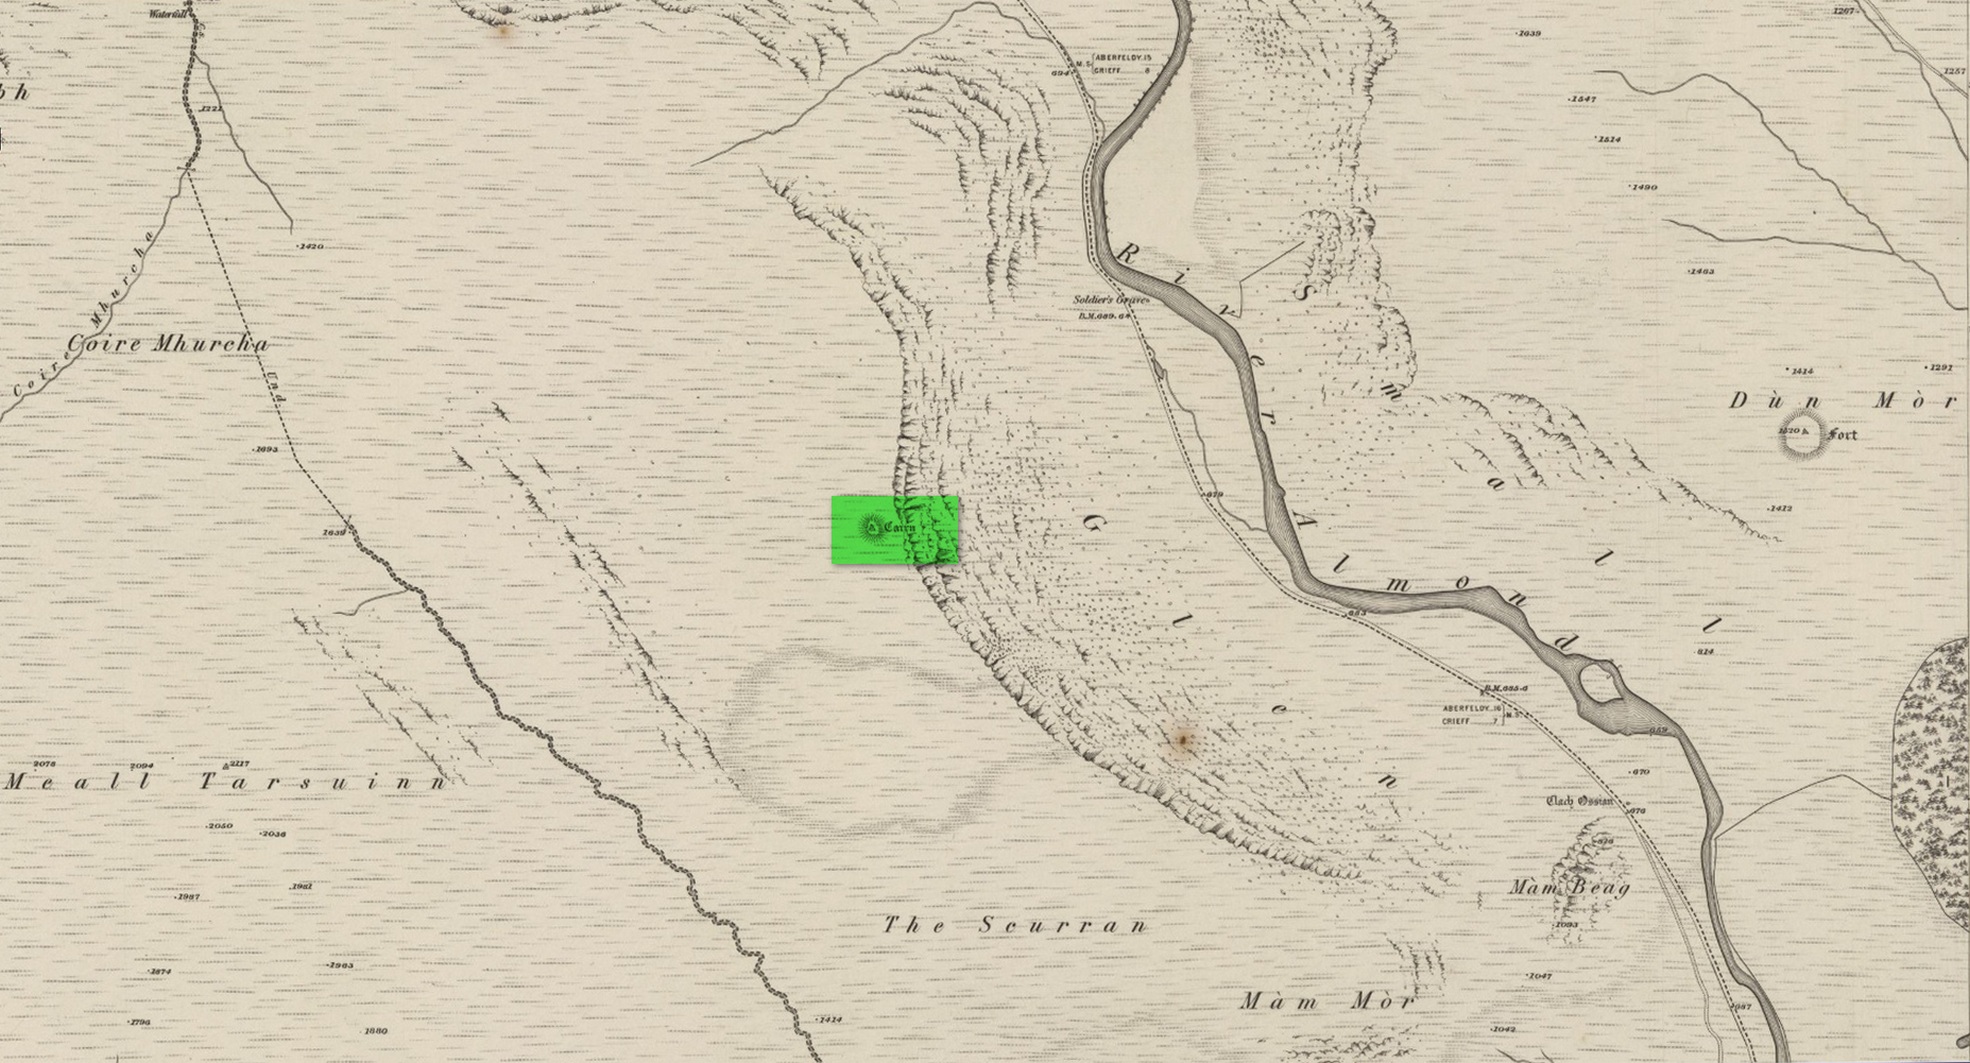
Make a day out for this one! You could, of course, go barely half-a-mile straight up the hill (southwest) from Ossian’s Stone in the Sma’ Glen below – but it’s steep as fuck and I know that most of you wouldn’t do it. So, park-up and take the gradual 3 mile walk into the mountains. Coming via Crieff, along the A85 road east, turn left up the A822 Dunkeld road at Gilmerton. 2½ miles on, you reach the Foulford golf course on the right-hand side of the road, whilst directly across the road a dirt-track leads you into the fields, past the large Foulford cup-and-ring stone. Keep along this track, bearing right just before Connochan Lodge and follow this dirt-track uphill on and on for another 2 miles where you’ll eventually see the cairn-peak in the distance. Another shallow track leads uphill after about 2 miles: we walked up to where the ground levels out, walked across the dodgy swamp-land and up again to the tomb. It’s well worth it!
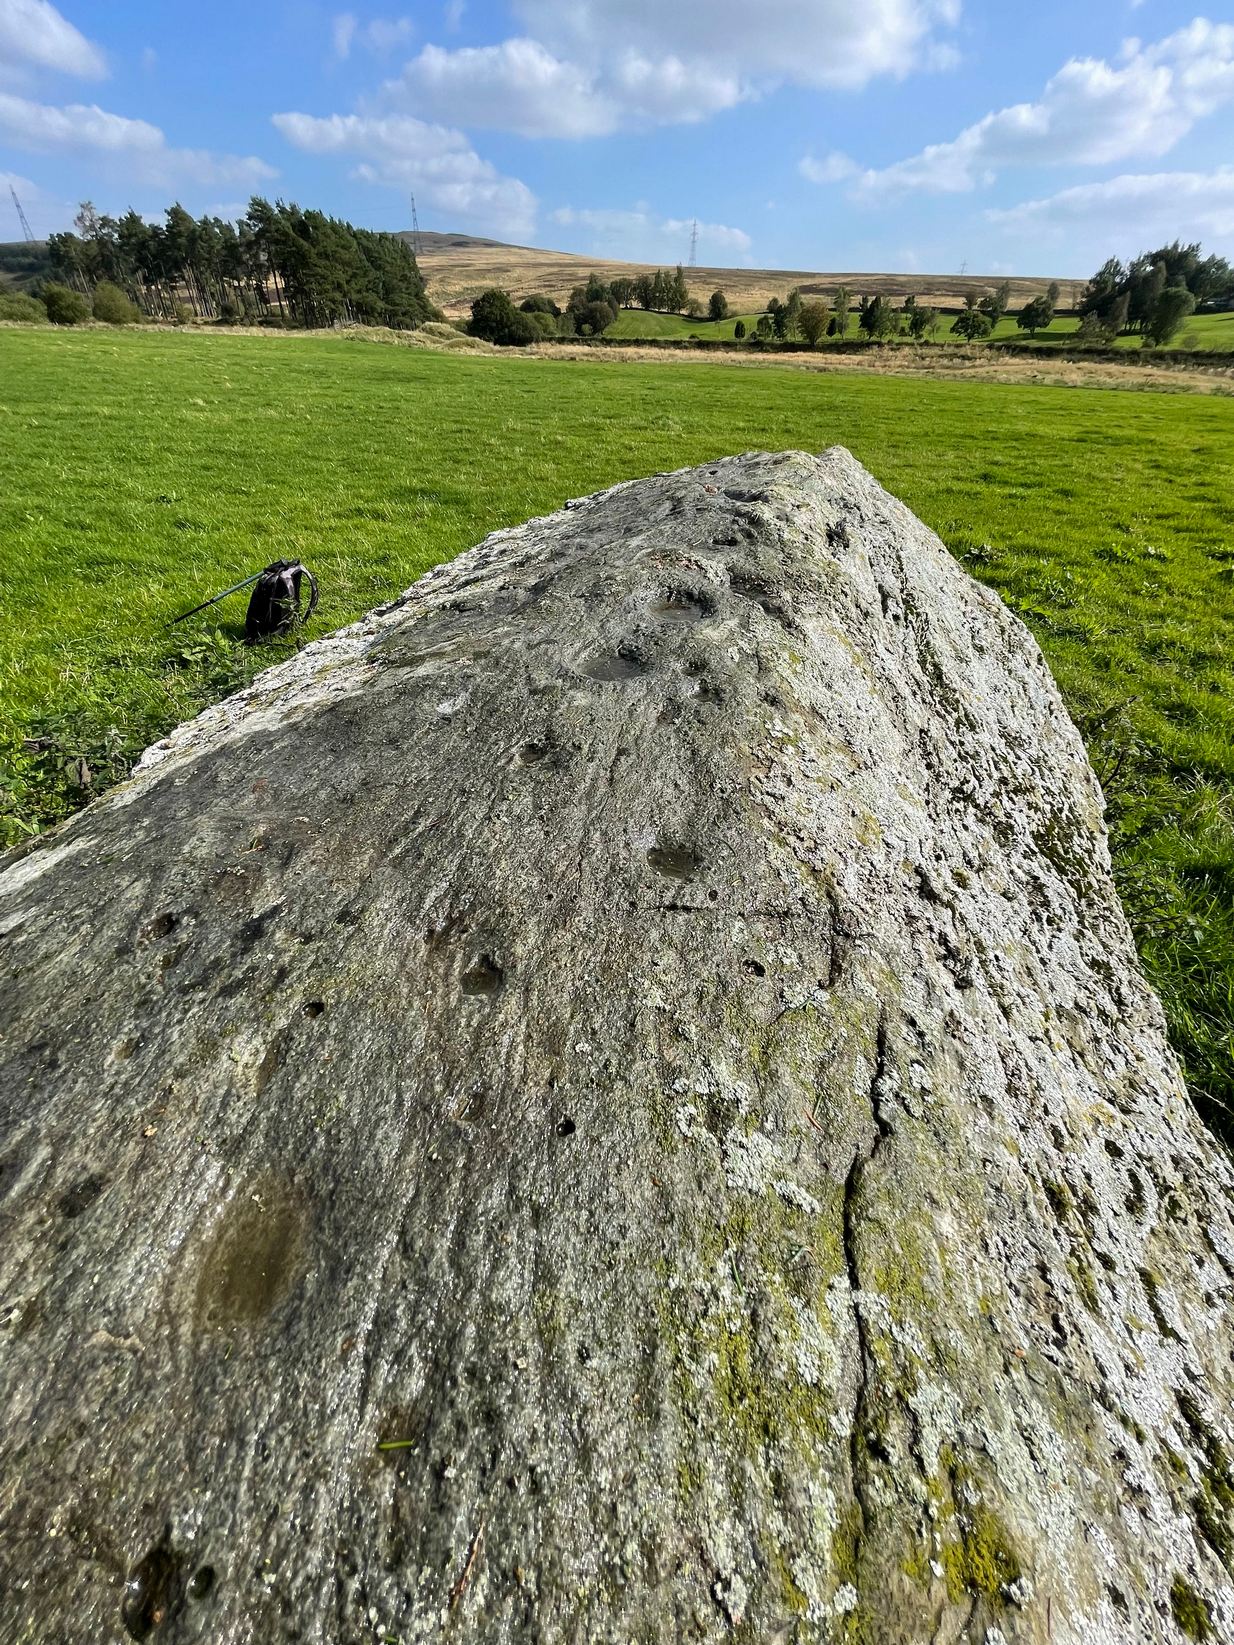
Archaeology & History
Visible for many miles round here from the surrounding hills, this somewhat mutilated giant cairn, highlighted on the earliest Ordnance Survey map of the area in 1867, hasn’t fared well in archaeology tomes. Apart from a passing note in Margaret Stewart’s (1966) summary article on prehistoric remains in central Perthshire—where she erroneously told it to be 400 feet lower down that it actually is—almost nothing has been said of this place. Most odd.
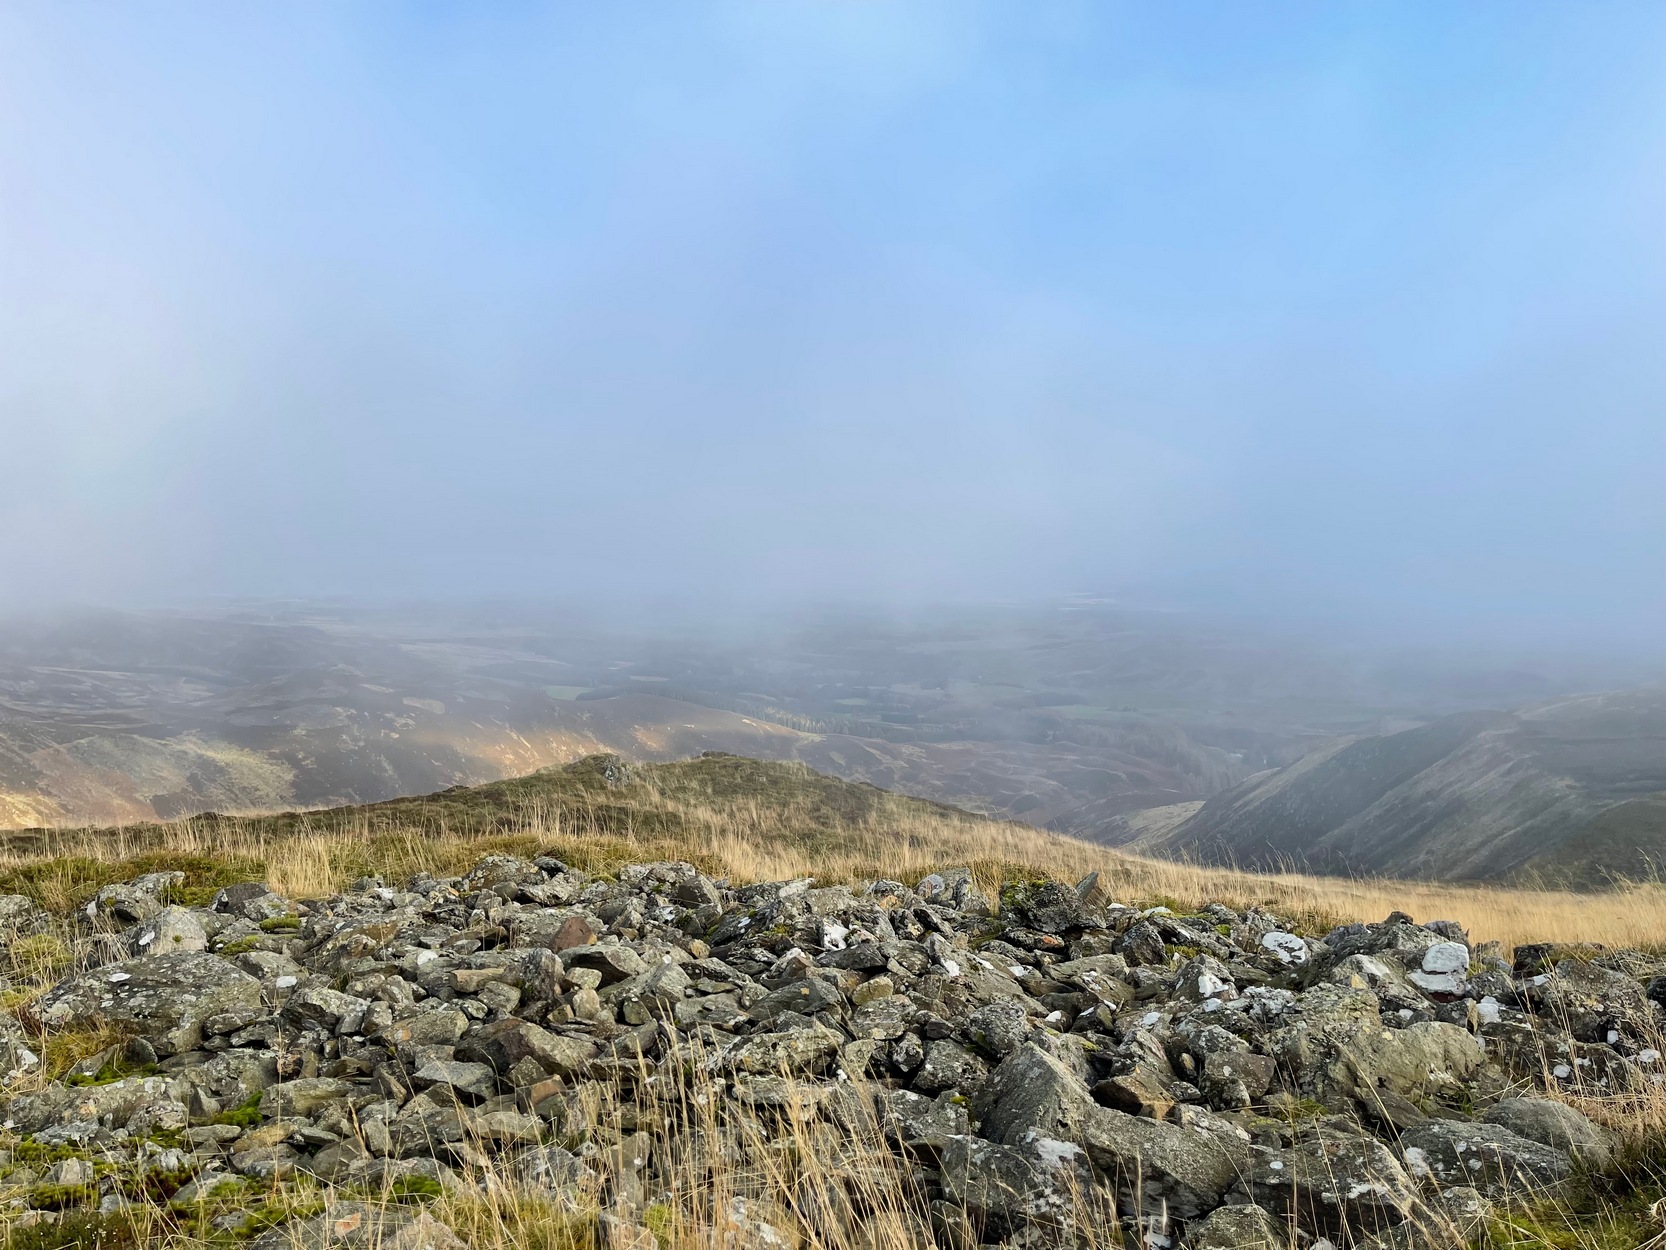
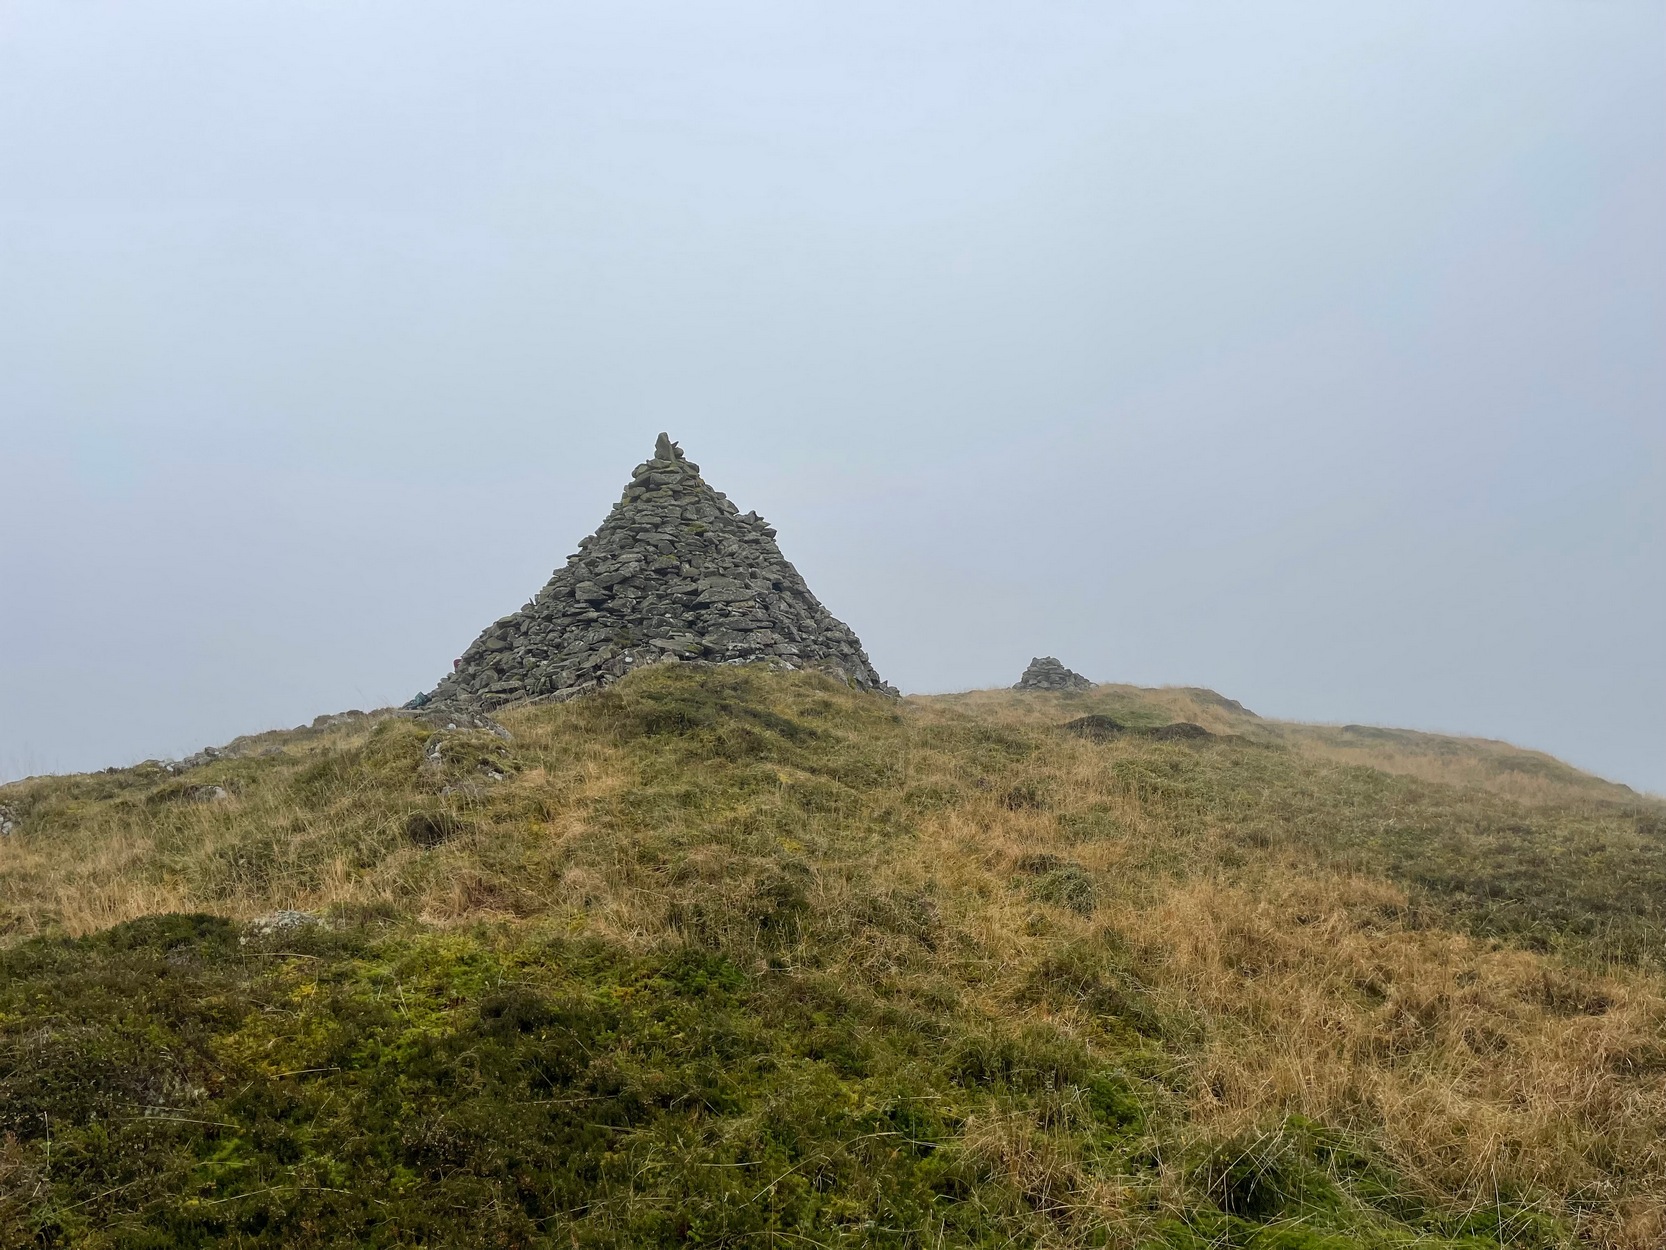
Cairn spoil, looking SE
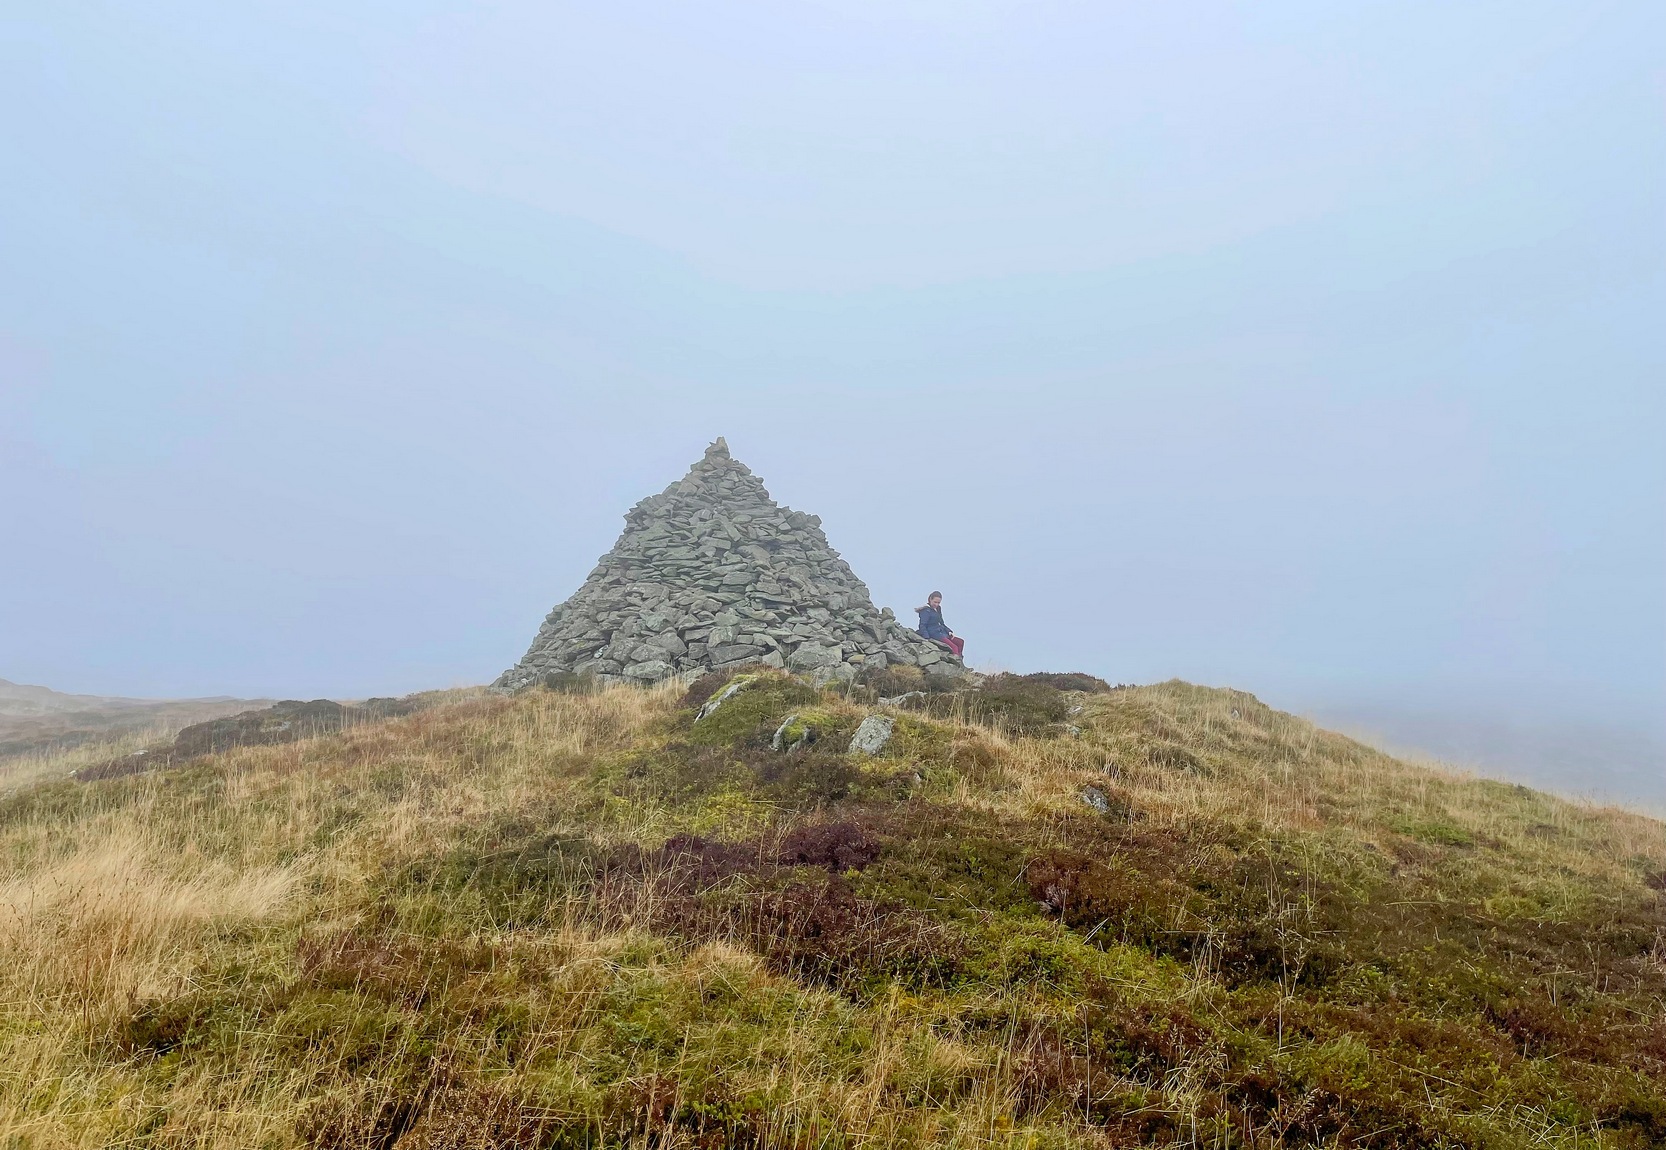
New cairn atop of the old
Despite it being ransacked over the centuries, it was obviously of some considerable size in its early days. Today, surmounting it, is a very large walker’s cairn which, no doubt, has accrued some of its own foundations from the prehistoric tomb on which it sits. To the side of this recent cairn, another one is growing, thanks to stones brought from near and not-too-far. But the original creation can still be seen in outline and mass all around. Indeed, as you walk all round the modern cairn, you’re walking over much of the early collapsed stonework sleeping gently beneath the moorland vegetation, and once you walk away and below the cairn mass itself, looking back up at it you’ll notice the very ancient raised plinth of stone on which our modern one now lives.
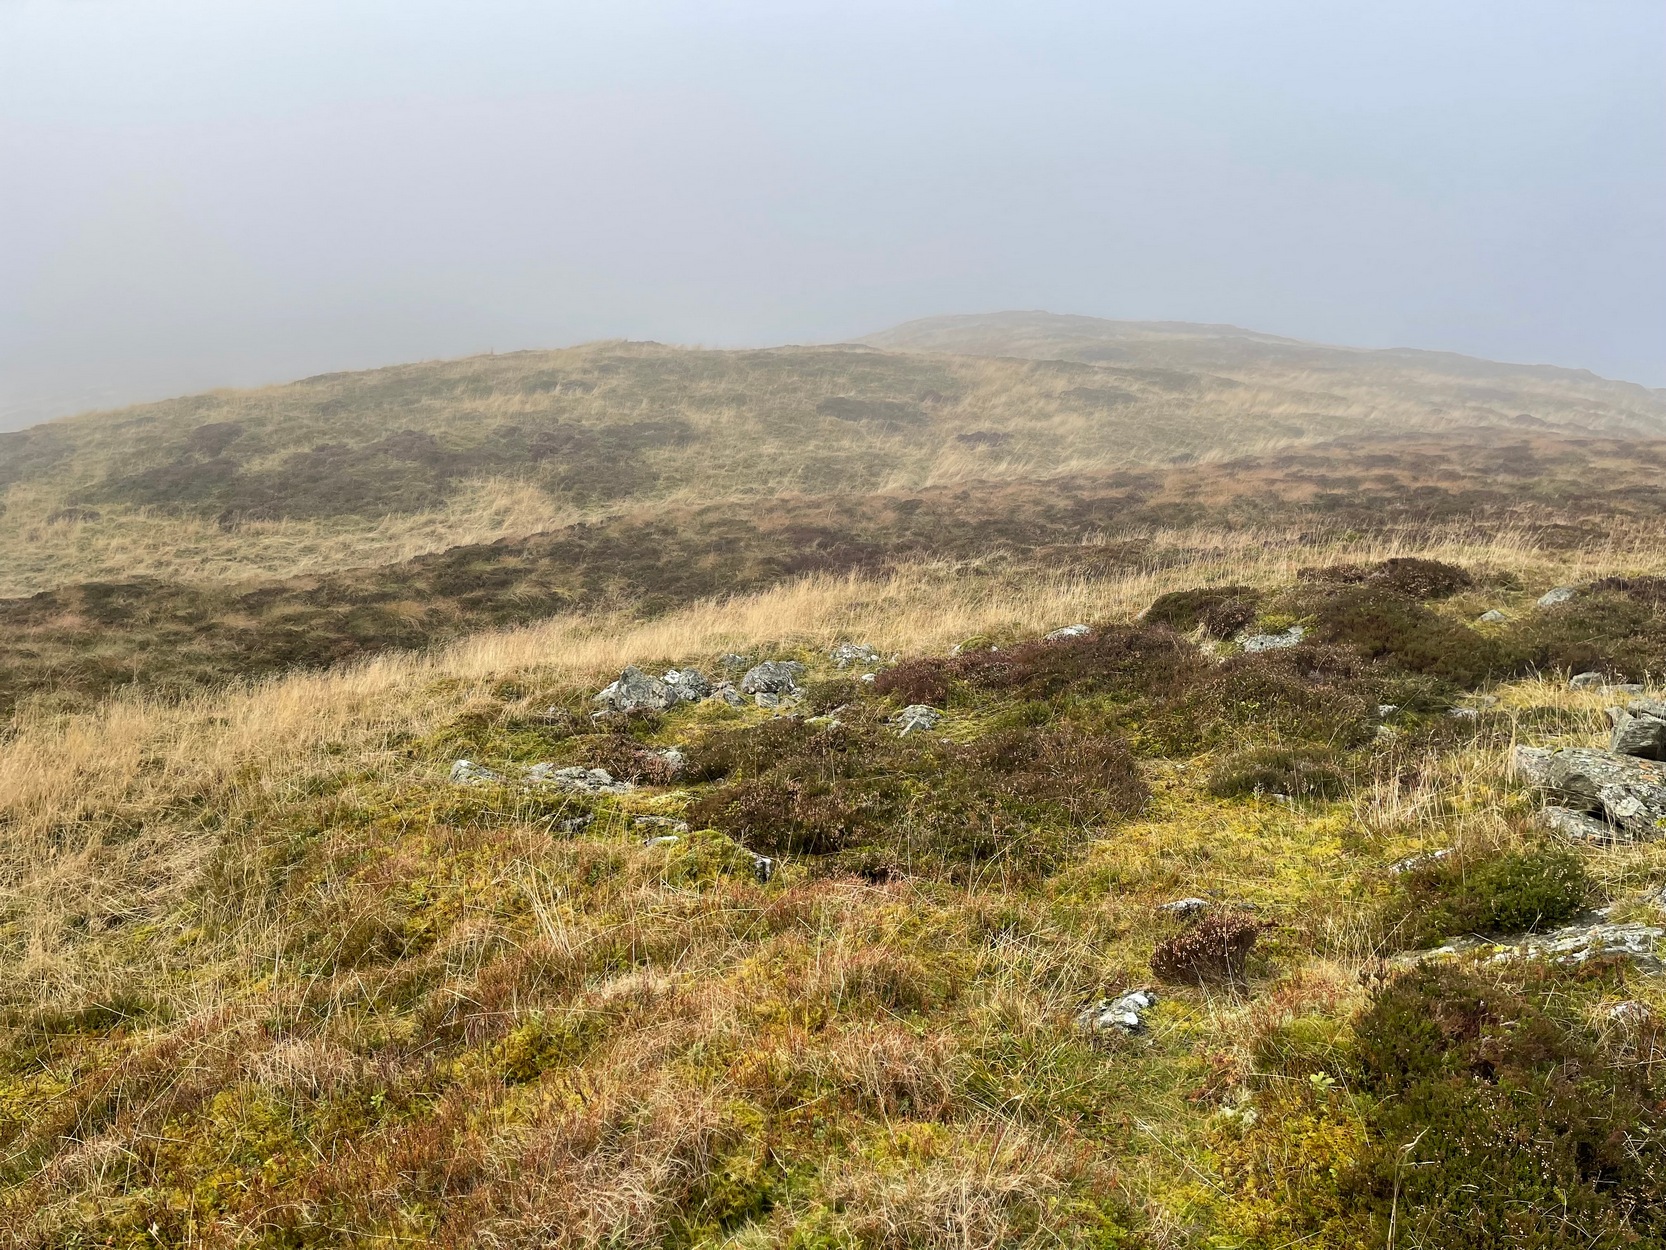
Low walling on NW side
Its amorphous shape is somewhat amoeboid, measuring more than 22 yards across east-west, by 15 yards north-south, with a curious arc of low walling, very old indeed, on its northwestern side. Whether this walling outlines the original edge of the tomb, only an excavation will tell. The most notable remaining mass of ancient cairn material reaches out on its south-east to eastern edges, where some of it is beginning to fall away down the edge of the mountain slope.
Folklore
Local tradition assigns this cairn to be where the bones of the great hero-figure Ossian was removed to, when they were disturbed by the unruly mob of General Wade and his cohorts in the middle of the 18th century. Notes of the event were written at the time by one of Wade’s mob, a Captain Edward Burt, who told,
“the Highlanders, they assembled from distant parts, and having formed themselves into a body, they carefully gathered up the relics, and marched with them, in solemn procession, to a new place of burial, and there discharged their fire-arms over the grave, as supposing the deceased had been a military officer.”
This was essential, said Burt, as
Site shown on 1867 map
New cairn on old, looking W
“they (the Highlanders) firmly believe that if a dead body should be known to lie above ground, or be disinterred by malice, or the accidents of torrents of water, &c. and care was not immediately taken to perform to it the proper rites, then there would arise such storms and tempests as would destroy their corn, blow away their huts, and all sorts of other mis-fortunes would follow till that duty was performed. You may here recollect what I told you so long ago, of the great regard the Highlanders have for the remains of their dead…”
Oral tradition tells us that this cairn, high above Ossian’s Stone, is where the rites occurred. It makes sense too.
References:
Finlayson, Andrew, The Stones of Strathearn, One Tree Island: Comrie 2010.
Acknowledgements:Huge thanks for use of the Ordnance Survey map in this site profile, reproduced with the kind permission of the National Library of Scotland.
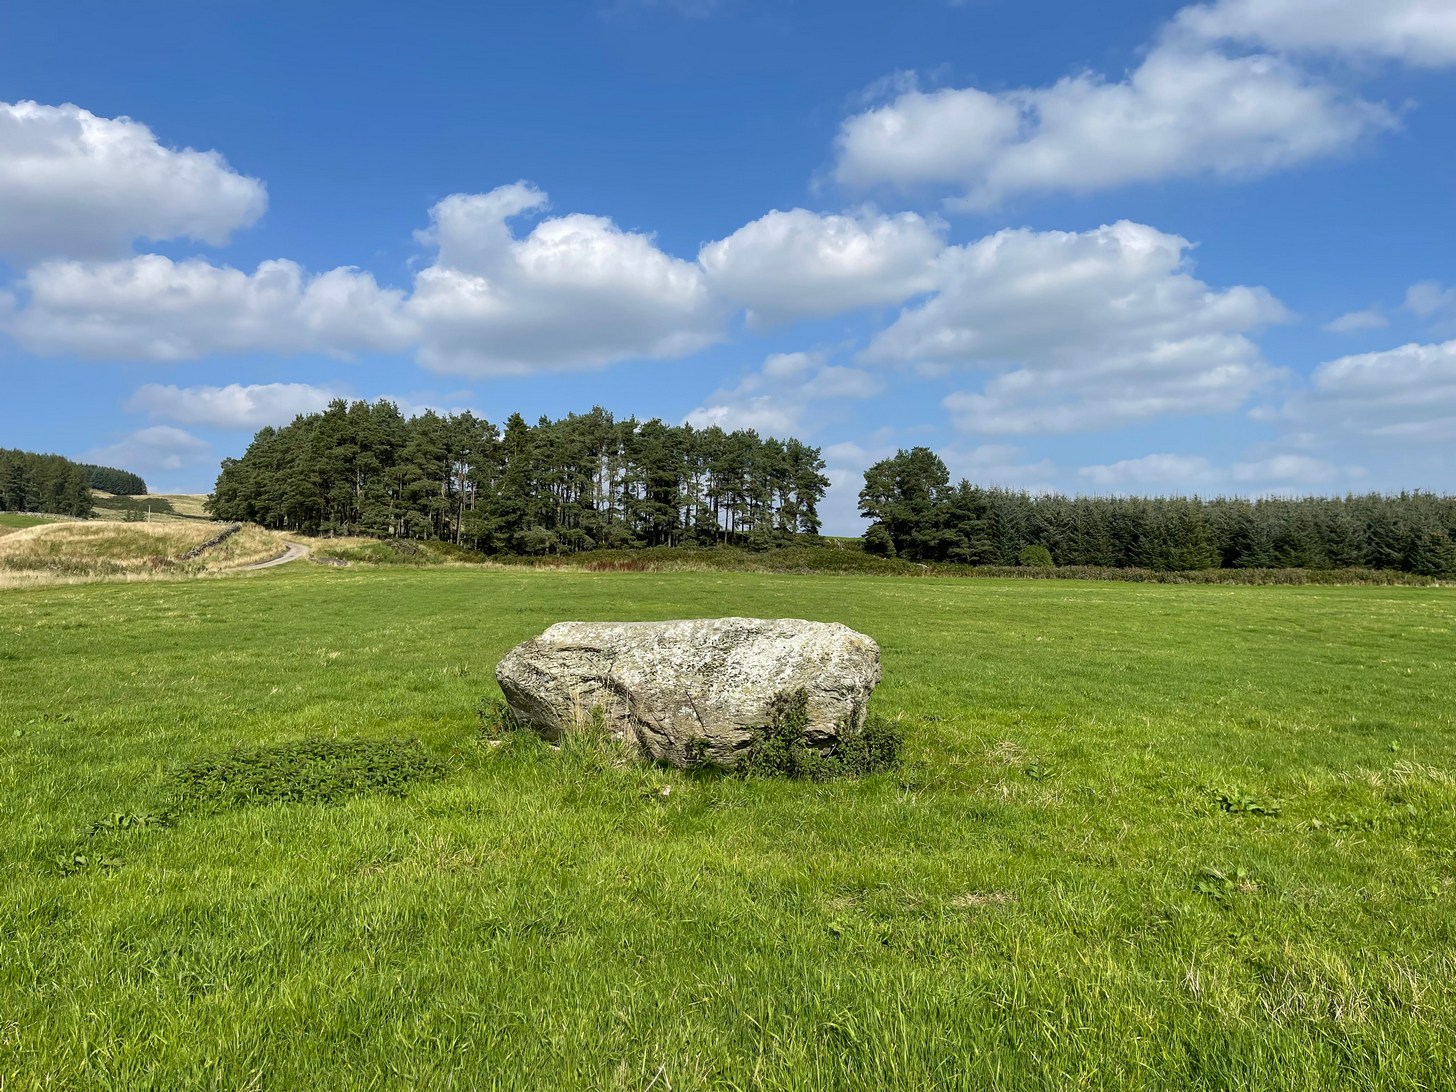
Take the A85 road east out of Crieff and after roughly 2 miles at Gilmerton, turn left up the A822 Dunkeld road. Go along here for nearly 2½ miles, where you’ll reach the Foulford golf course on the right-hand side of the road. Directly opposite the entrance into the golf course, a dirt-track leads you into the fields where, laying alone and standing out like a sore thumb about 300 yards away, you’ll see a large rounded boulder sitting there minding it’s own business. You can see it quite clearly from the roadside. Nice n’ easy.
Archaeology & History
For such a large conspicuous stone, you’d think there’d be quite a lot written about it as well as hope for a good ornate design—but alas!, both hopeful expectations are lacking. Although, as usual, there’s more to it than is described in the official records—although not much more….
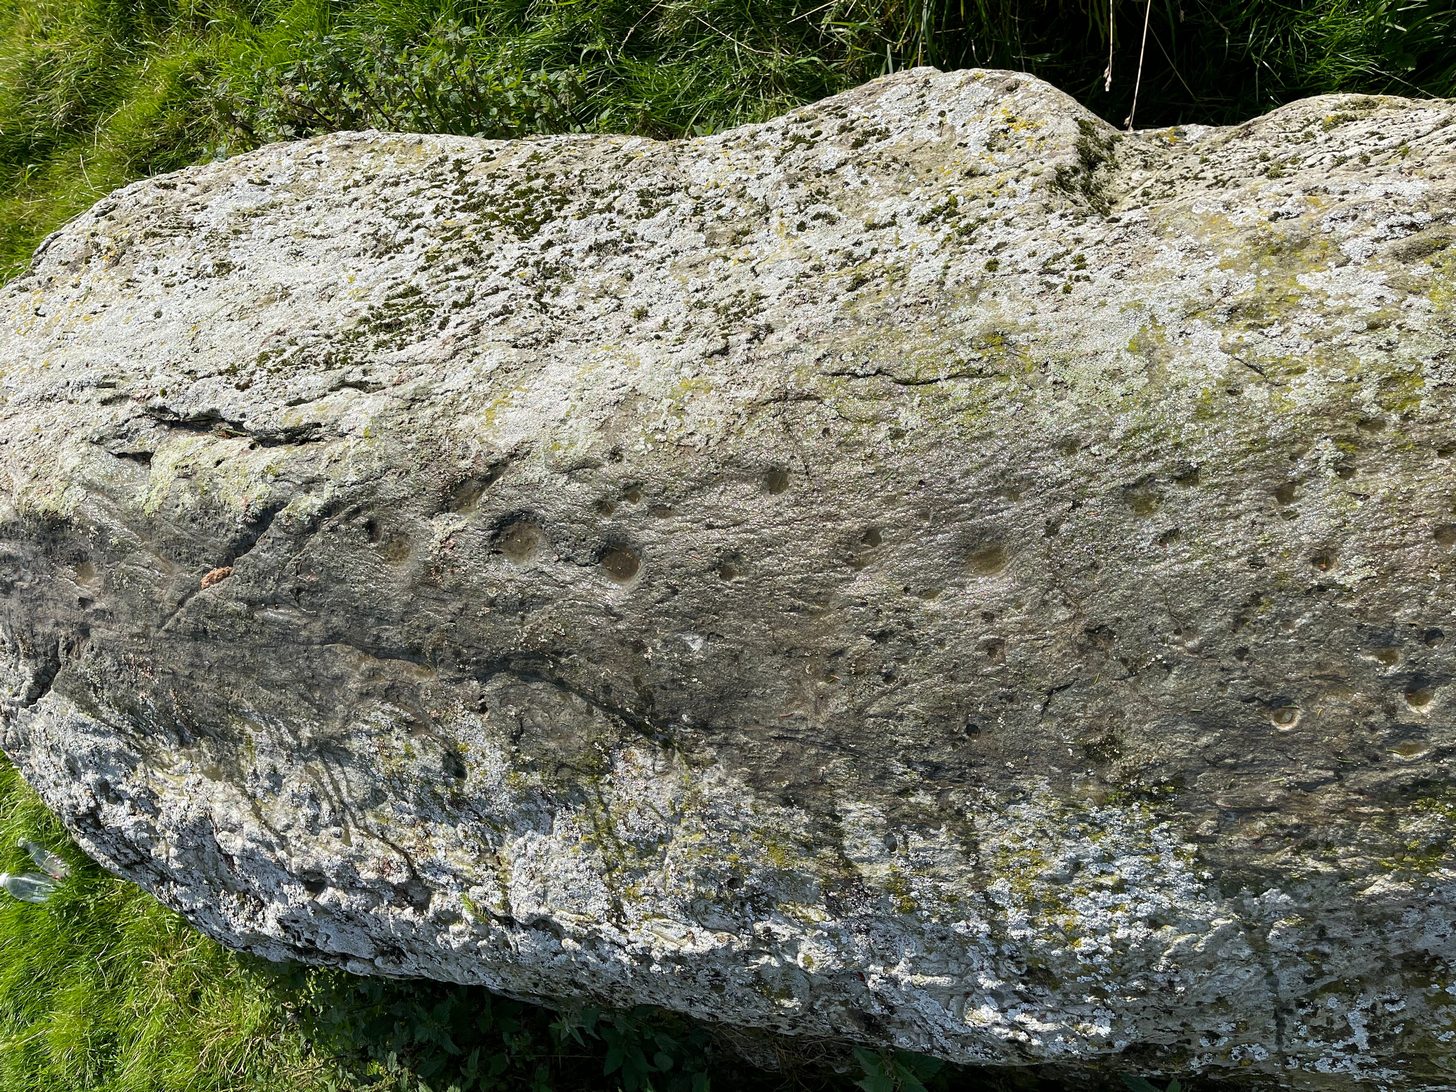
Long stone & its cupmarks
Cups along the spine
As you walk towards it, it seems as if a rounded earthfast boulder is in front of you, but once you reach it you realise that it’s nothing of the sort. Indeed, the more you looked at the stone, the more it seems as if it might have stood upright not too many centuries ago; the prevalence of other standing stones in the area being well known. But, along the spine of this long stone, a number of cup-marks speak out to you: at least seven of them, perhaps eight. There are a number of smaller “cups” roughly along the same length of stone, but these are Nature’s handiwork; but, it looks as if one or two of the man-made cups might have started their lives as Nature’s indentations and been worked into the symbols that still remain to this day.
Faint ring around a cup
Nose of stone, looking E
The official records tell us of the cup-marks, but says nothing of the faint but distinct rings around two or three of the cups. The most notable one, albeit faint, is near the southeastern part of the stone, where the ring seems to be an artistic partnership of Nature and man. You can make it out in the photo, albeit not too clearly. Nearer to the middle of the stone at least one of the cups has a semi-circle around it and, just to the side of it, a natural crack in the stone has been enhanced and carved into a short line. On the whole, it’s not a visually impressive carving and the design is troublesome to see if the lighting isn’t right (as usual), but is worth having a look at if you’re in the area. Very little’s been written about it apart from brief notes in the regional megalithic surveys of both Finlayson (2010) and Watson (2006).
References:
Finlayson, Andrew, The Stones of Strathearn, One Tree Island: Comrie 2010.
Watson, David, A Simple Introduction to the Stone Circles and Standing Stones of Perthshire, Photoprint 2006.
Acknowledgements:Huge thanks for use of the Ordnance Survey map in this site profile, reproduced with the kind permission of the National Library of Scotland.