Cup-Marked Stone (lost): OS Grid reference – NN 918 524
Archaeology & History
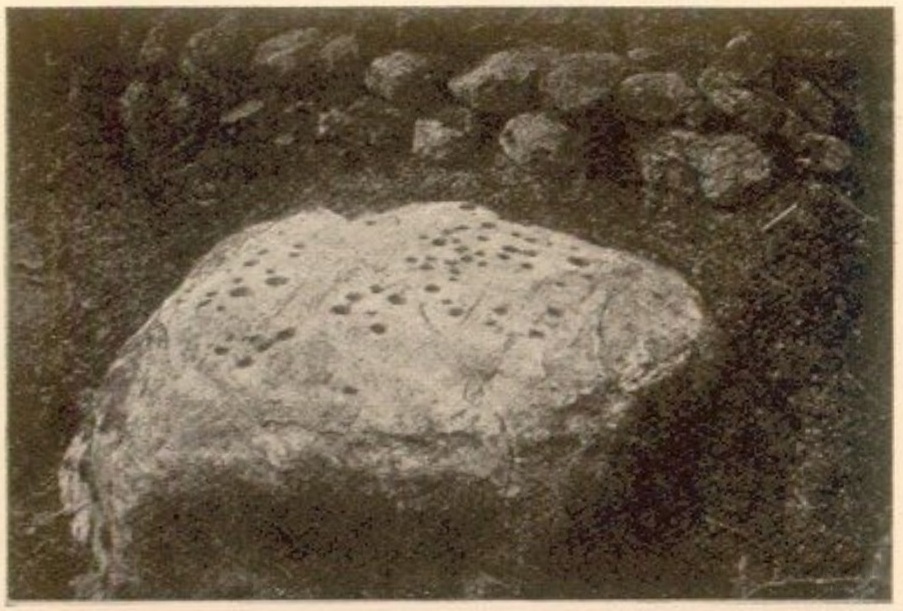
On the hillside a short distance (probably) south of old Balnabeggan farmhouse, up against some walling at the edge of some natural birch wood, could once be seen—some fifty or sixty years ago—a large, ornately inscribed, quartz-enriched cup-marked stone. And, although seemingly lost, it shouldn’t be too hard to uncover with a little bit of bimbling and dedication. It was described in some considerable detail in John Dixon’s (1922) survey of the Strathtay petroglyphs as being,
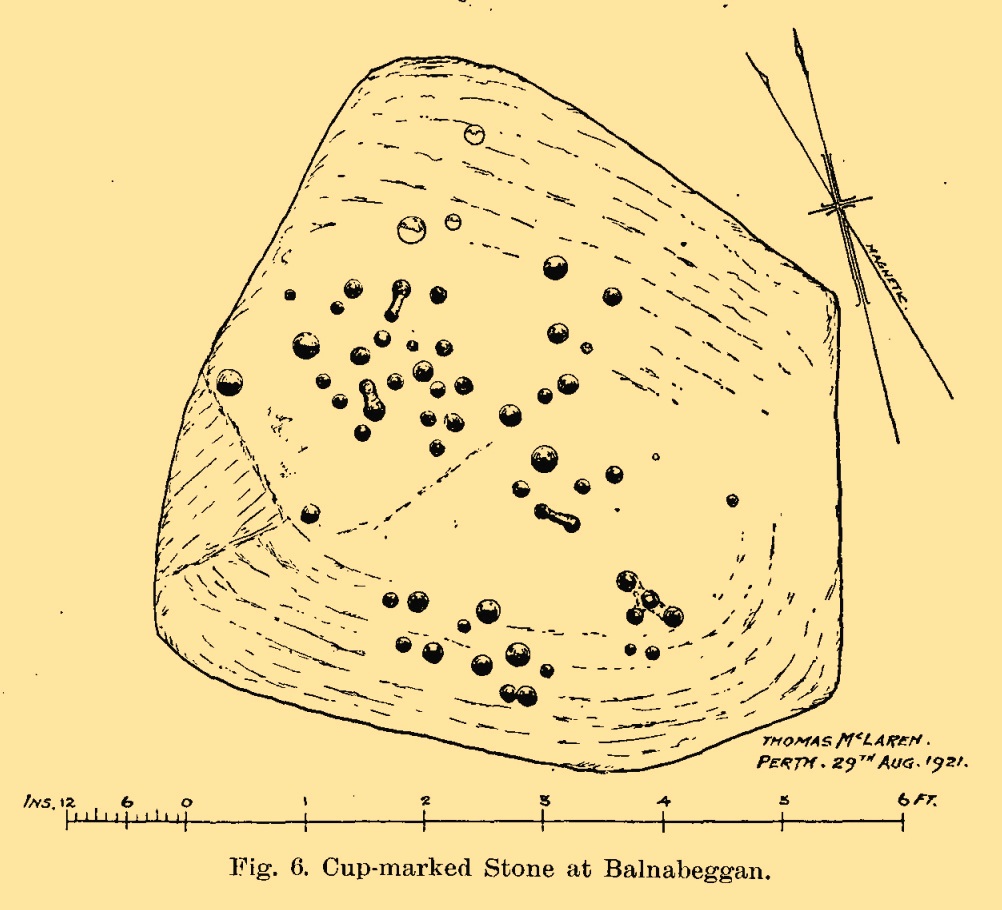
Balnabeggan stone, c.19201921 sketch of the stone
“roughly hexagonal in shape, but one side is partly hidden by an old dry-stone wall built above it. The greatest width is 7 feet, whilst a diameter at right angles measures 6 feet. The thickness or depth of the stone is at least 2 feet, but it may be more underneath, as the stone stands in a wet place in which it may have settled down.
“On the upper surface of the stone are fifty-nine cups of various sizes, the largest measuring 2½ inches in diameter, and from 1 inch to ½ inch, or less, in depth. A special feature is that four equidistant cups (three in a row and the fourth at a right angle to the centre of the row) are connected by grooves slightly less broad and deep than the cups. Three pairs of cups are also similarly connected. The cups connected as described are discernible, but the group of four cups on the low left side of the stone does not appear in the photograph to have its fourth cup (the lowest) connected, as it really is, with the central cup of the group.”
Mr Dixon’s additional clue as to its whereabouts is that it’s “about 500 feet above sea level.” So what, pray, has become of it…?
References:
Dixon, John H., “Cup-Marked Stones in Strathtay, Perthshire,” in Proceedings Society Antiquaries, Scotland, volume 56, 1922.
Kennedy, James, Folklore and Reminiscences of Strathtay and Grandtully, Munro Press: Perth 1927.
Cup-Marked Stone (lost): OS Grid reference – NN 8866 5320
Also Known as:
Sunday Well
Tobar an Donich
Archaeology & History
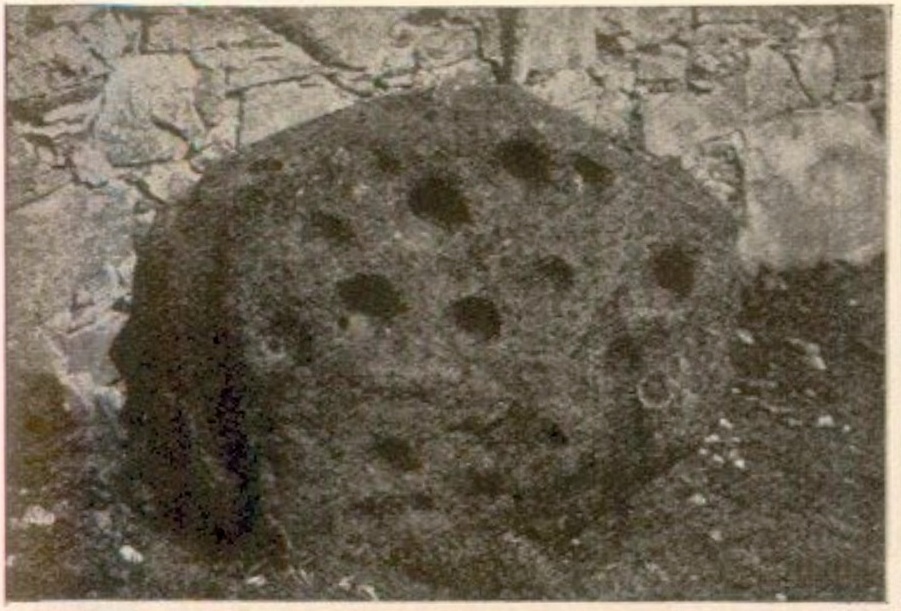
Tobairandonaich stone, c.1920
Located some 30 yards south of a holy well known (in English language) as the Sunday Well, this carving was rediscovered shortly before John Dixon (1922) wrote his survey of petroglyphs in the Strathtay region. It would seem to have been a large “portable” cup-marked stone that had been placed, face-downward, into an old doorstep at the stable at Easter Tobairandonaich and forgotten about, long long ago. Then, at the beginning of the 20th century when the people living here had to clear a drain beneath the stable, the stone was moved and the cup-markings were noticed. The carving was a pretty simplistic design, as you can see, which was described by Mr Dixon as follows:
“The stone…has nineteen cups all on the same face. The largest cup is 3¾ inches in diameter and 2 inches deep. The next largest has the same diameter, but is 1½ inch deep. Other five of the cups are very nearly the same size. The smallest cup is 1¾ inch in diameter and ½ inch deep, but weathering has effected much towards almost obliterating some of the smaller cups. The stone is of whinstone with slight veins of quartz. It is oval in form and varies in thickness from 2½ inches to 4 inches. Its greatest diameter is 3 feet 2 inches, and its least diameter 2 feet 8 inches.”
Tom MacLaren’s 1921 sketch
The stone would seem to have disappeared as no one has seen it for fifty years or more. It may (hopefully) be in one of the walls, or perhaps buried somewhere under the soil. Or maybe, tragically, some fuckwit has destroyed it. Twouldst be good to find out one way or the other. The photograph above, taken by Mr Dixon sometime around 1920, is the only thing that remains of the carving.
In this small part of Strathtay we are fortunate in finding a cluster of petroglyphs with folklore about them relating to our faerie and witch folk. Some larger man-made stone “bowls” in the area were also used as “praying stones.” I have little doubt that the people who originally used this carving as a doorstep were fully aware of the cup-marks—and I’d suggest that they even put it here on purpose, probably as a form of protection from the fairies who might have stolen or caused sickness to the horses.
References:
Dixon, John H., “Cup-Marked Stones in Strathtay, Perthshire,” in Proceedings Society Antiquaries, Scotland, volume 56, 1922.
Kennedy, James, Folklore and Reminiscences of Strathtay and Grandtully, Munro Press: Perth 1927.
Yellowlees, Walter, Cupmarked Stones in Strathtay, Scotland Magazine: Edinburgh 2004.
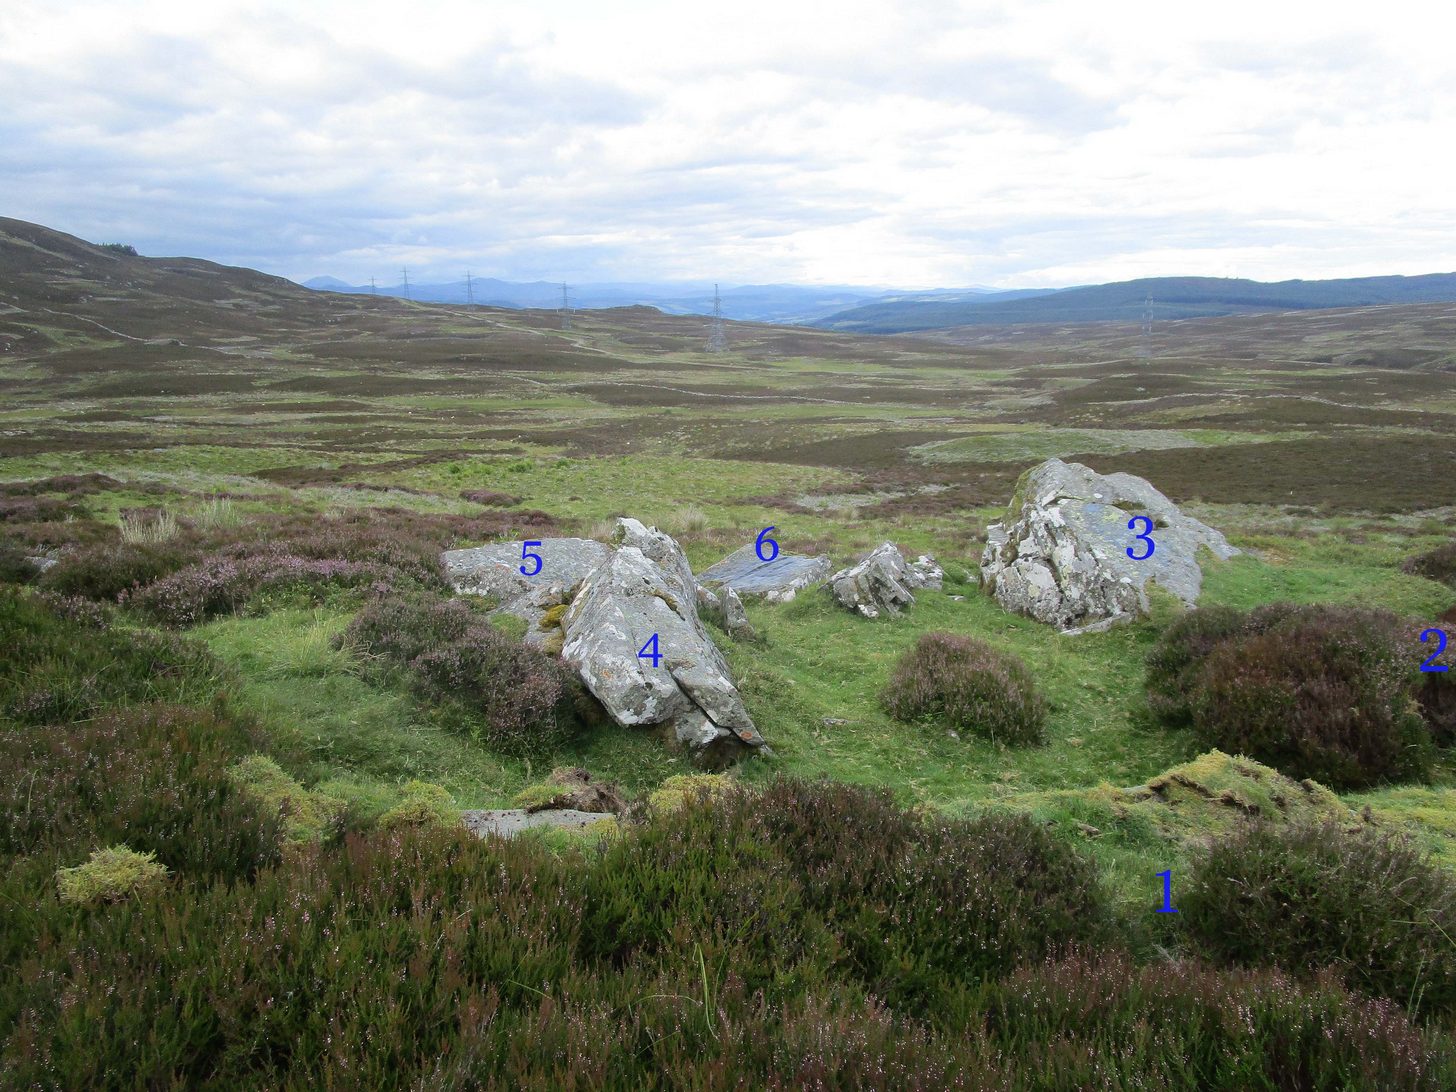
From Kenmore go east up the steep mountain road towards Glen Quaich, or if you’re coming from Amulree, go west along the same glen. After 2½ miles (4km) up the Kenmore route (nearly 9 miles on the Amulree route) you’ll reach a small lochan on your left (you’ve got a very small parking spot a coupla hundred yards before the loch). A gate and stile past the loch takes you east along a track into the moors. More than a mile on, the track splits, but you need to keep to the left and follow the track along the wall-side for another 400 yards or so, where you’ll see a small crag of rocks 100 yards down the slope on your right. Once here, the deformed triangle-shaped stone to the left-side of the cluster is the one you’re looking for.
Archaeology & History
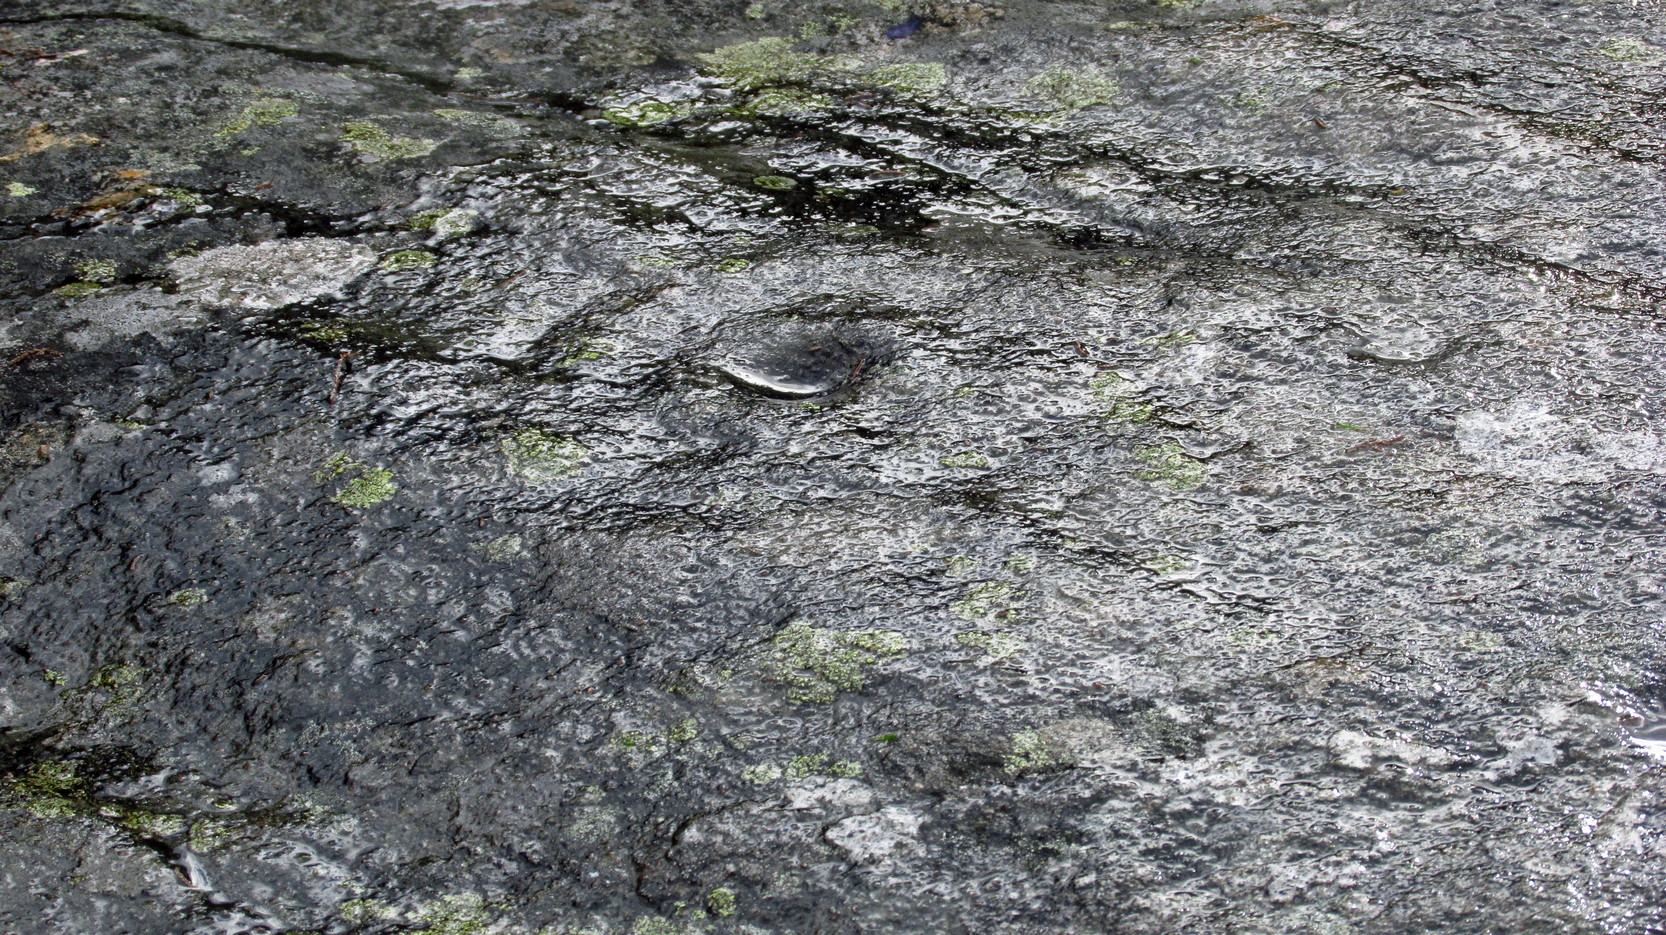
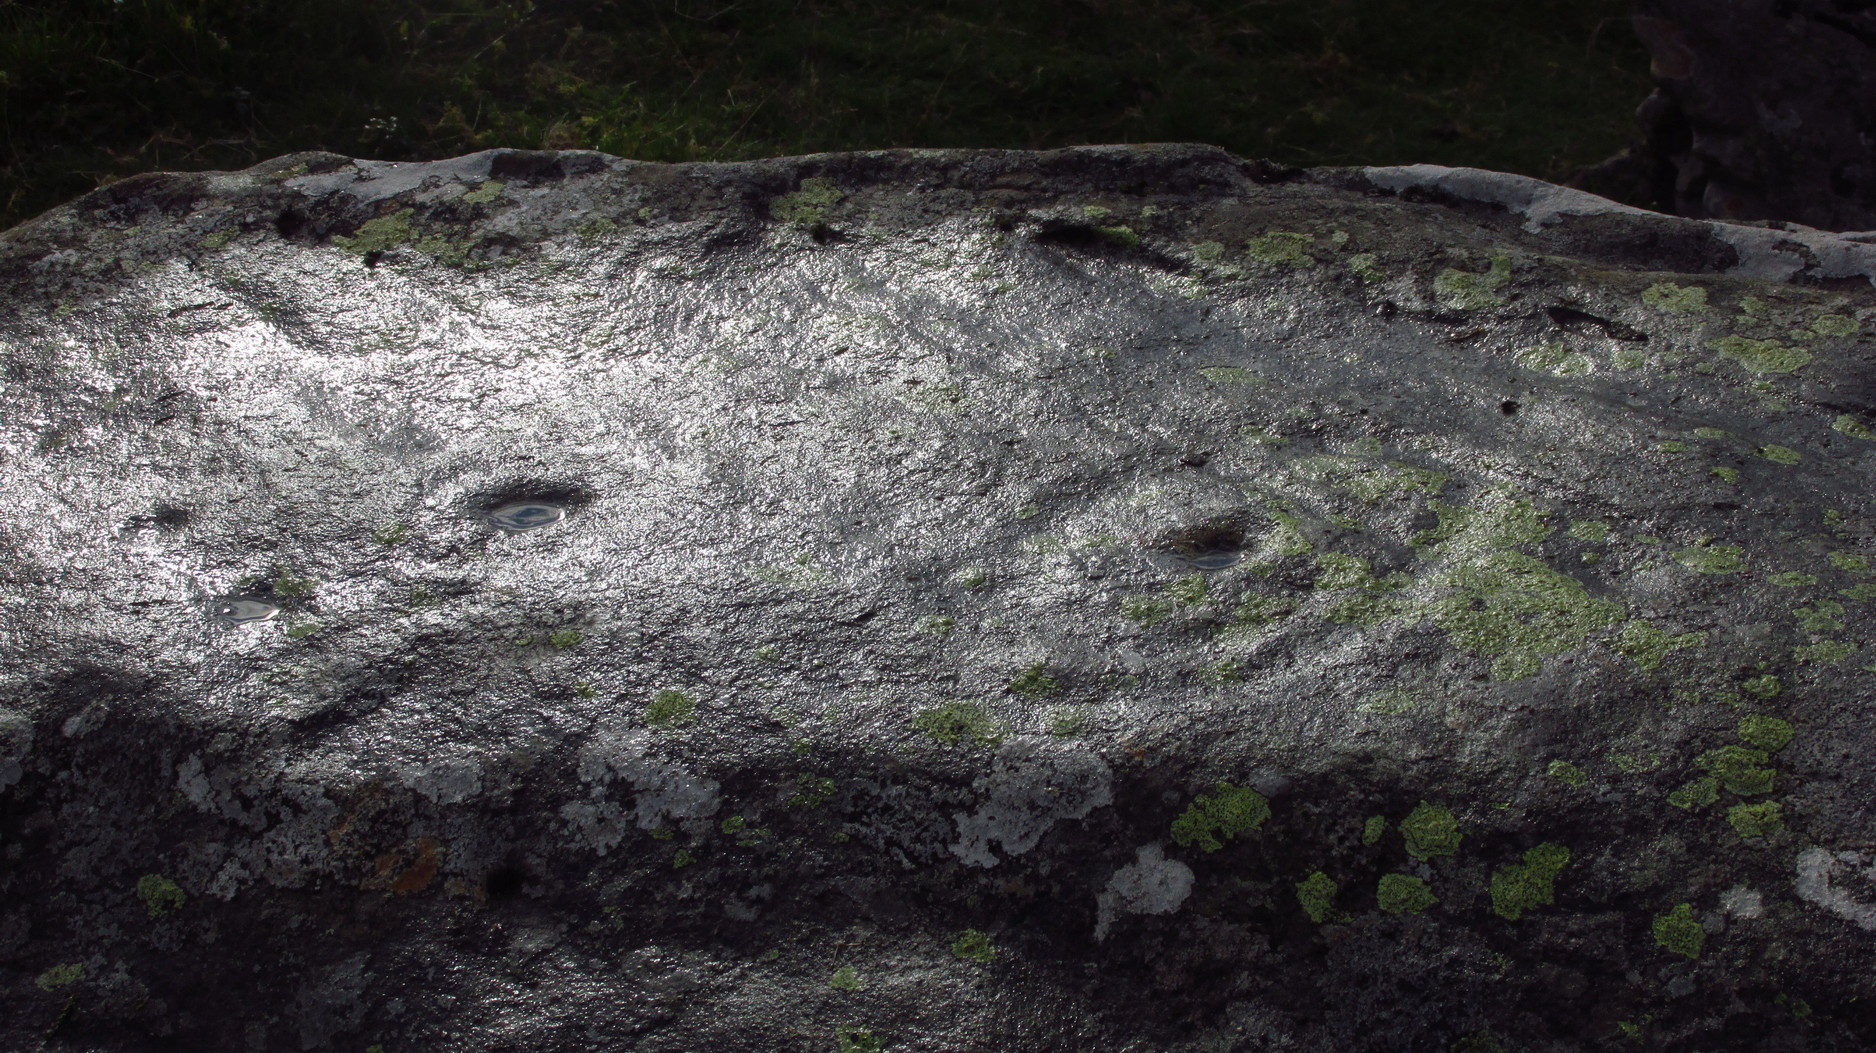
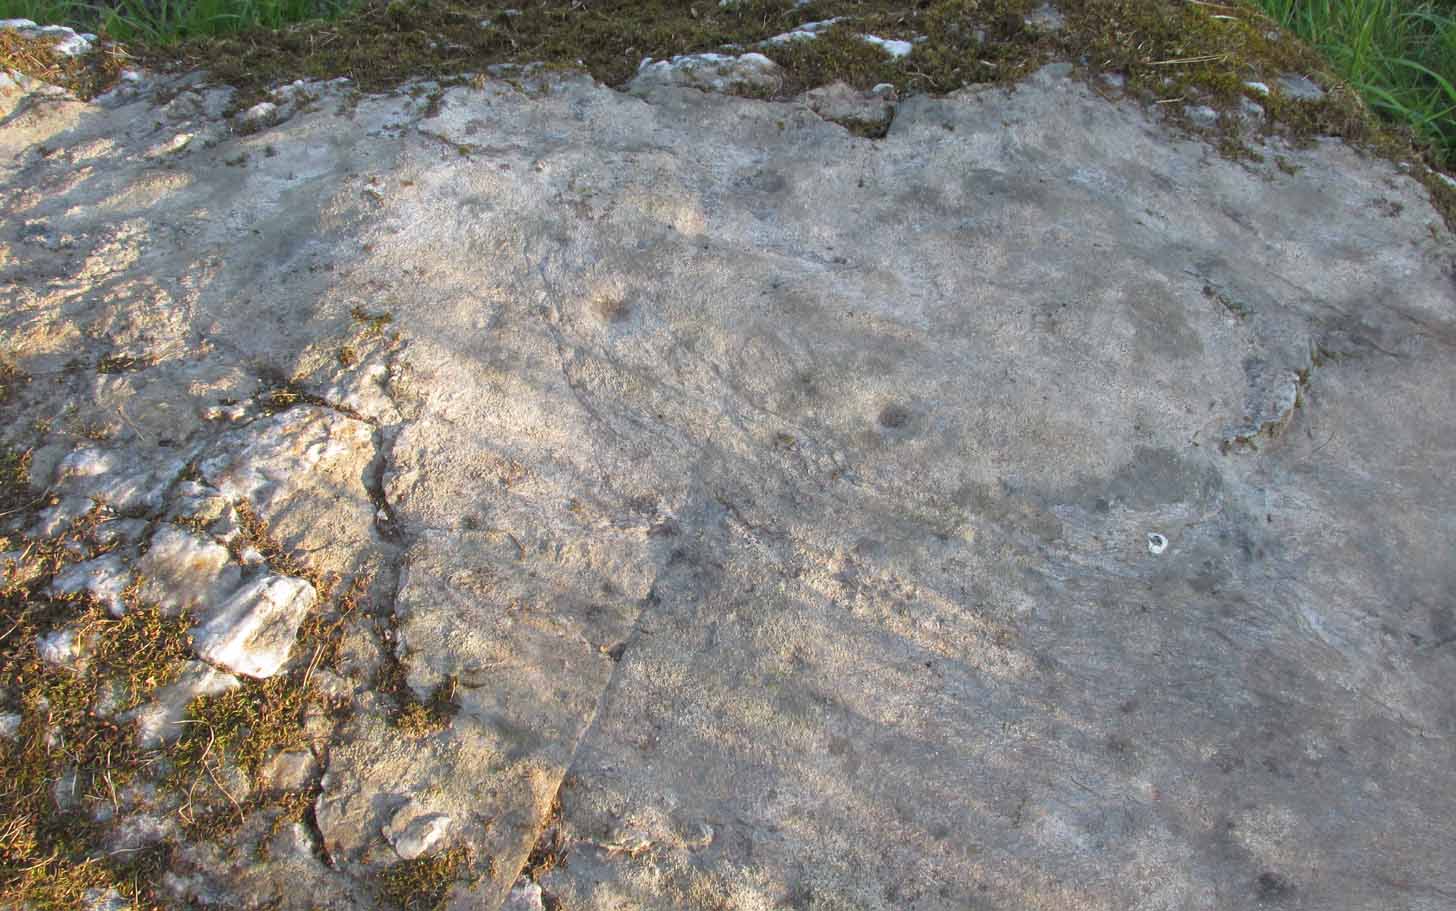
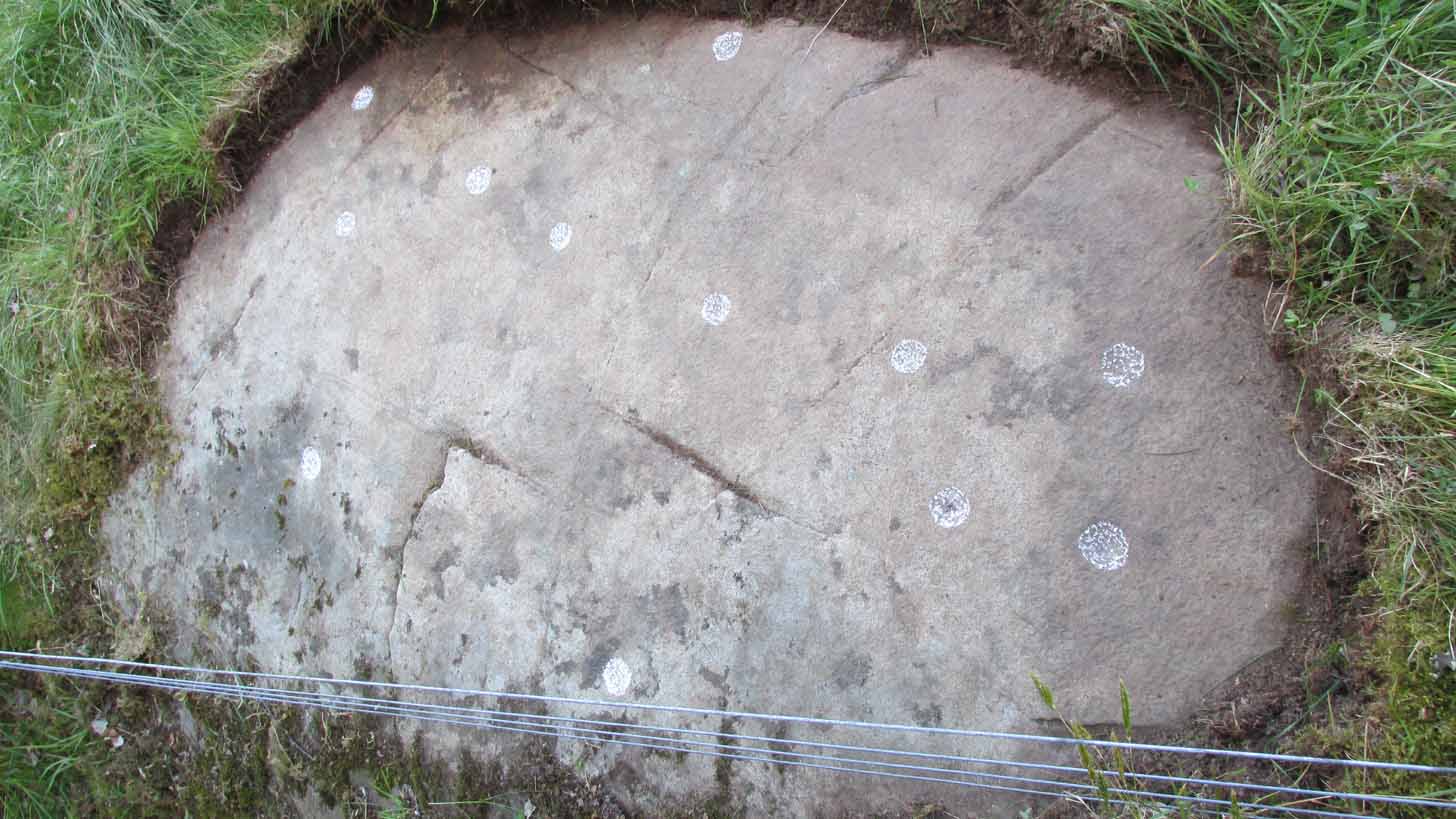
About four yards west of the Craig Hill cluster (3) carving, this gently smooth sloping rock was initially noted to have between six and seven cup-marks on it. Under the grey skies it was difficult to see any of this clearly, and so we wet the surface when Nature gave us some short bursts of light through the clouds which then enabled us to get a much better look at the design—but it’s still far from clear.
Curious eye motifCentral elements of carving
We found at least eight cups on here, two of which had single rings: the one near the top of the stone seems to be complete, whilst the other nearest the bottom of the stone looks to be incomplete. Another cup had a curious double ring; whilst the one nearest the middle of the stone has what may be three rings, with what could be a carved line running from its centre—but it’s very difficult to say with certainty until we’ve made another visit. I have little doubt that there’s more to this petroglyph than we could make out beneath the grey skies. On the west-side of the stone, the “curious” double-ring has, as its outer surround, an “eye” motif, or lozenge, which is also found on the Craig Hill cluster (3) stone a few steps away. The eye motif on both stones have the same levels of erosion and, I would suggest, were carved within a century or two of each other; perhaps even around the same time.
This one’s well worth checking out!
Acknowledgements: Huge thanks to Prof Paul Hornby for use of his photos in this site profile; and to Myrna Hurley for getting us up there. Cheers doods. 😉
From Kenmore go east up the steep mountain road towards Glen Quaich, or if you’re coming from Amulree, go west along the same glen. After 2½ miles (4km) up the Kenmore route (nearly 9 miles on the Amulree route) you’ll reach a small lochan on your left (you’ve got a very small parking spot a coupla hundred yards before the loch). A gate and stile past the loch takes you east along a track into the moors. More than a mile on, the track splits, but you need to keep to the left and follow the track along the wallside for another 400 yards or so, where you’ll see a small crag of rocks 100 yards down the slope on your right. That’s your target!
Archaeology & History
The stone in question
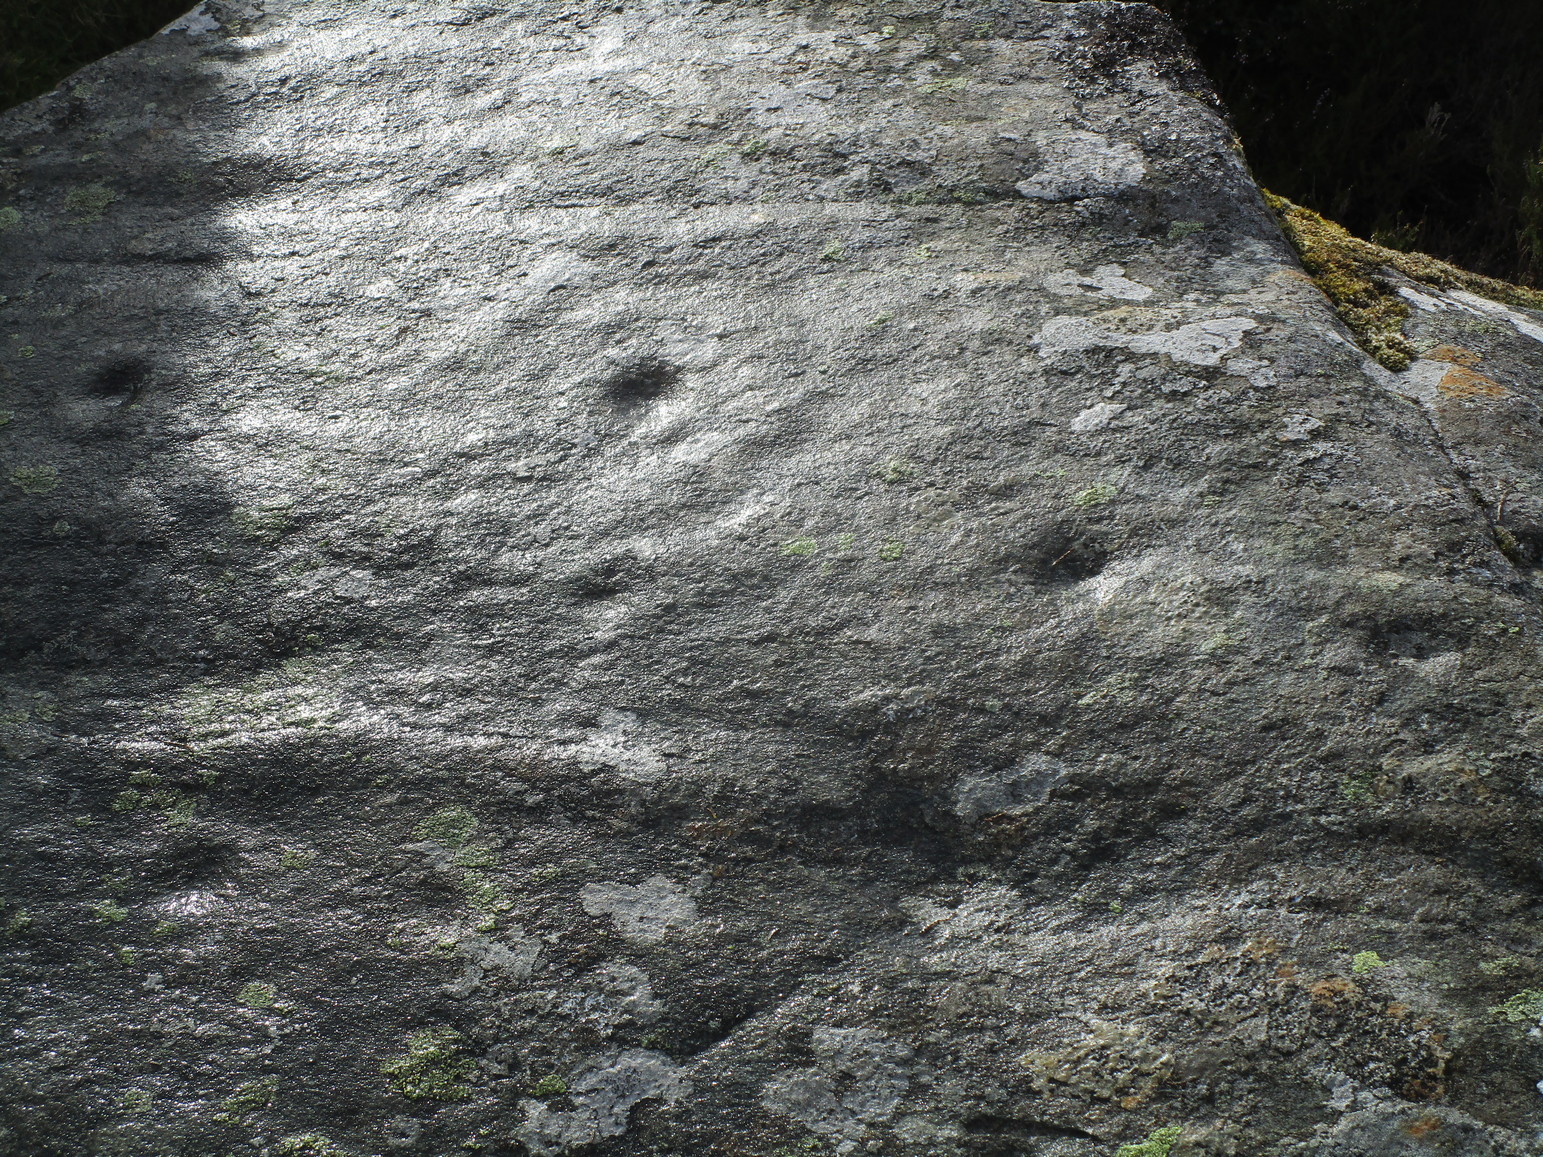
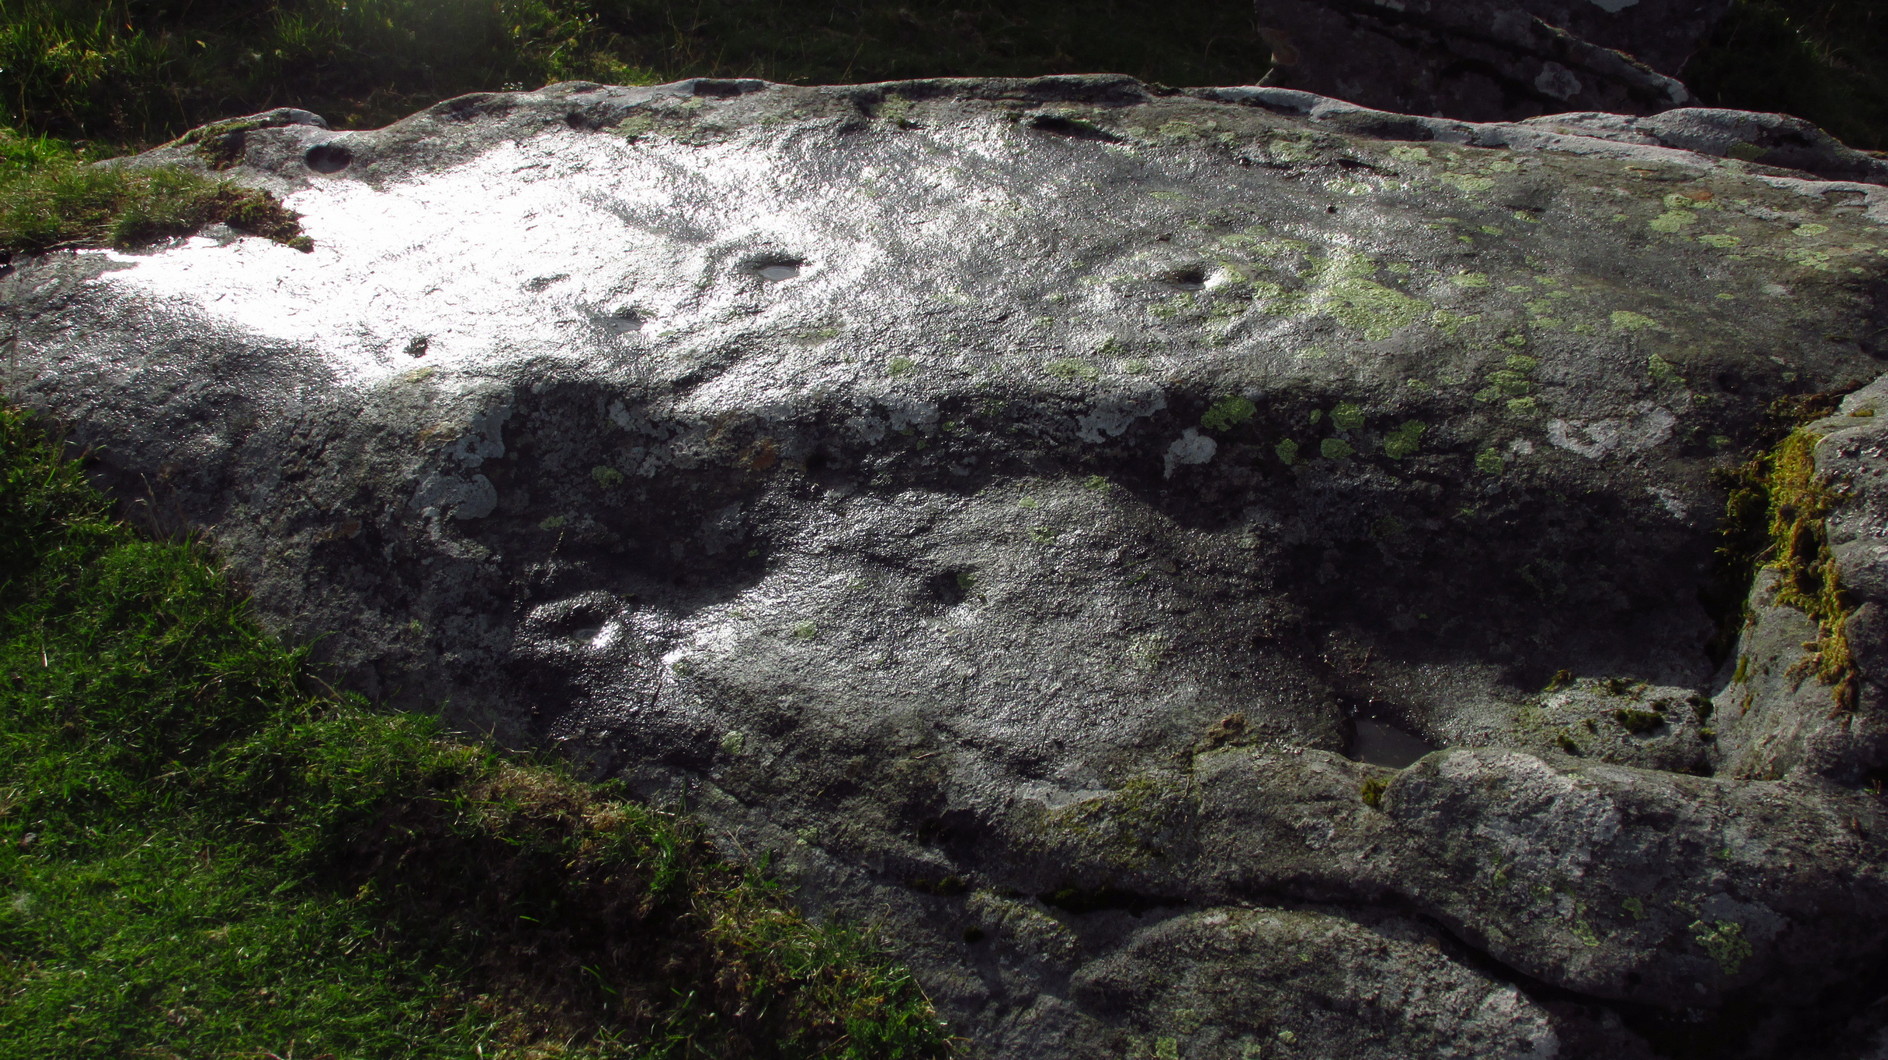
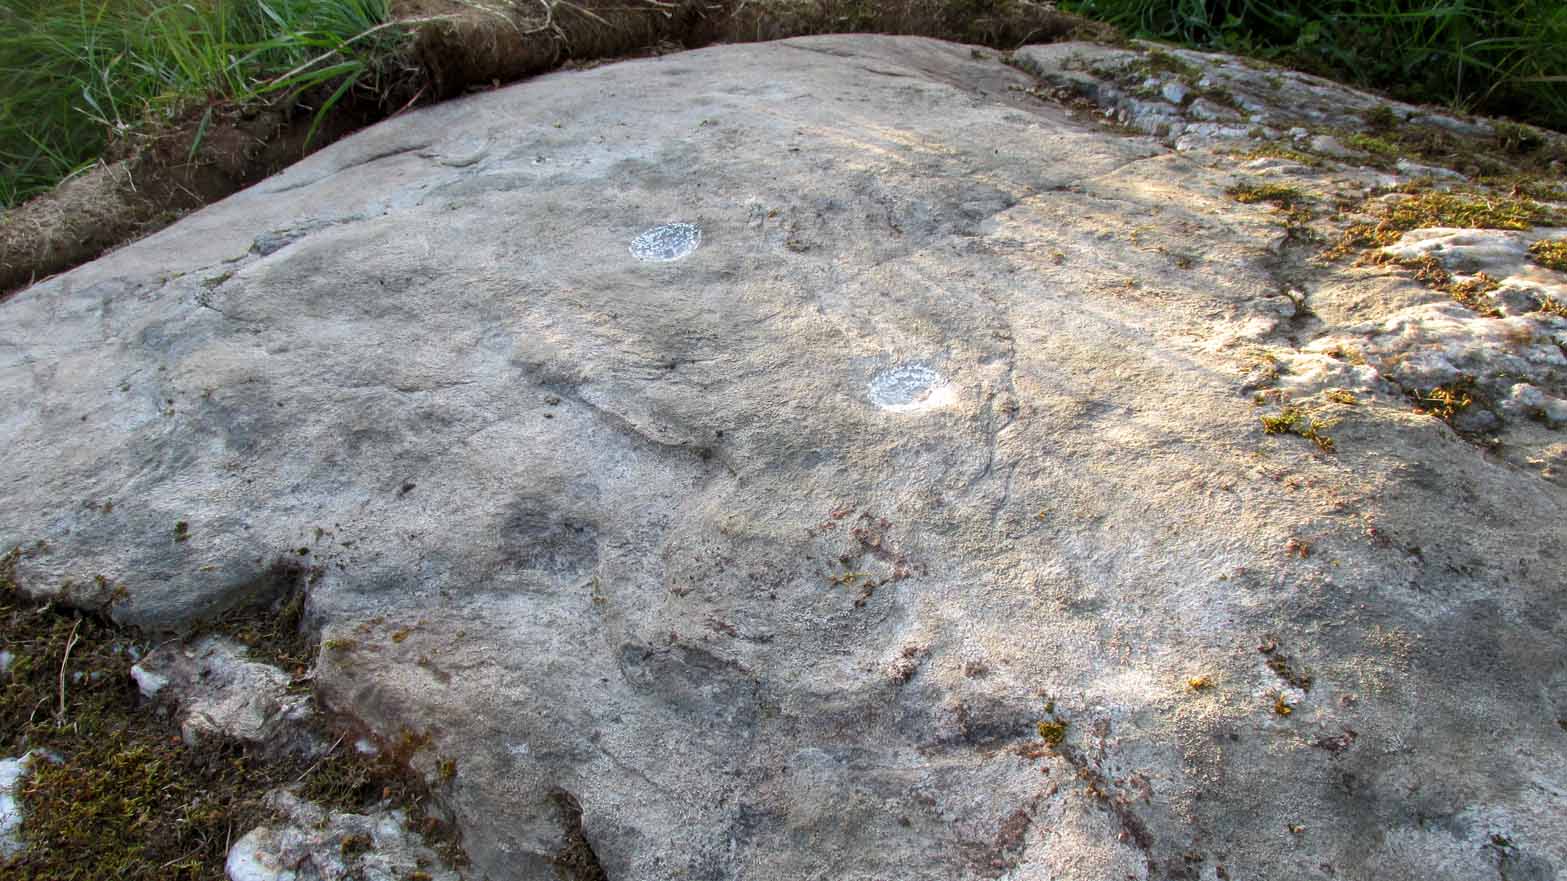
One of at least six rocks next to each other that possess cup-and-rings, this is the most notable of the bunch inasmuch as it’s the one that stands out above all the others. At first sight it doesn’t look impressive: a shallow scatter of nine or ten cup-marks can be seen when the light’s alright, but that’s about it. This is what George Currie (2005) noticed when he first came across it in 2004, describing it simply as “a boulder with 10 cups” a few yards away from one of it’s fellow petroglyphs (CR19, or the Craig Hill cluster-2 carving). But there’s much more to it than that. Unfortunately when we visited here, we weren’t blessed with good daylight, so were unable to get a decent appraisal of the entire design and have most probably missed some elements.
Curious double-ringed eyeGeneral overview of design
On the top sloping surface are six or seven cup-marks; another two or three are on a secondary lower level of the stone. Of those on the top, at least two of them have surrounding rings: one with a carved line coming out to the south-east; the other having a more extravagant appearance, surrounded by what looks like a secondary outer “oval”, or eye-shaped design. It’s unusual. Other lines intersect these cup-and-rings, but it was difficult to say with any certainty whether they were Nature’s handiwork, or had been modified by humans. Below these on a slightly lower level are two or three single cup-marks, one of which, close to the edge of the rock, appears to have an incomplete ring round it—but this might have just been a trick of the light. Another visit is required for a better appraisal…
Acknowledgements: Huge thanks to Prof Paul Hornby for use of his photos in this site profile; and to Myrna Hurley for getting us up there. Cheers doods. 😉
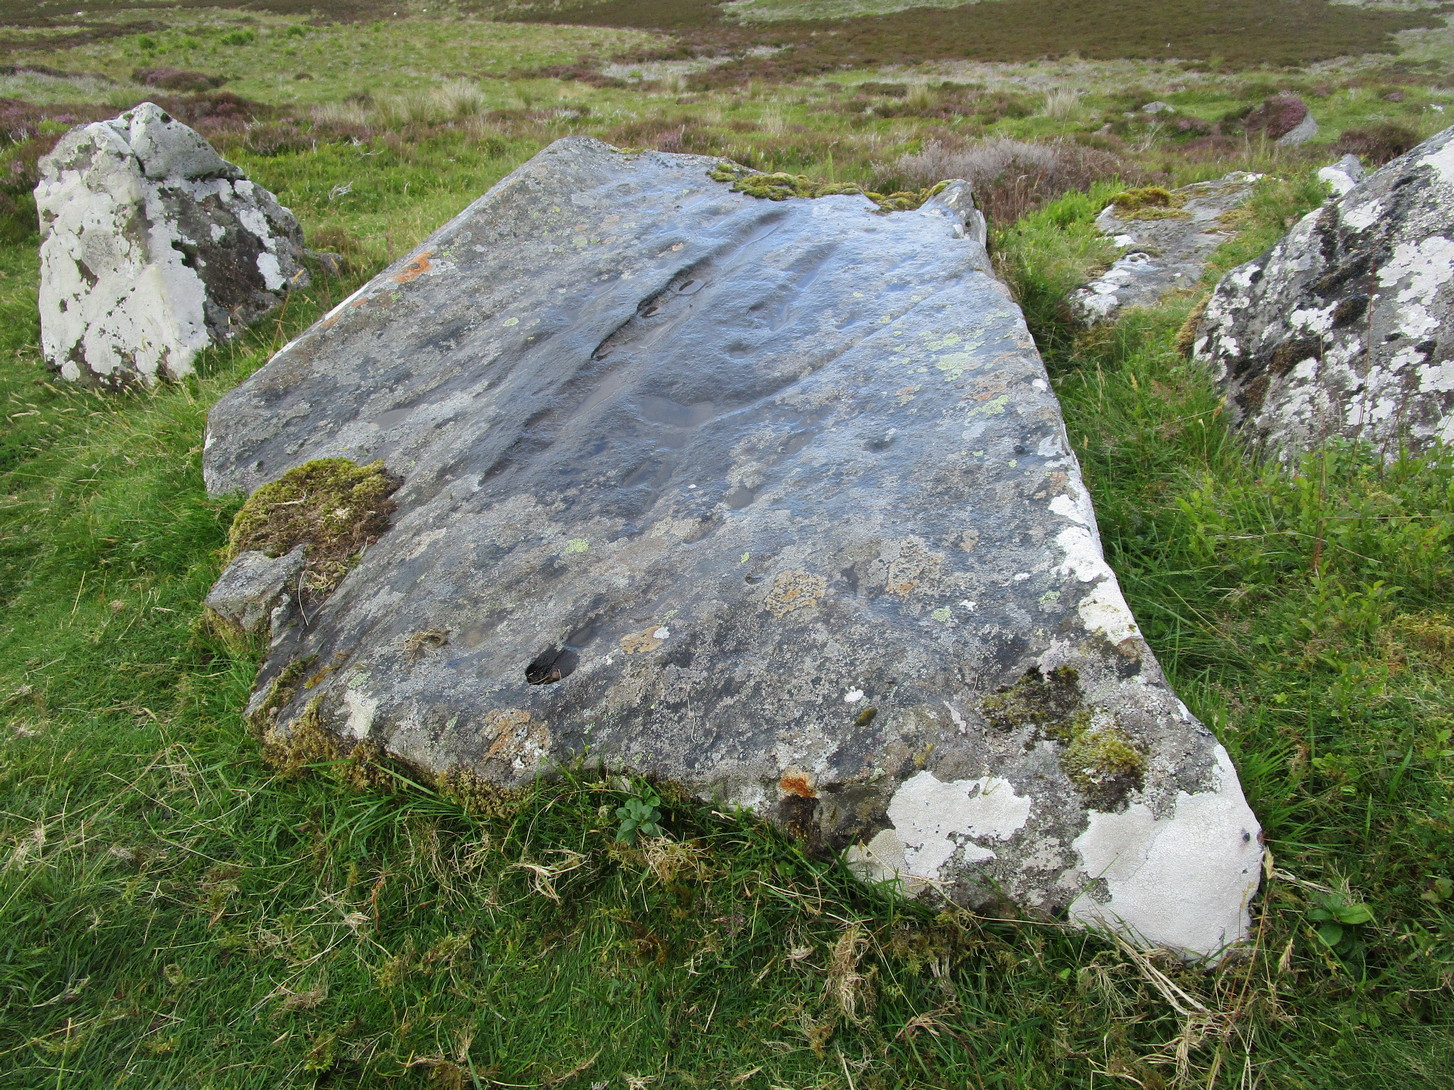
Follow the same directions to reach either the Craig Hill cluster (3), no.4 or no.5 carvings. Once here, looking at the sloping moorland ahead of you, the elongated stone that’s closest to where the moorland slopes downhill is the one you’re after. Y’ can’t really miss it!
Archaeology & History
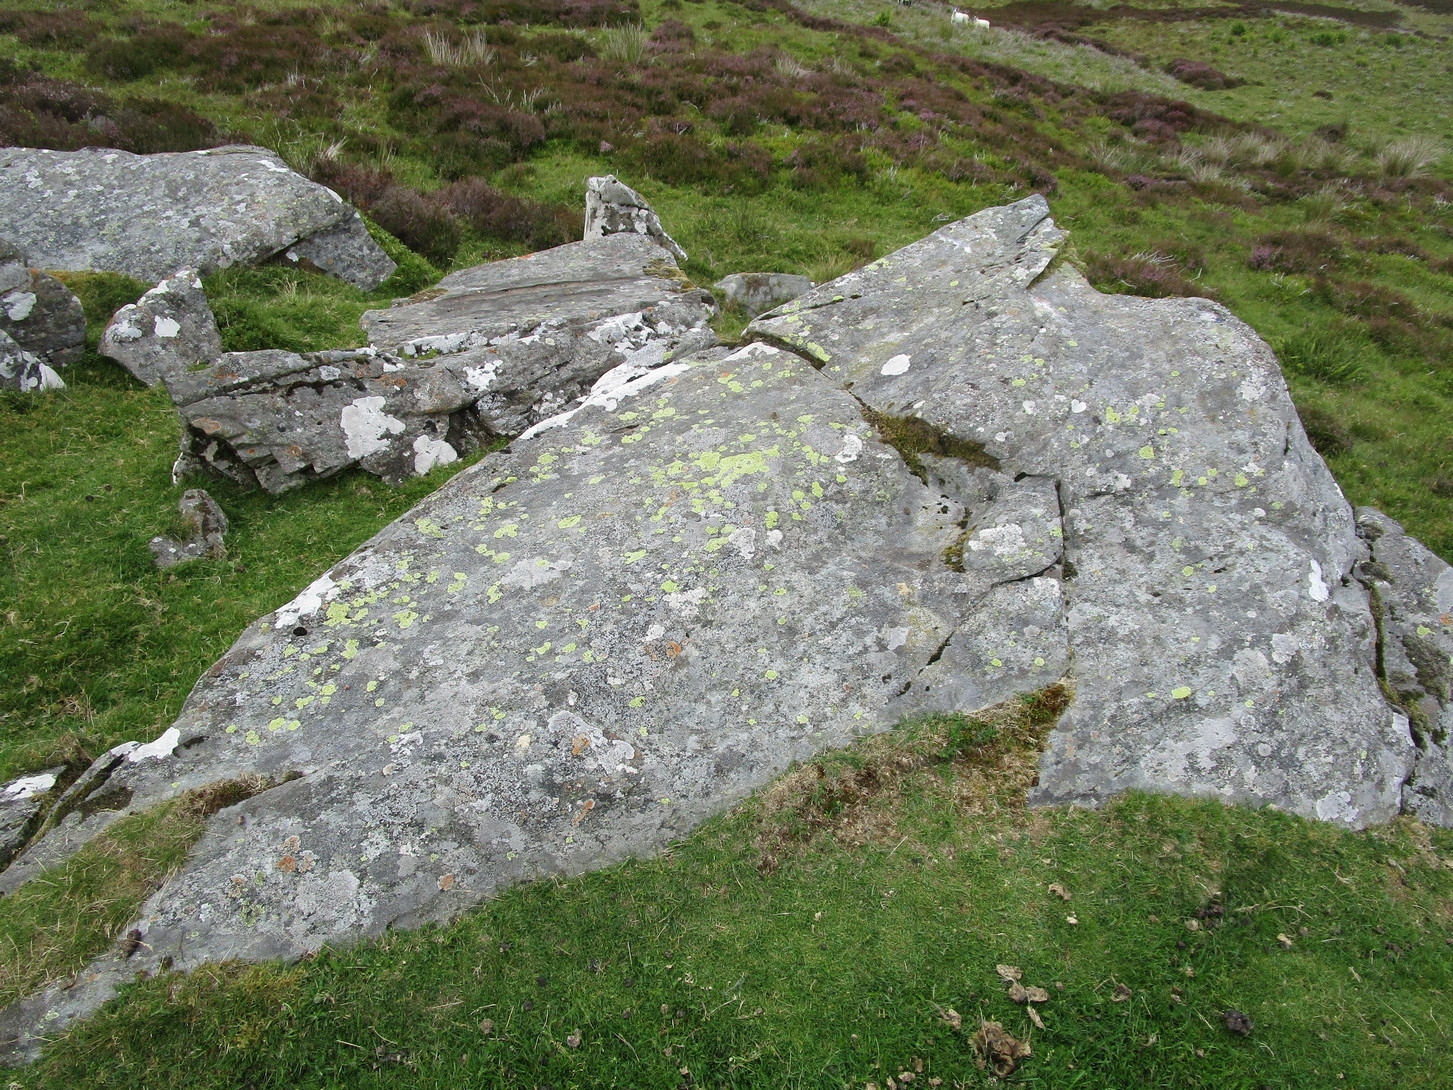
The sixth carving in this small close-knit cluster and, design-wise, the least impressive of the bunch. There are three distinct cup-marks on the rock: two on its more southern side and one near the middle of the stone. There may be another two cups, but these may have been part of the curious long, naturally-eroded line running along the length of the stone. Other man-made elements may have been cut into the stone, but it needs to be seen in perfect low light to tell us one way or the other.
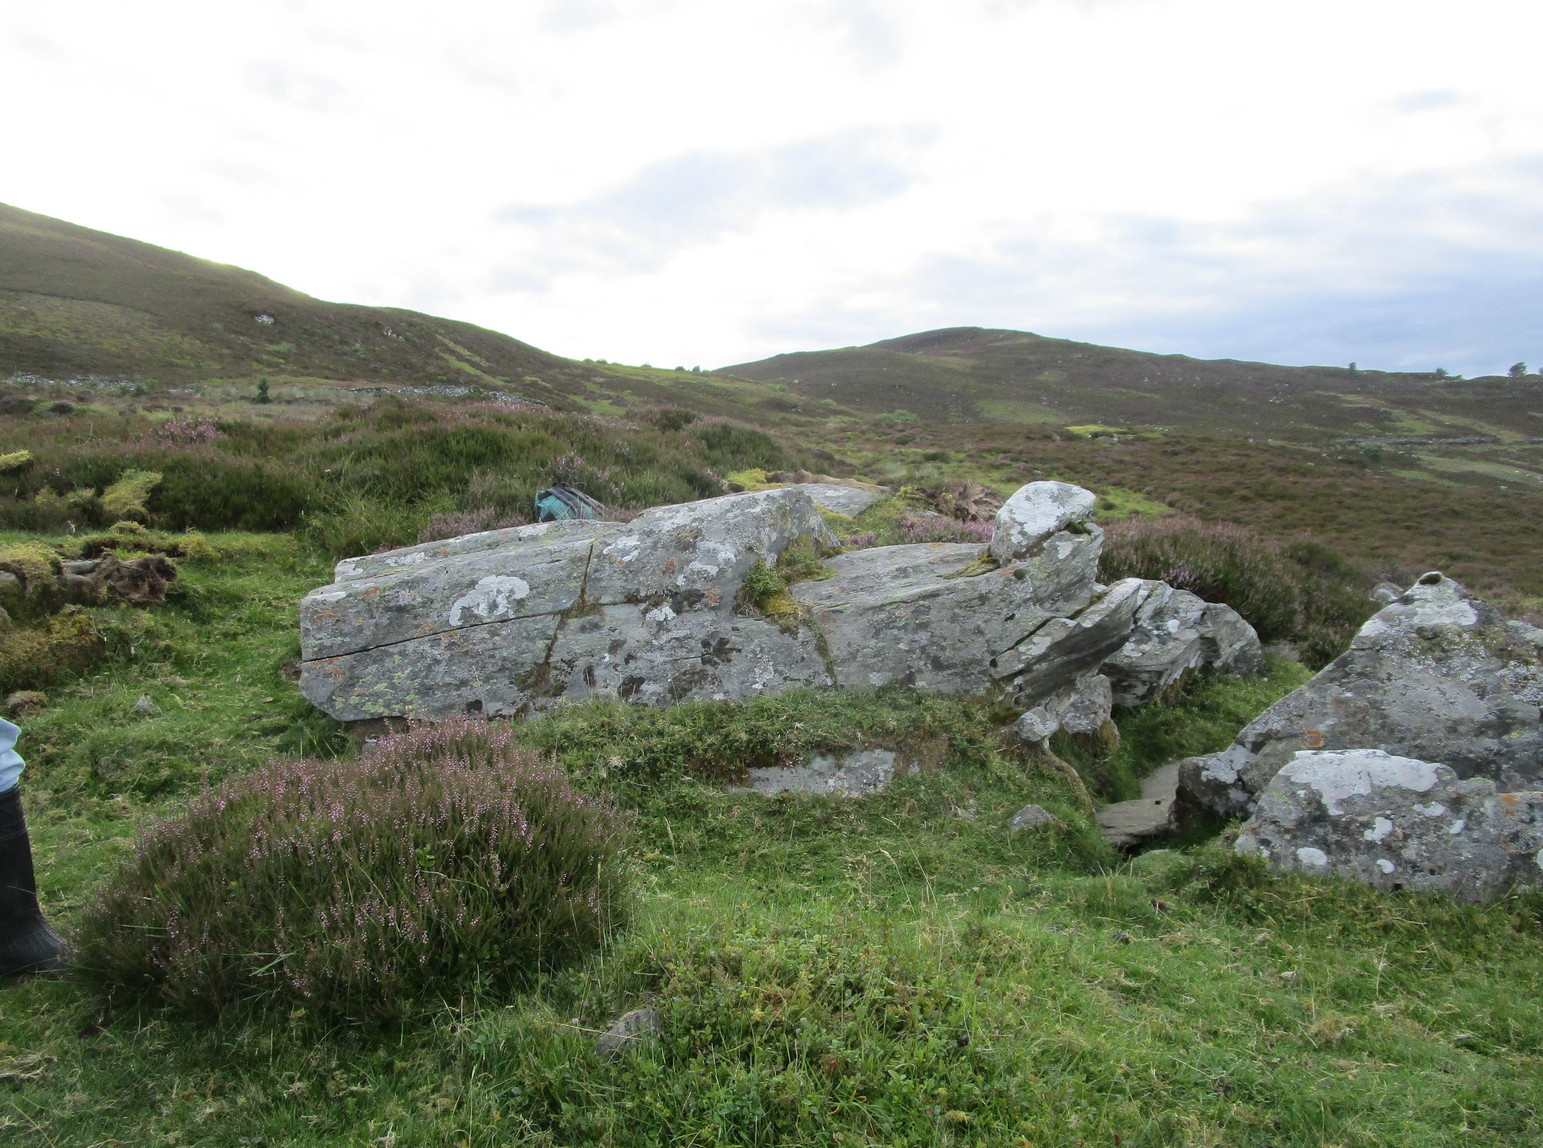
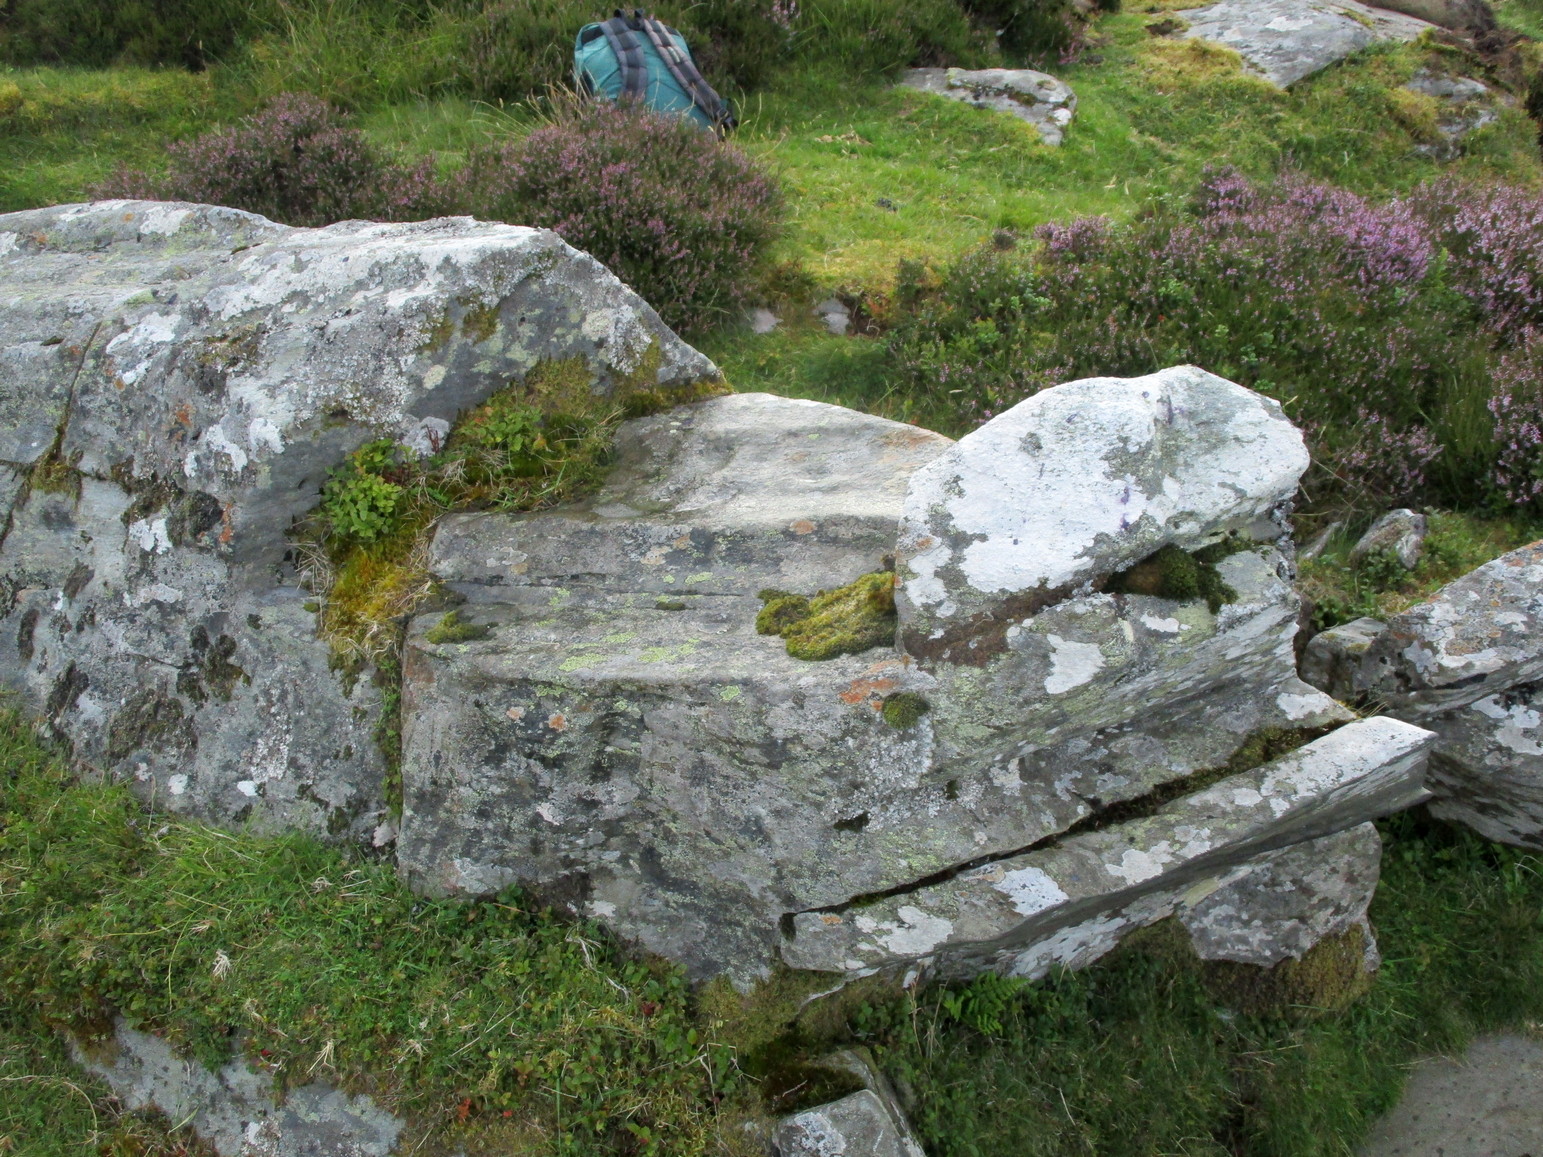
From Kenmore go east up the steep mountain road towards Glen Quaich, or if you’re coming from Amulree, go west along the same glen. After 2½ miles (4km) up the Kenmore route (nearly 9 miles on the Amulree route) you’ll reach a small lochan on your left (you’ve got a very small parking spot a coupla hundred yards before the loch). A gate and stile past the loch takes you east along a track into the moors. More than a mile on, the track splits, but you need to keep to the left and follow the track along the wall-side for another 400 yards or so, where you’ll see a small crag of rocks 100 yards down the slope on your right. Once here, the elongated rock with a “seat” that you can sit in is the stone in question.
Archaeology & History
At first sight this stone doesn’t seem to have anything petroglyphic about it, and—as when we visited the other carvings in this Craig Hill cluster—the weather was grey and overcast, so it was difficult to discern anything at first. But as we walked round and round inspecting the Craig Hill cluster-5 carving, a glance at this adjacent stone seemed to indicate one or two cup-marks within the curious chair-like aspect of the rock, but we couldn’t initially work out whether they were simple geophysical elements or not.
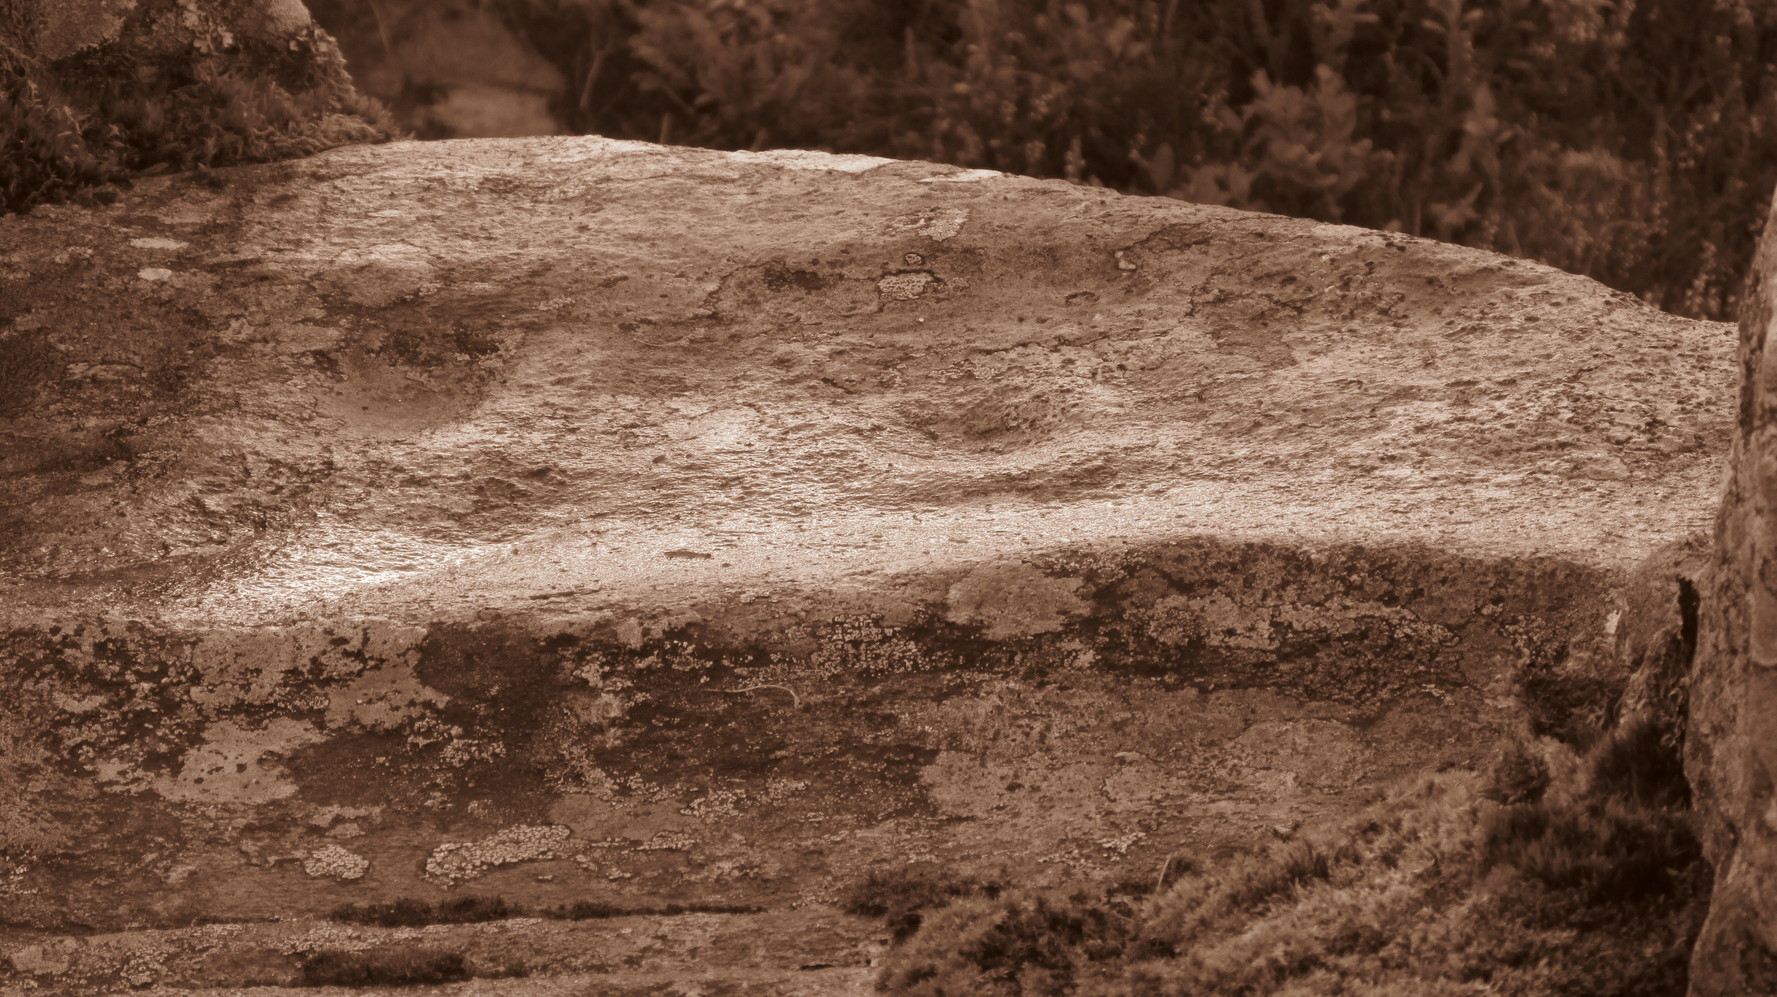
Very faint cup-&-half ring near the centreClose-up of the C&R
So we poured water onto the stone in the hope that something might show up. And the more we walked round and round, bending down, looking from as many angles as possible, not only did we see what looked like several cups, but one of them had a half-ring that curved round what may or may not be a natural cupmark. You can see it pretty clearly in the attached photos. In other photos that we took, the faint cup-and-half-ring seems to plays its part in a line of three or four other cups; although in order to ascertain whether these elements are man-made or not, we could do with the help of a good geomorphologist.
Acknowledgements: Huge thanks to Prof Paul Hornby for use of his photos in this site profile; and to Myrna Hurley for getting us up there. Cheers doods. 😉
Out of Aberfeldy, take the A826 road as if you’re going up Glen Cochill. Not far up, just where the housing of Aberfeldy itself ends and the green fields open up either side of you, keep on the road for a half-mile where you meet a small copse of trees on your left, with a dirt-track that runs down the slope. Go along the track for 0.8 miles (1.3km), past the Ursa Major Stone and where the track splits, go left past the Quartz Stone and follow the track through the farmyard. It’s somewhere there – or is supposed to be!
Archaeology & History
On our visit here, we couldn’t locate the cup-and-ring stone that’s described in Sonia Yellowlee’s (2004) regional rock art survey. She described it, as archaeologists always do, in the briefest manner, telling us simply:
“Leaning against a pile of rubble in the farmyard there is a split boulder bearing eighteen cupmarks, one of which is ringed.”
It may have been destroyed, as we were told by a couple of locals that there used to be “a real miserable sod” living there. When we visited the place and tried to ask the present farm owner, sadly he wasn’t to be found. If any rock art explorer manages to locate this seemingly lost cup-and-ring, please let us know – and mebbe send us some photos so that we can add them to this site profile. 😉
References:
Yellowlees, Sonia, Cupmarked Stones in Strathtay, RCHAMS 2004.
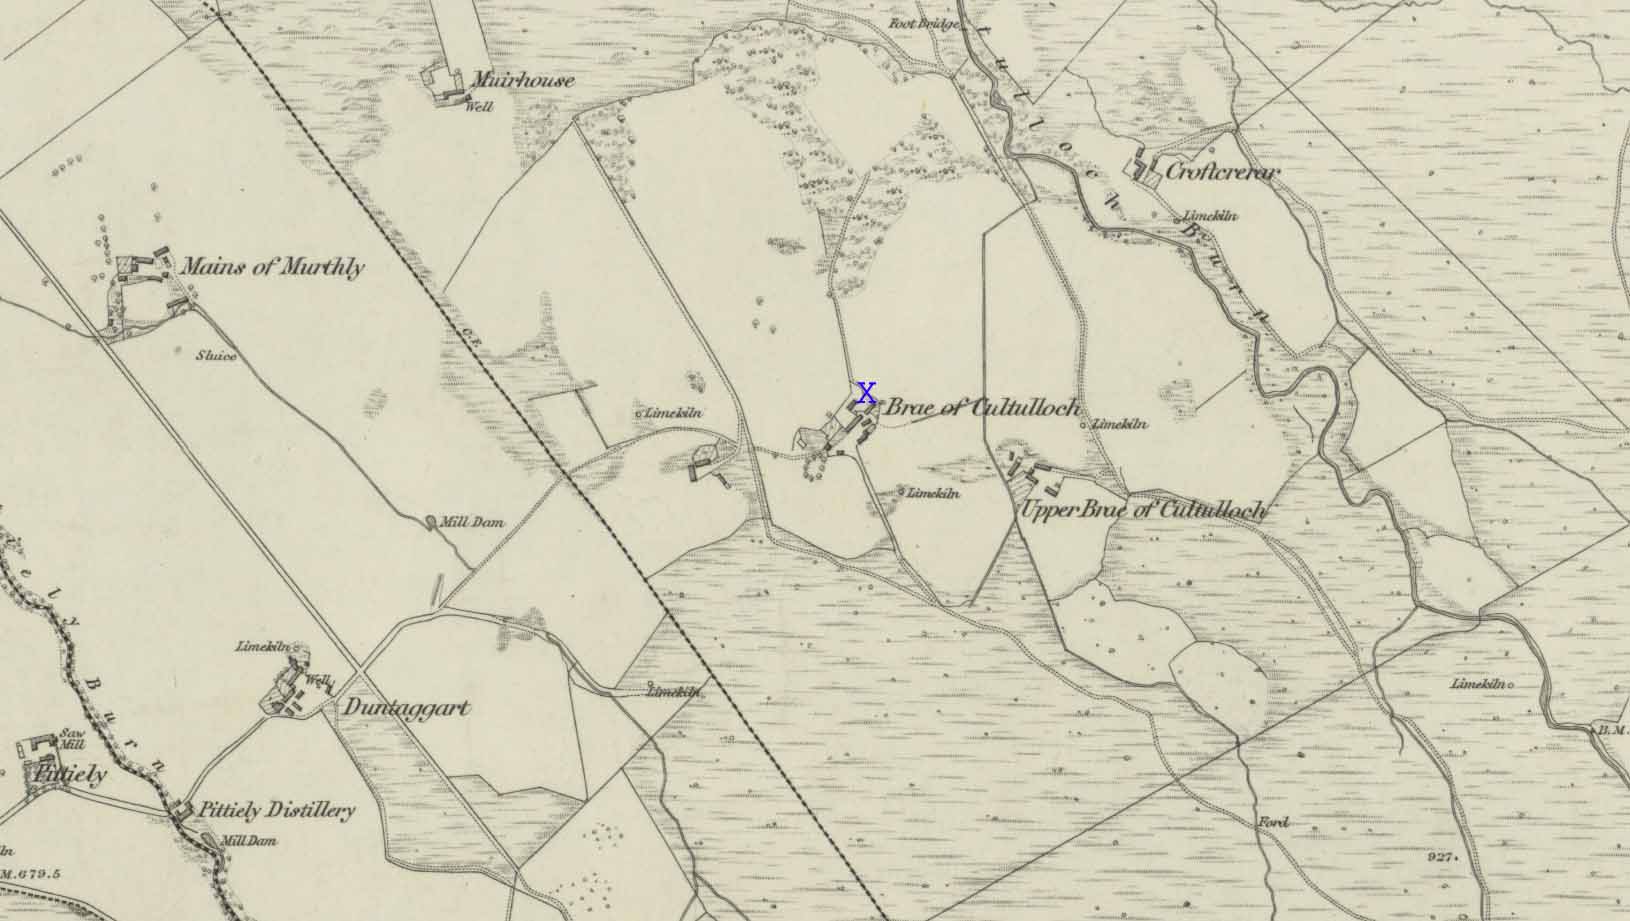
Acknowledgements: Big thanks to the crew – this time being Neens Harris, Paul Hornby & Frank Mercer. And the stunning resource of Scotland’s 1st edition OS-maps is Reproduced with the kind permission of the National Library of Scotland.
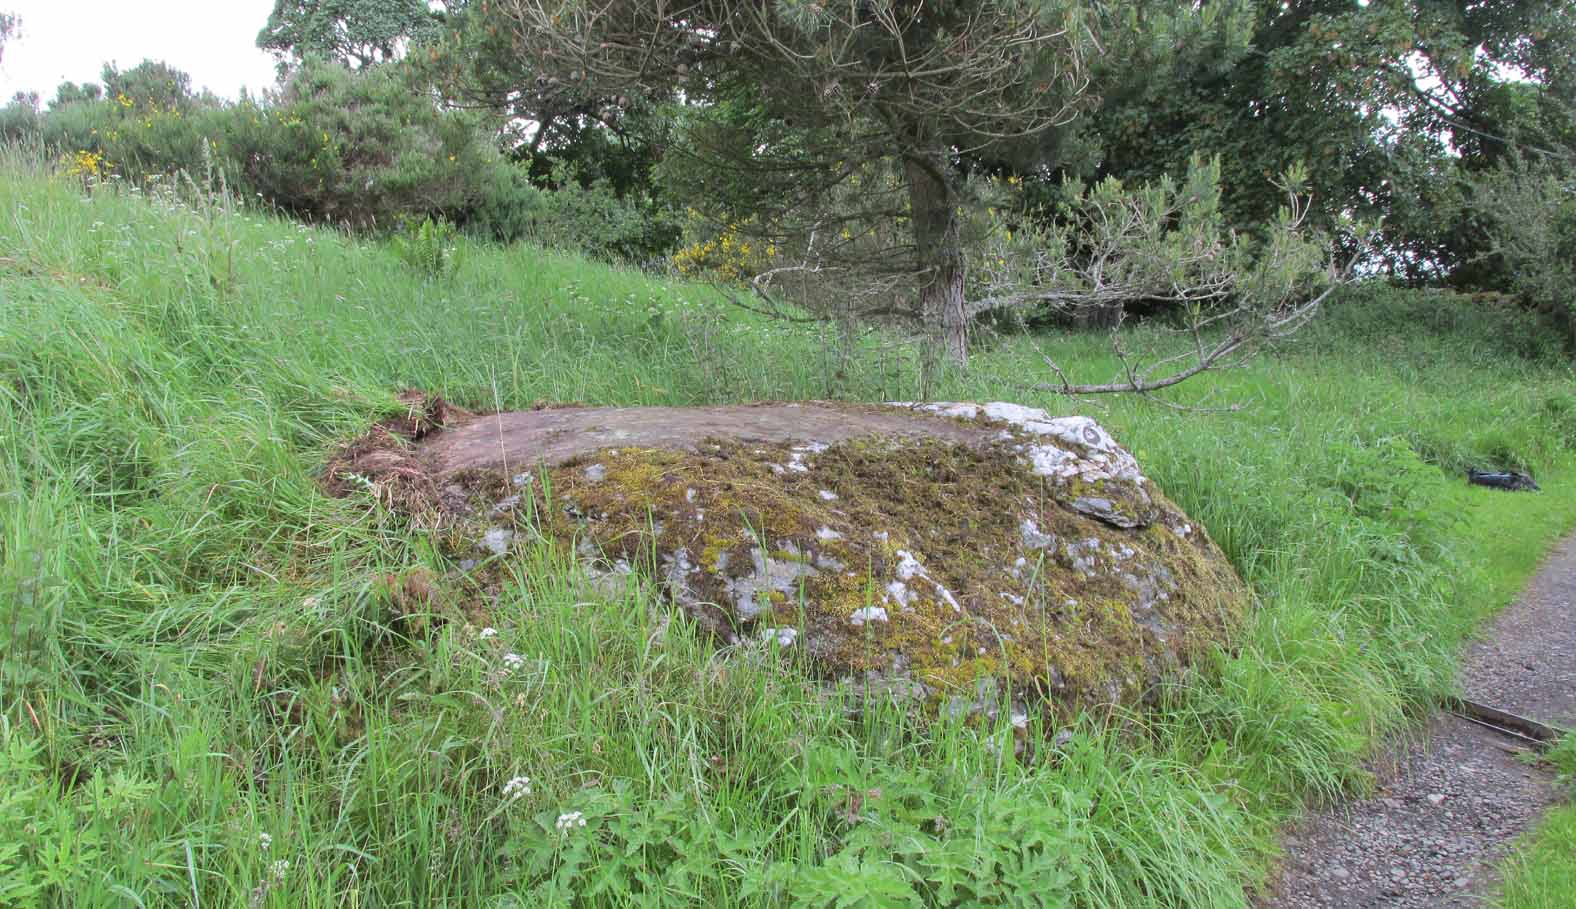
Out of Aberfeldy, take the A826 road as if you’re going up Glen Cochill. Not far up, just where the housing of Aberfeldy itself ends and the green fields open up either side of you, keep on the road for a half-mile where you meet a small copse of trees on your left, with a dirt-track that runs down the slope. Go down here and follow the slightly meandering track for 0.8 miles (1.3km), a short distance past the Ursa Major Stone where the track splits. Take the track to the left and there, less than 100 yards on you’ll hit a large boulder on your left. That’s it!
Archaeology & History
Not previously recorded, this simple cup-marked stone will probably only be of interest to petroglyph aficionados, or those folk who are into ‘energies’ at sites. This latter aspect is due entirely to the carving being etched onto a huge rock, much of which is composed of quartz—which isn’t too unusual in this part of the world. But that aside…
Looking down at the cupsThe cupmarks highlighted
It is one in a group of carvings within a few hundred yards of each other, with its nearest neighbour 20 yards to the north. That one’s covered in cups—but on this large Quartz Stone, only two of them exist, on the top near the centre. Just a couple of inches across and half-an-inch deep, they’re pretty clear once you see them. The raised piece of ground behind the stone is artificial and has variously been described by antiquarians and archaeologist alike, as either a prehistoric dun, or a stone circle. Whatever it may be, some of it is certainly man-made. Check it out – and mebbe ask the friendly fat fella who lives nearby and what he thinks.
Out of Aberfeldy, take the A826 road as if you’re going up Glen Cochill. Not far up, just where the housing of Aberfeldy itself ends and the green fields open up either side of you, keep on the road for a half-mile where you meet a small copse of trees on your left, with a dirt-track that runs down the slope. Go down the track, bending to the right, then the left and then on for a quarter of a mile until the lines of trees appear either side of you. Barely 200 yards along, the track swerves slowly to your right, and the field above you slopes uphill. Keep your eyes peeled at the fencing on your right and you’ll see a stone sloping towards you right by the fence with faint cup-marks on it. You’ll find it!
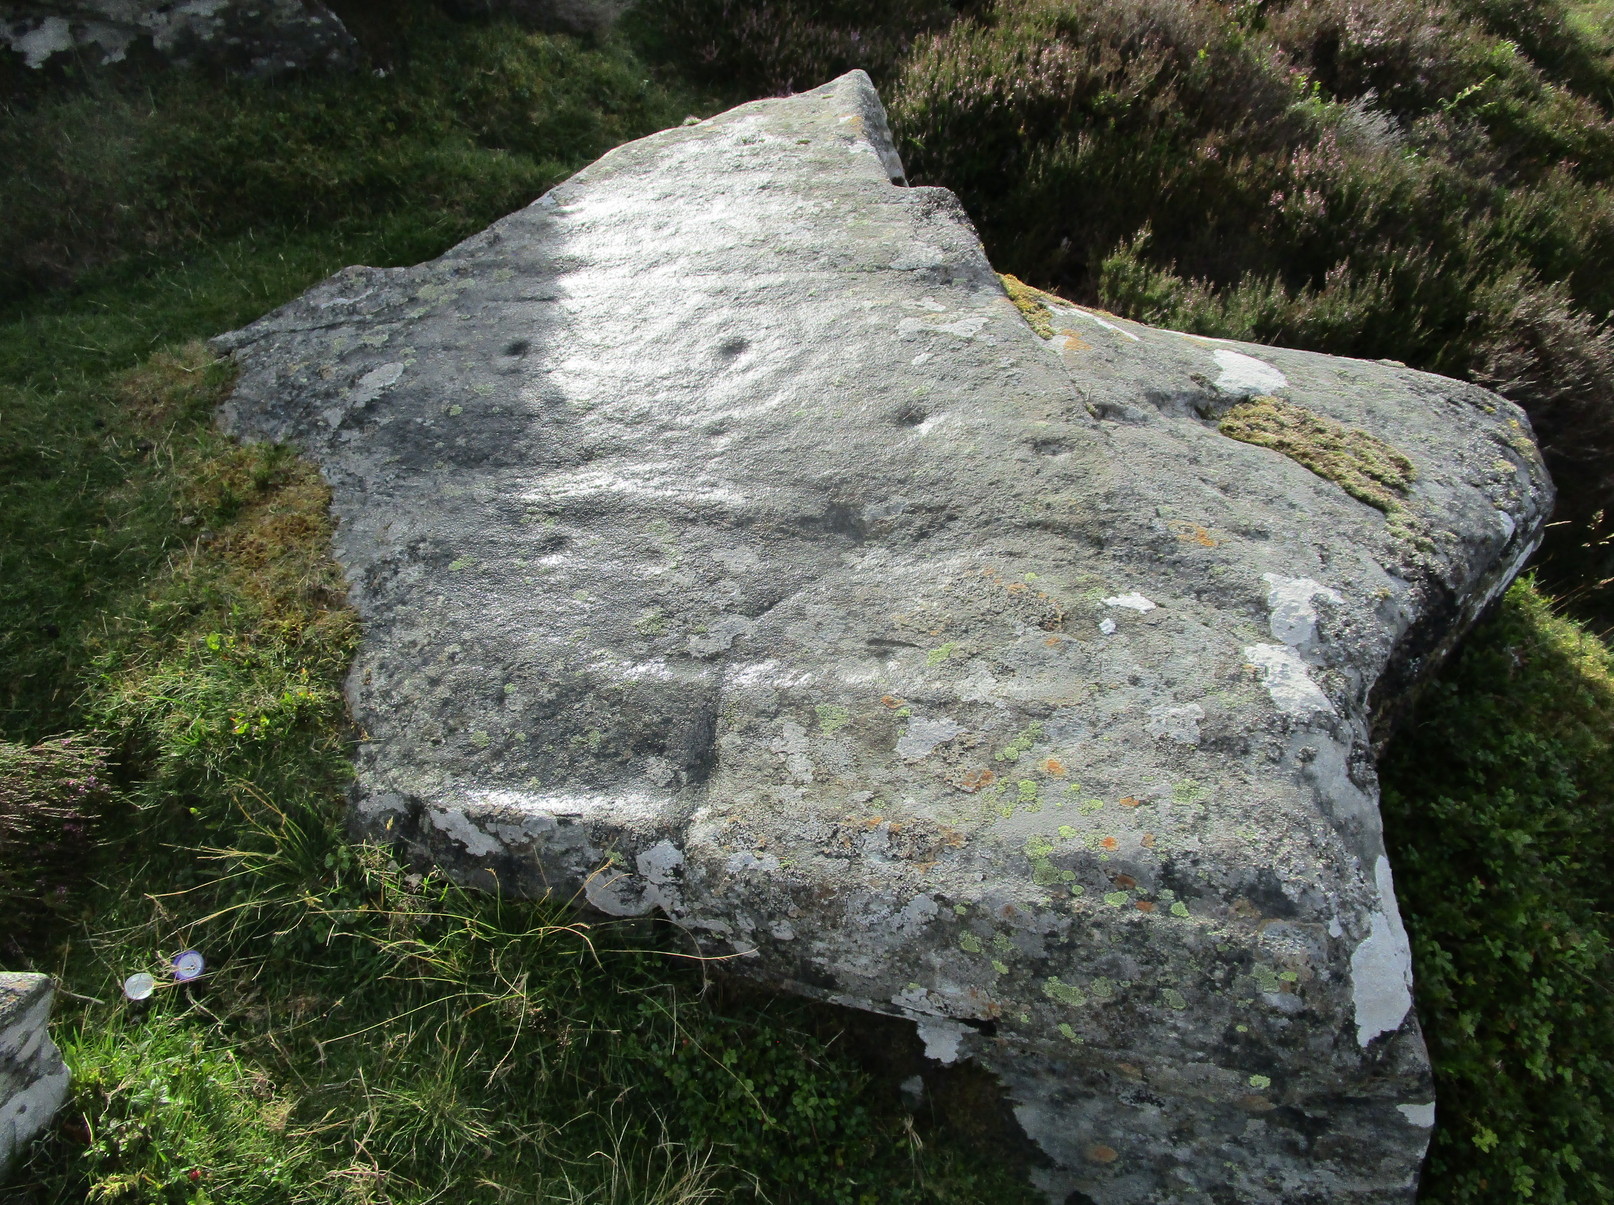
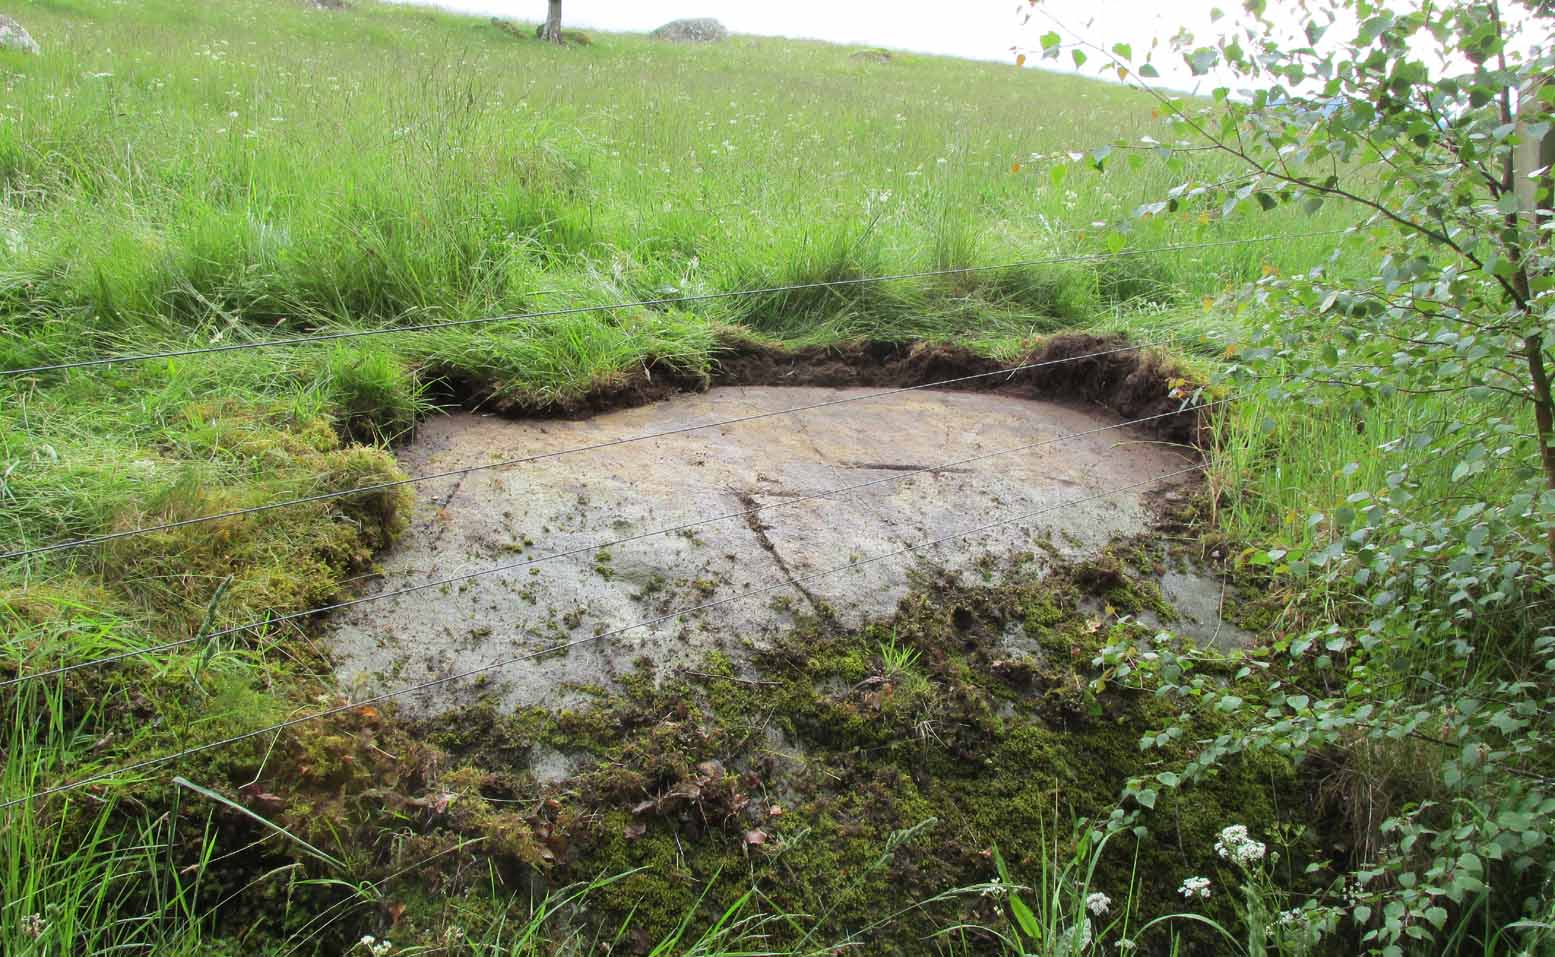
Archaeology & History
A truly fascinating cup-marked stone recently uncovered by Paul Hornby on another one of our TNA meanderings. Fascinating because of the curious arrangement of the cups on the stone. Often, cup-marked stones have little to interest the causal visitor – but this one’s different. As can be seen quite clearly, the cups are arranged in the shape of the constellation of the Great Bear, or Ursa Major – albeit with an extra ‘star’ in this design. But it’s damn close! In all likelihood (he says with his sceptical head on 😉 ), the design is fortuitous when it comes to the Ursa Major. I know from many years experience how easy it is to see meaningful shapes and designs in the almost entirely abstract British petroglyphs, but the design is very close to the constellation we all got to know when we were kids.
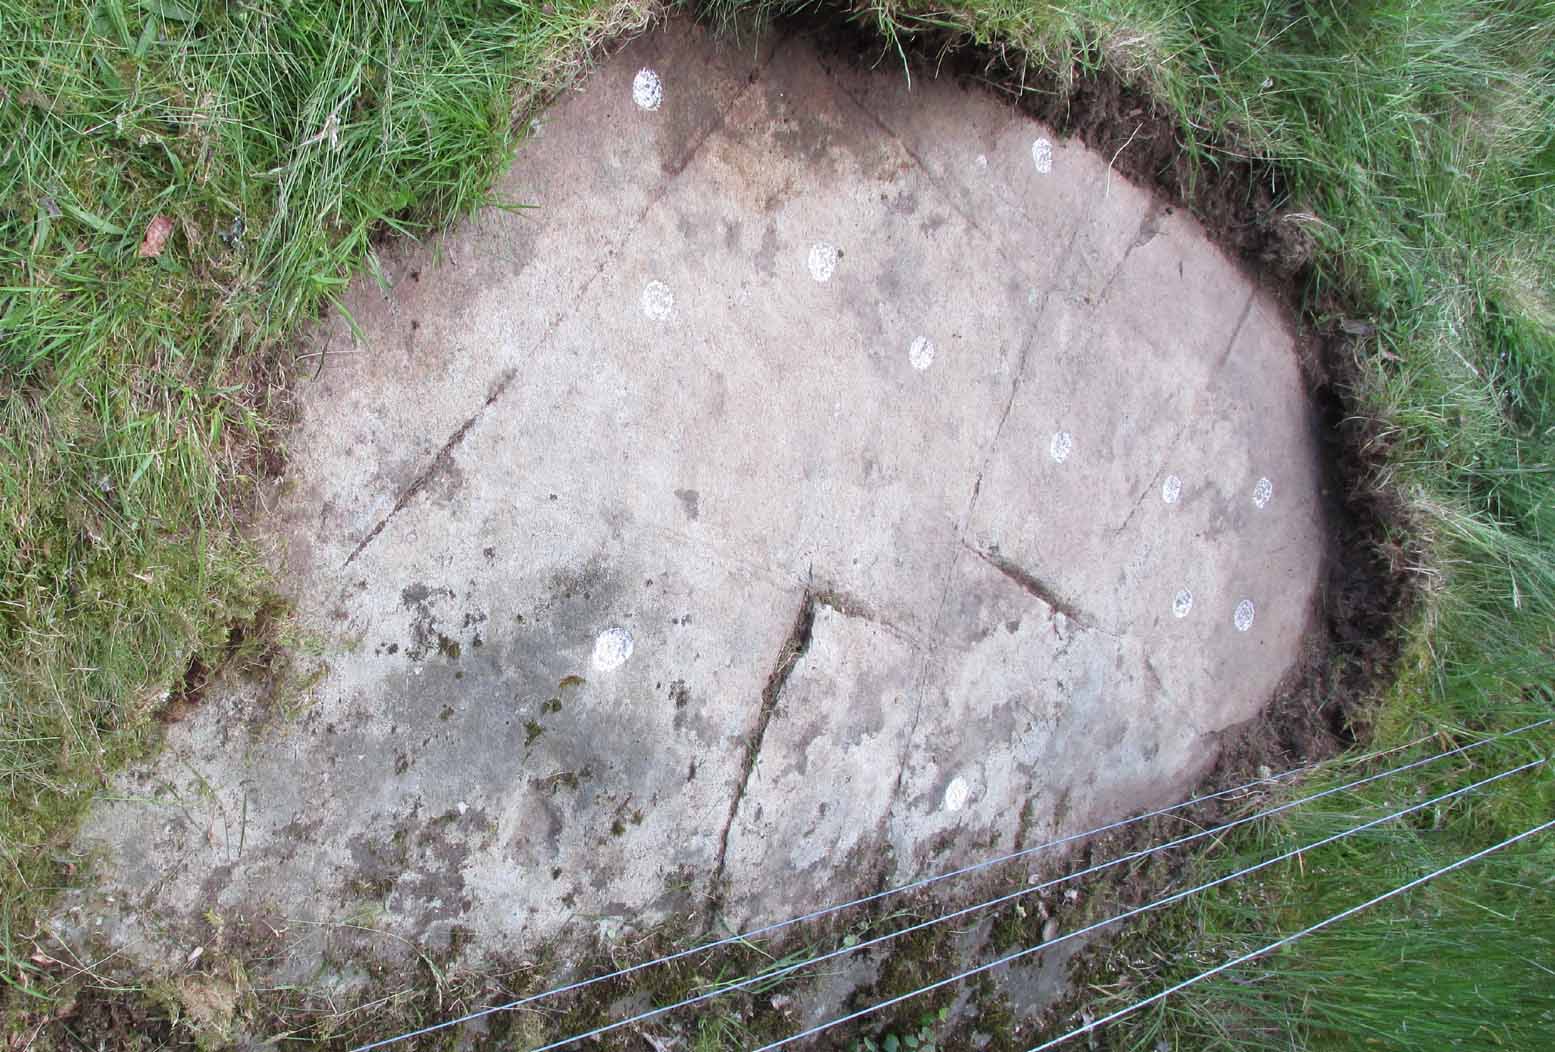
Looking along the stoneGazing down at Ursa Major
The stone itself slopes upwards at an angle of about 60º, before starting to level out as it rises. All of the cup-marks have been pecked onto this sloping surface (the vast majority of carvings are found on top of stones). Altogether, at least twelve faint and shallow cups were exposed when we looked at it—measuring the usual inch to inch-and-half across—but it is likely that more of them are hidden beneath the turf at the top of the stone. We could discern no rings or other features in the design.
This is just one carving amidst a good cluster of petroglyphs within a few hundred yards of each other (the Quartz Stone being one of the nearest) that are well worth checking out if you like your rock art. It may also be of interest to astronomy students, or those exploring archaeo-astronomy.
References:
Yellowlees, Sonia, Cupmarked Stones in Strathtay, RCHAMS 2004.
Take the same directions to reach the impressive Carn Ban prehistoric tomb. From here, walk along the winding track past the giant cairn onto the moors for about 350 yards, until the track goes dead straight and heads NNW uphill. Walk up here for another 350 yards keeping your eyes peeled on the rounded pyramidal hill with the large rock on top. The circle is 20 yards off the track as you head up to the pyramidal hill stone.
Archaeology & History
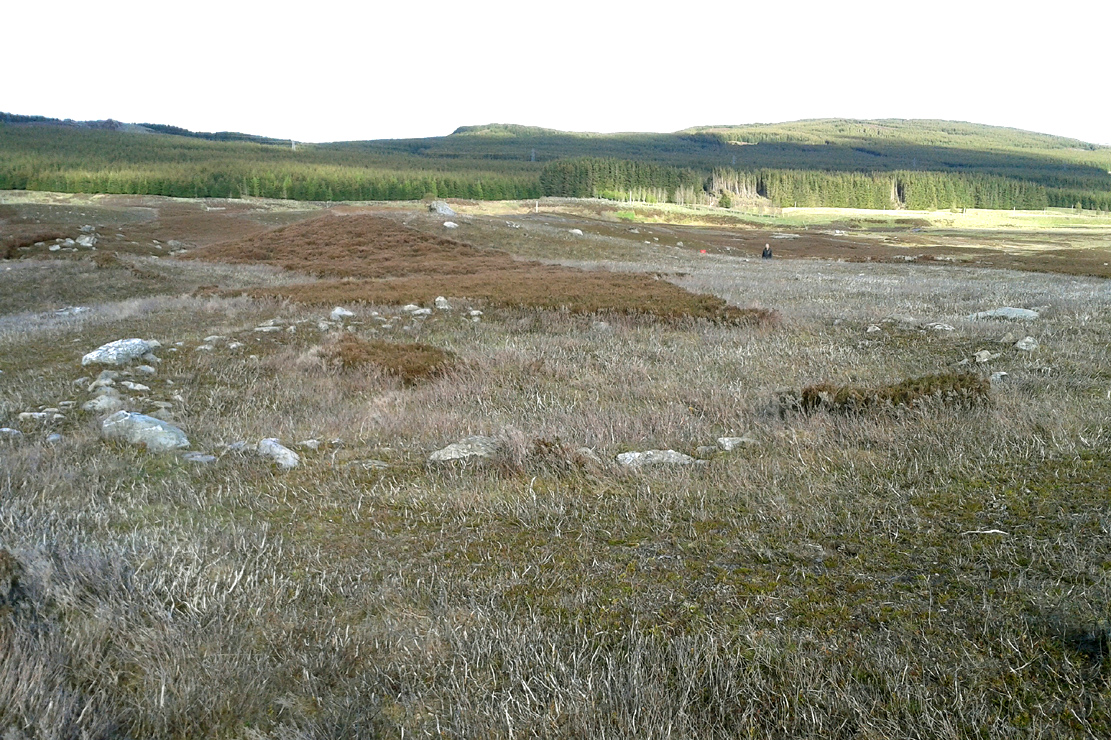
Although this site is mentioned in notes by the Scottish Royal Commission and highlighted by Ordnance Survey, information thereafter is pretty scarce. Which is surprising when you check this place out first-hand. It’s bloody impressive! David Cowley (1997) describes the area, but not in much detail.
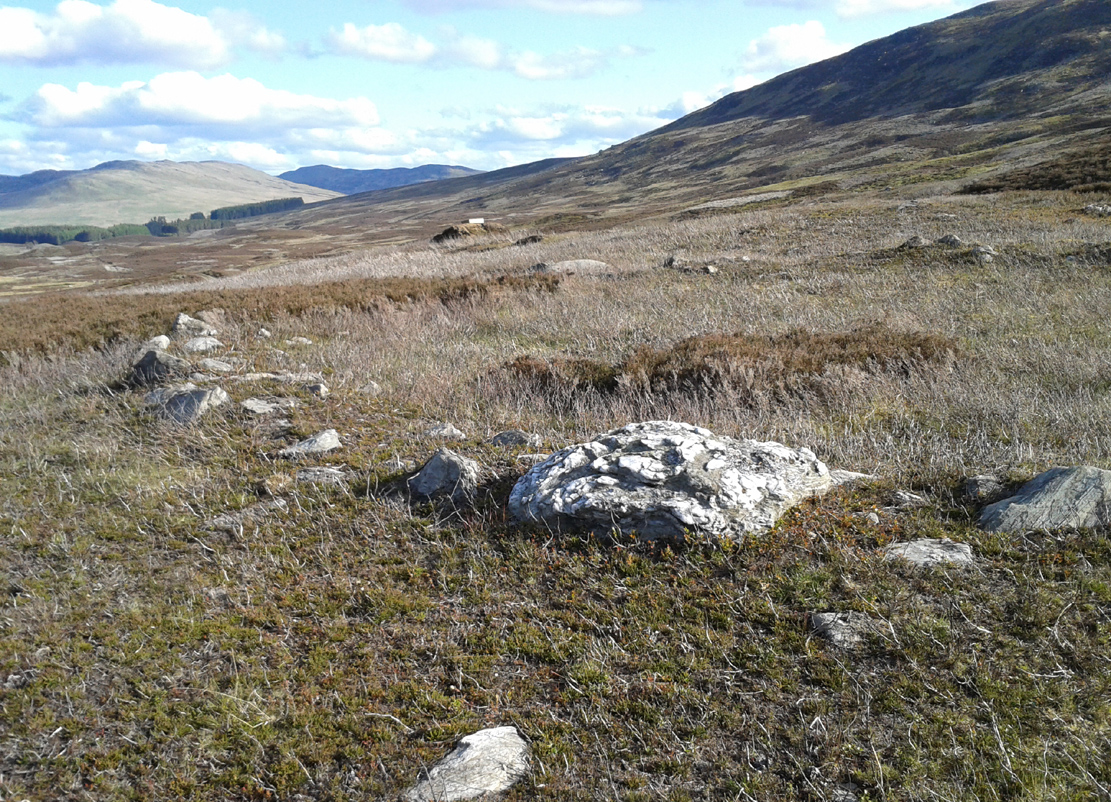
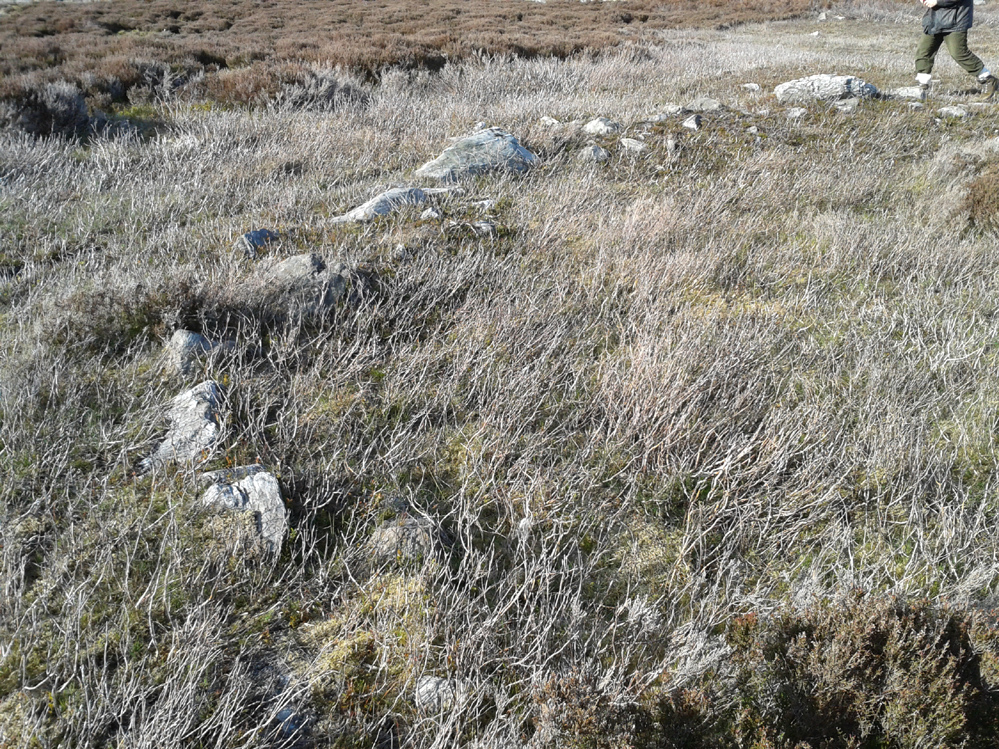
Northern arc of walling
Eastern arc of walling
The circle seems to have been rediscovered first of all by the dowser J. Scott Elliott (1964), who thought it was a cairn circle – which is understandable. However, it has been classified by the Royal Commission lads as a “hut circle”, so we’ll stick with that for the time being.
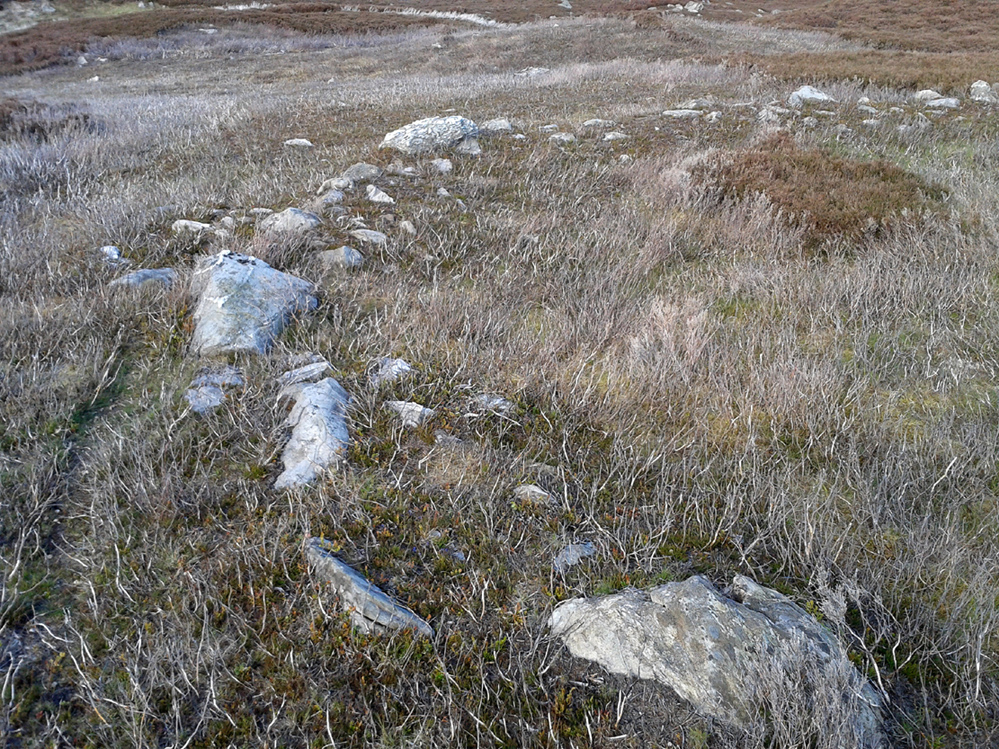
An entrance to the circle doesn’t stand out. There may be one on the southeastern side, but this isn’t clear; and what looked like a possible entrance on its northern edge was discounted, as a larger stone blocked this on the outside. There was no immediate evidence of any internal structure, no hearth, no tomb – merely a small stone at its centre, deeply embedded in the peat. This may, however, cover a central cist – which would make this a cairn circle and not a large hut circle. But that’s guesswork on my behalf!
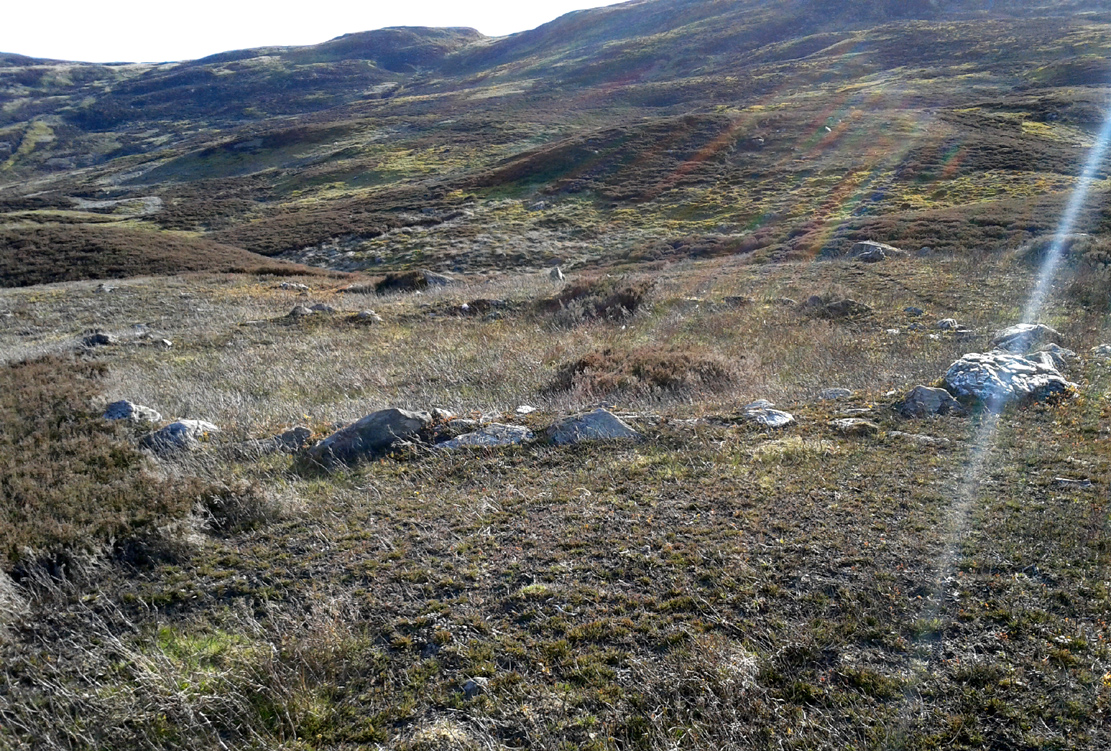
Arc of ring from east to southWNW arc of walling
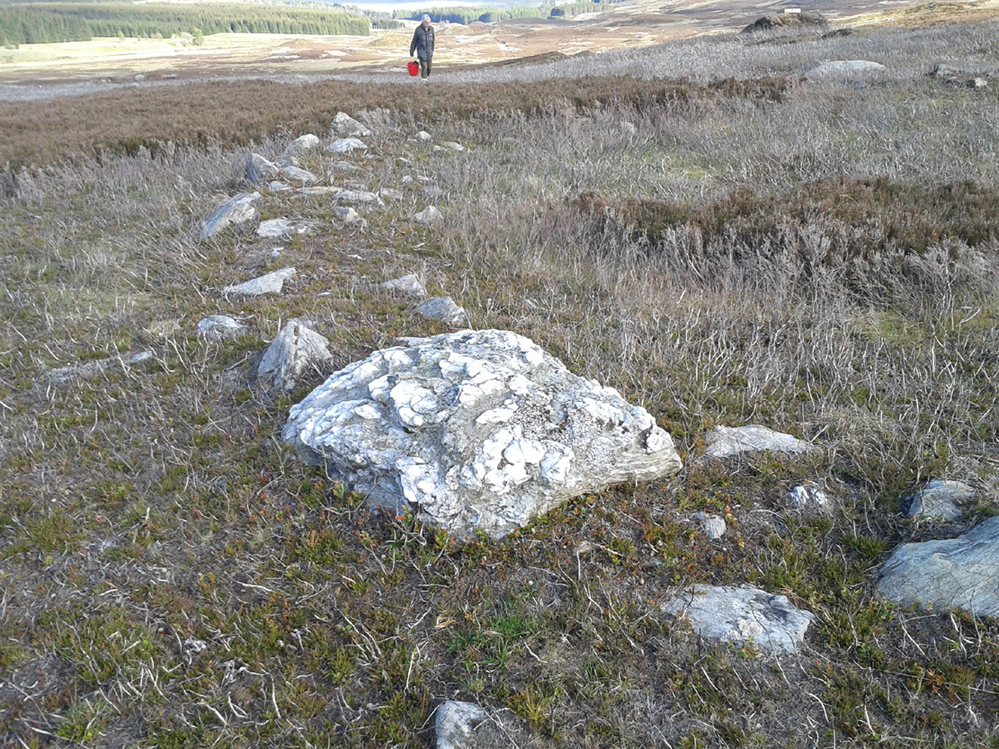
Never excavated, what we’ve got here is a very well-preserved, large ring of stones, more typical of Pennine and Derbyshire ring cairns than any standard hut circles. But this is Scotland we’re talking about! This impressive ring measures outer-edge to outer-edge 12 yards in diameter (north-south), by 11 yards (east-west), with the stone walling that defines the ring being between 3 and 4 feet across all round, and between 1-2 feet high. And it’s in damn good nick! More similar in structure to the likes of Roms Law, a number of notably large stones define the edges, but many hundreds of smaller packing stones build up the ring walls. Of the larger rocks in the ring, the most notable one is a large white quartz crystal stone on its NNE side.
Quartz rock reflects the sun, looking W
It’s an impressive site whatever it may be! – in very good condition for its age (Bronze Age by the look of it) and, whilst still visible above the heather, well worth checking out if you like your stone circles and prehistoric rings. The small prehistoric graveyard 30-40 yards south and east, plus the extensive settlement systems all over these moors are all worth exploring if you visit this place.
References:
Cowley, David C., “Archaeological Landscapes in Strathbraan,” in Tayside & Fife Archaeological Journal, volume 3, 1997.
Scott-Elliot, J., “Kinloch House, Amulree,” in Discovery & Excavation in Scotland, 1964.
Scott-Elliot, J., Dowsing – One Man’s Way, Neville Spearman: London 1977.