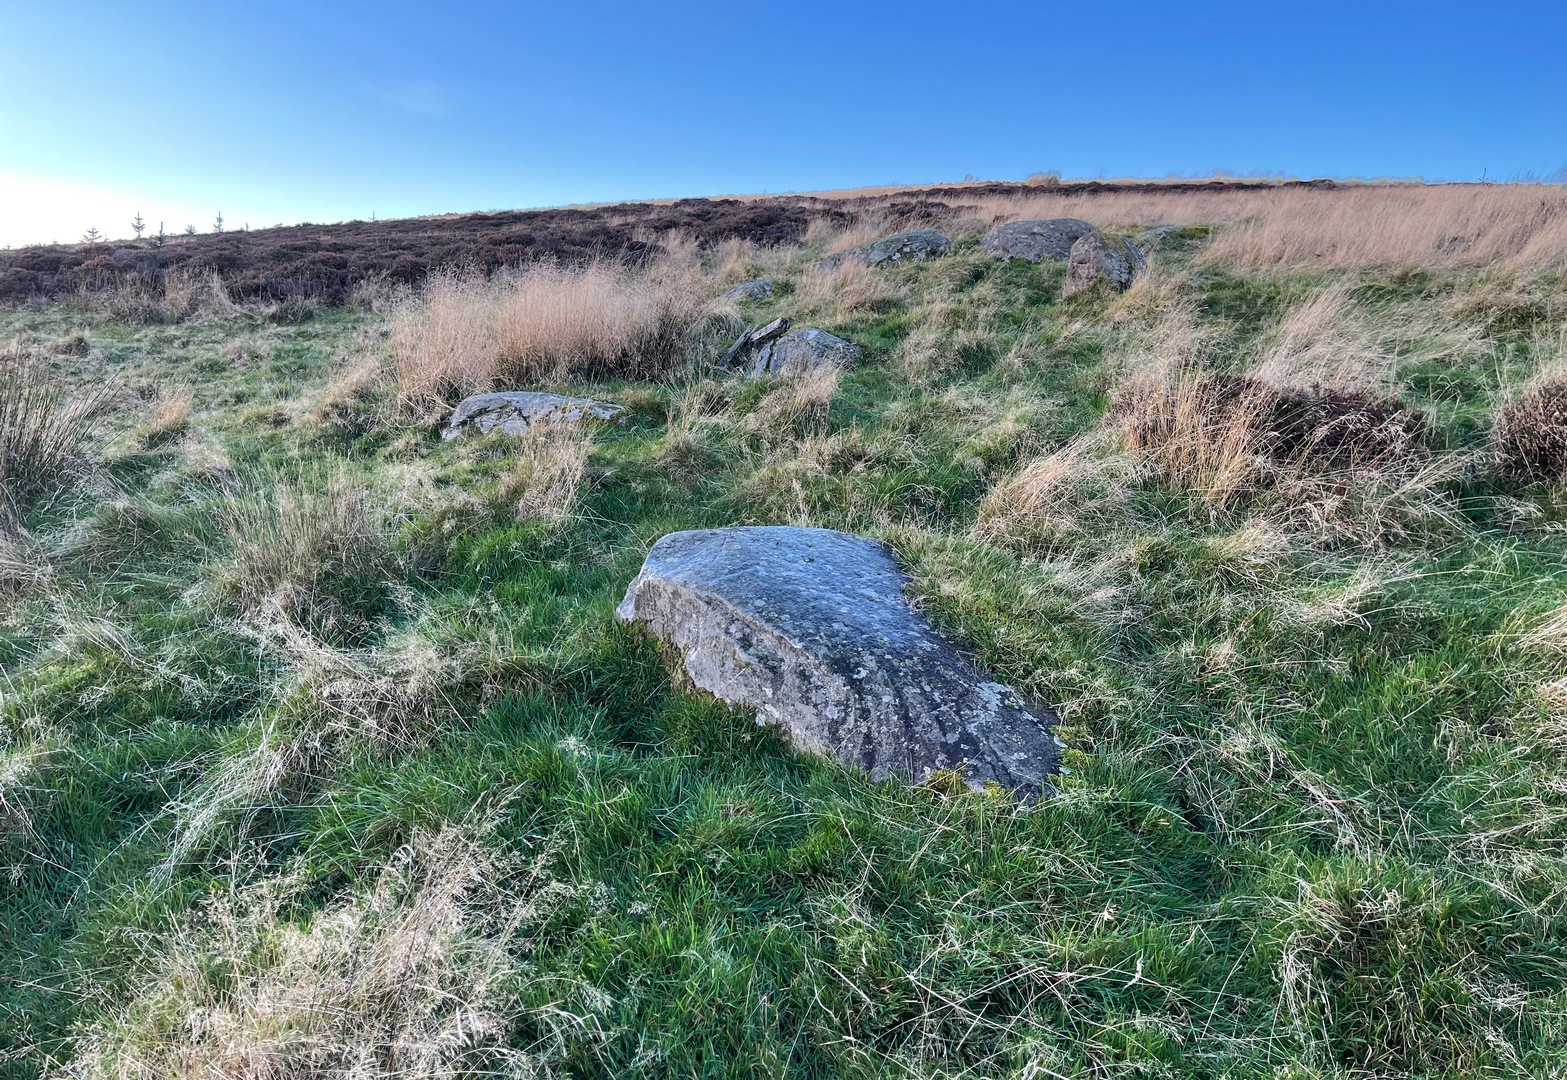
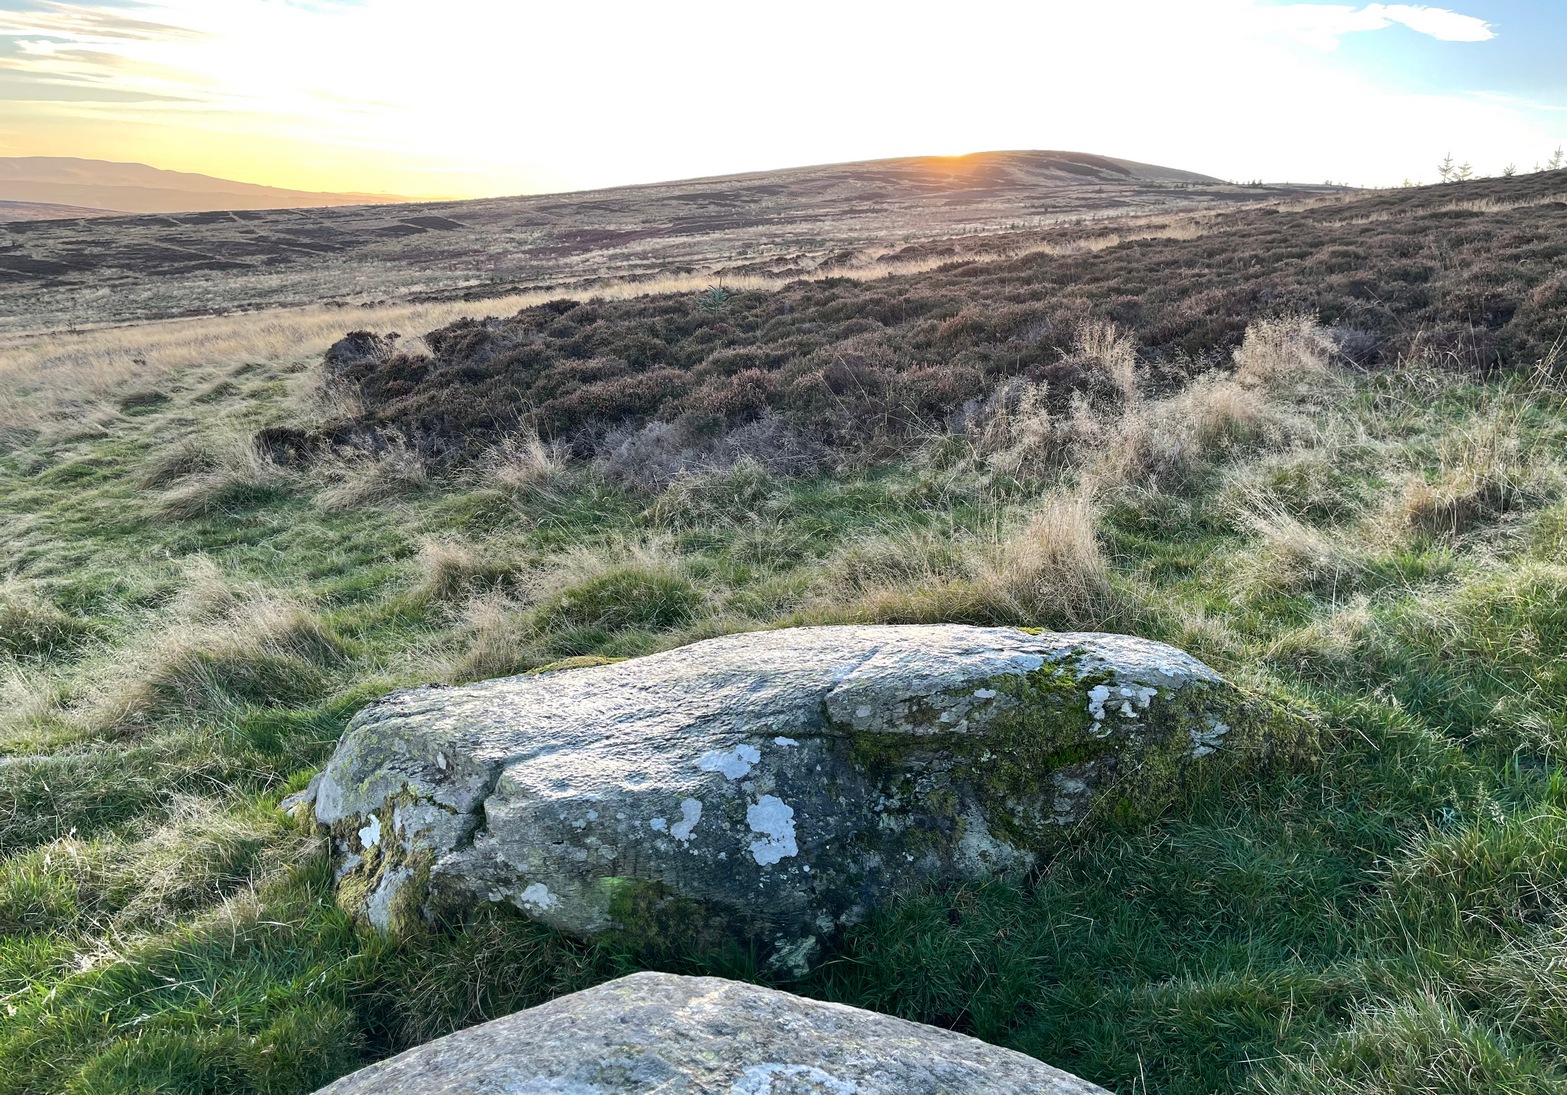
If you can make your way to the Stroness (2) carving, then walk down the slope for less than 50 yards past quite a few other earthfast stones, you’ll eventually run into the stone shown here in the photos. You’ll find it easily enough.
Archaeology & History
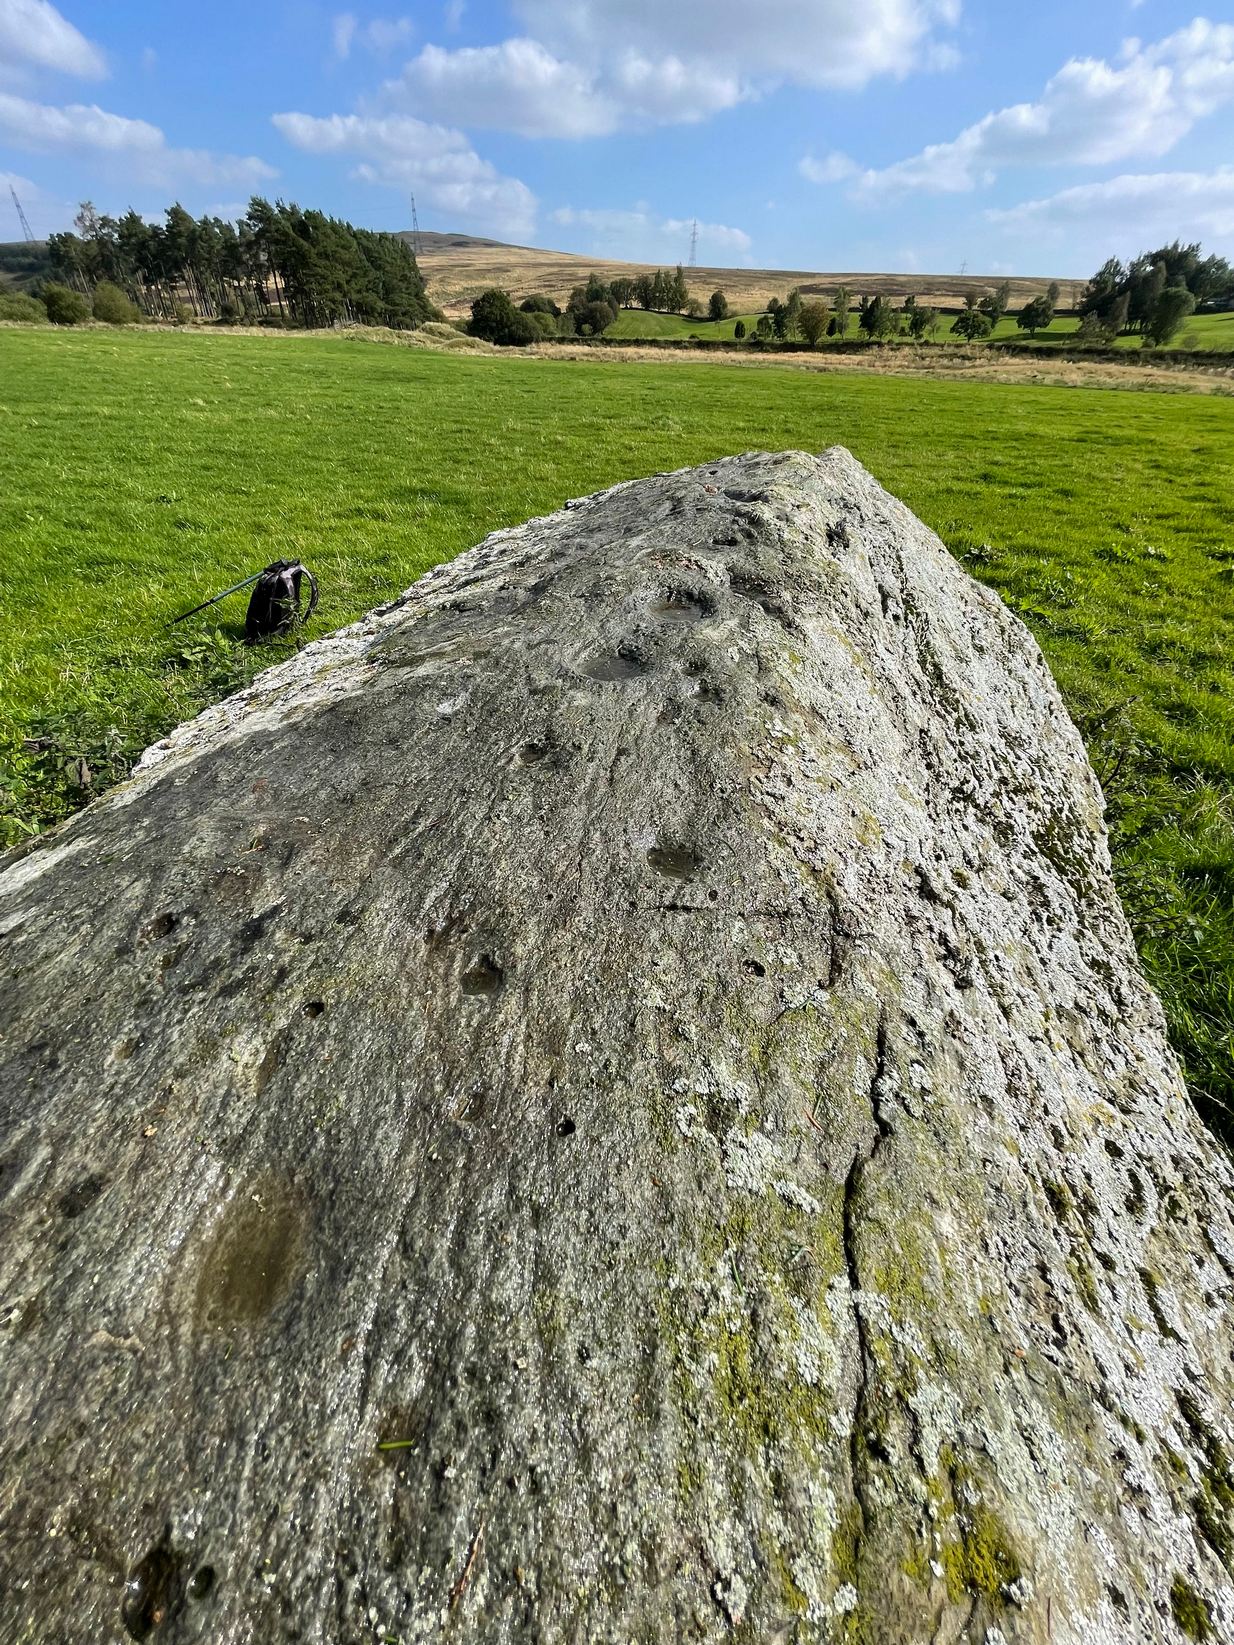
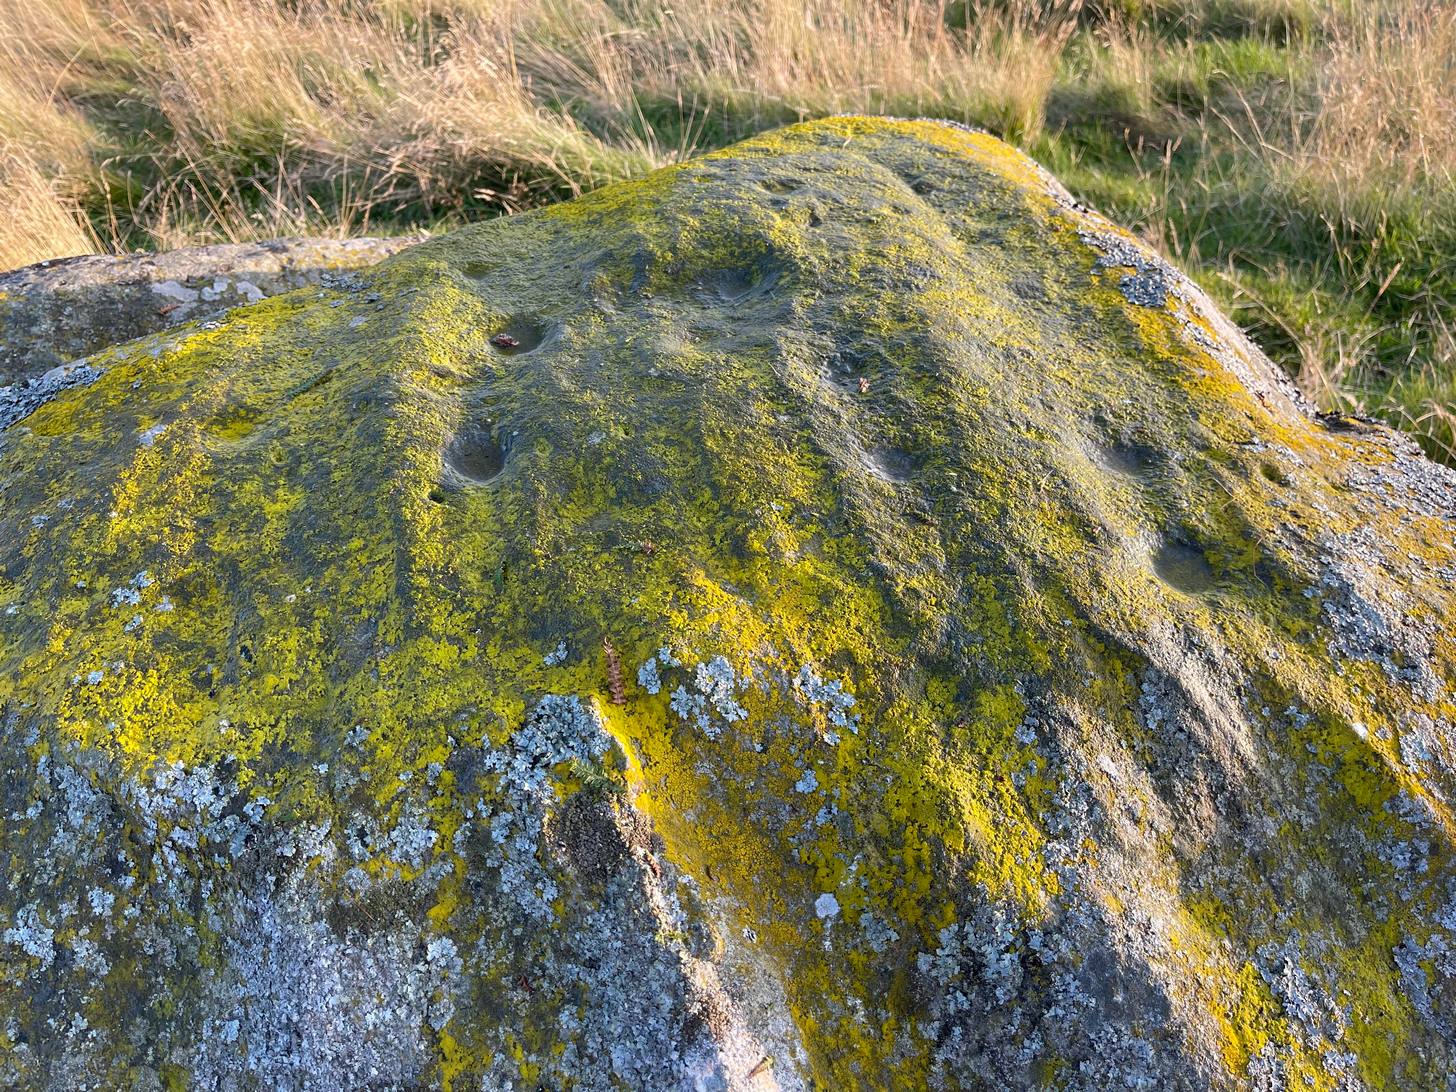
This carving was found when I was heading down the hillside to meet up with my antiquarian colleague 500 yards lower down. The sun was just setting, so visibility wasn’t good, but as I rushed from stone to stone feeling each one in the hope of finding a carving, this one gave my fingers that distinct feedback of a cup-marking; then another; and what seemed like another. I had a small amount of water left in a bottle and quickly sprayed it over the surface of the stone and saw that there were indeed a number of cups on it. Two or three certainly – but possibly as many as five. I laid on the wet ground and looked across its even surface from several angles and caught what seemed to be a very faint semi-circle around one of the cups. But I wasn’t sure it was real. However, on a number of quick photos I took, several of them do appear to show such an arc around one of the cups. But I’m very cautious about it. Only when we (or you) go back up and have a look at it in good light will we be able to affirm or discount it.
One additional feature that needs mentioning is a small low arc of walling just above this stone. It’s man-made, it’s very old, but I couldn’t work out what it might be: hut circle, cairn (there’s one further up the hill), enclosure walling. I’m not sure, but it needs to be looked at when we have a full day.
The minor road that runs roughly north-south between the hamlets of Fowlis Wester and Buchanty is probably your best bet. Nearly 2 miles north of the village up the tiny winding lane, where the moorland at the roadside finishes and the fields begin – is where to take the track, left, up onto the hillside. But after just 75 yards, go left over the rickety-gate and follow the walling until your reach the burn. Follow this up all the way to its source (it’s boggy as hell) and, once you’re there, walk due north for 250 yards until you reach a cluster of rocks. Look around!
Archaeology & History
It’s a long way to come to see such a simplistic design —but for the real petroglyph researchers among you, it’s worth it the trek. It’s had scant attention. George Currie (2004) seems to have been the only person to mention this stone, giving the standard bland description typifying archaeology. He wrote:
“SE-facing slope, 1.2m long pointed rock aligned E-W; three shallow cups, 30-40 x 6-10mm.”
Inspiring stuff, ey?! Anyhow… As usual, there’s more to it than that. If we assume that the carving described above is the same one I visited yesterday (Mr Currie’s grid-ref is slightly different), even despite the poor daylight, it was obvious there was more than three cup-marks on this.
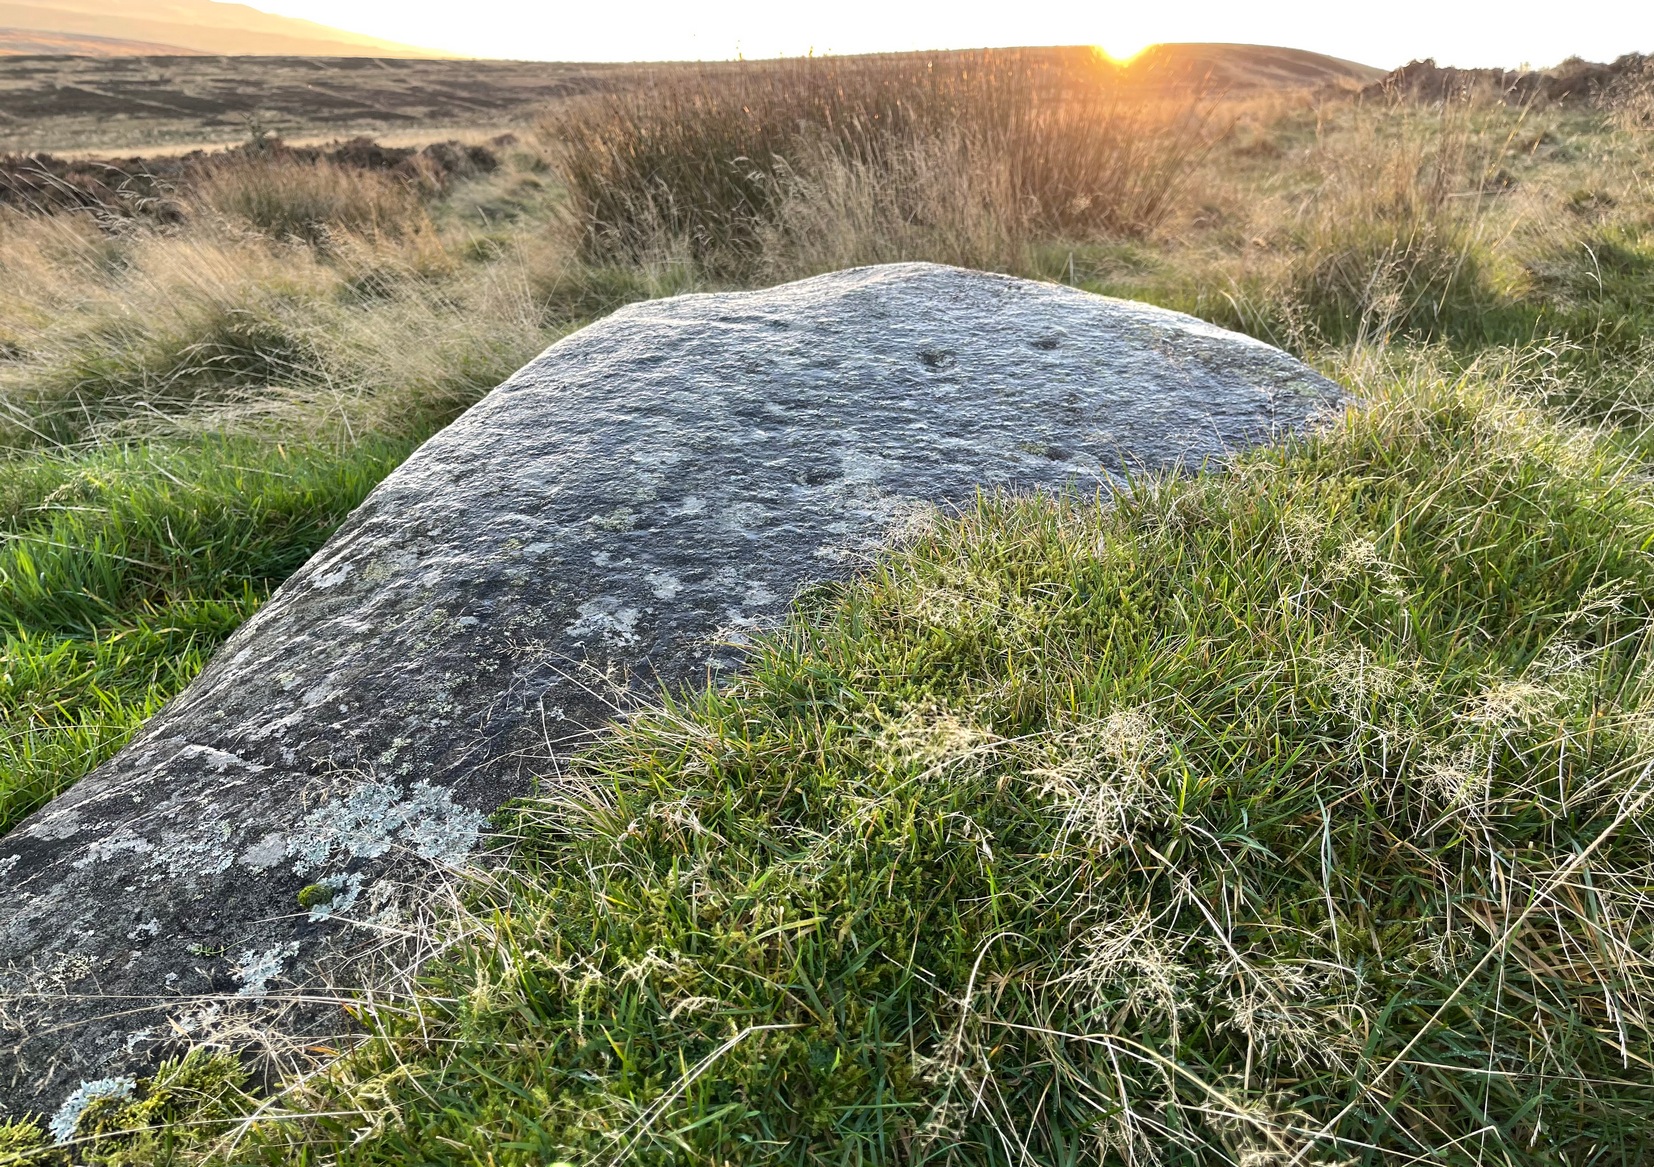
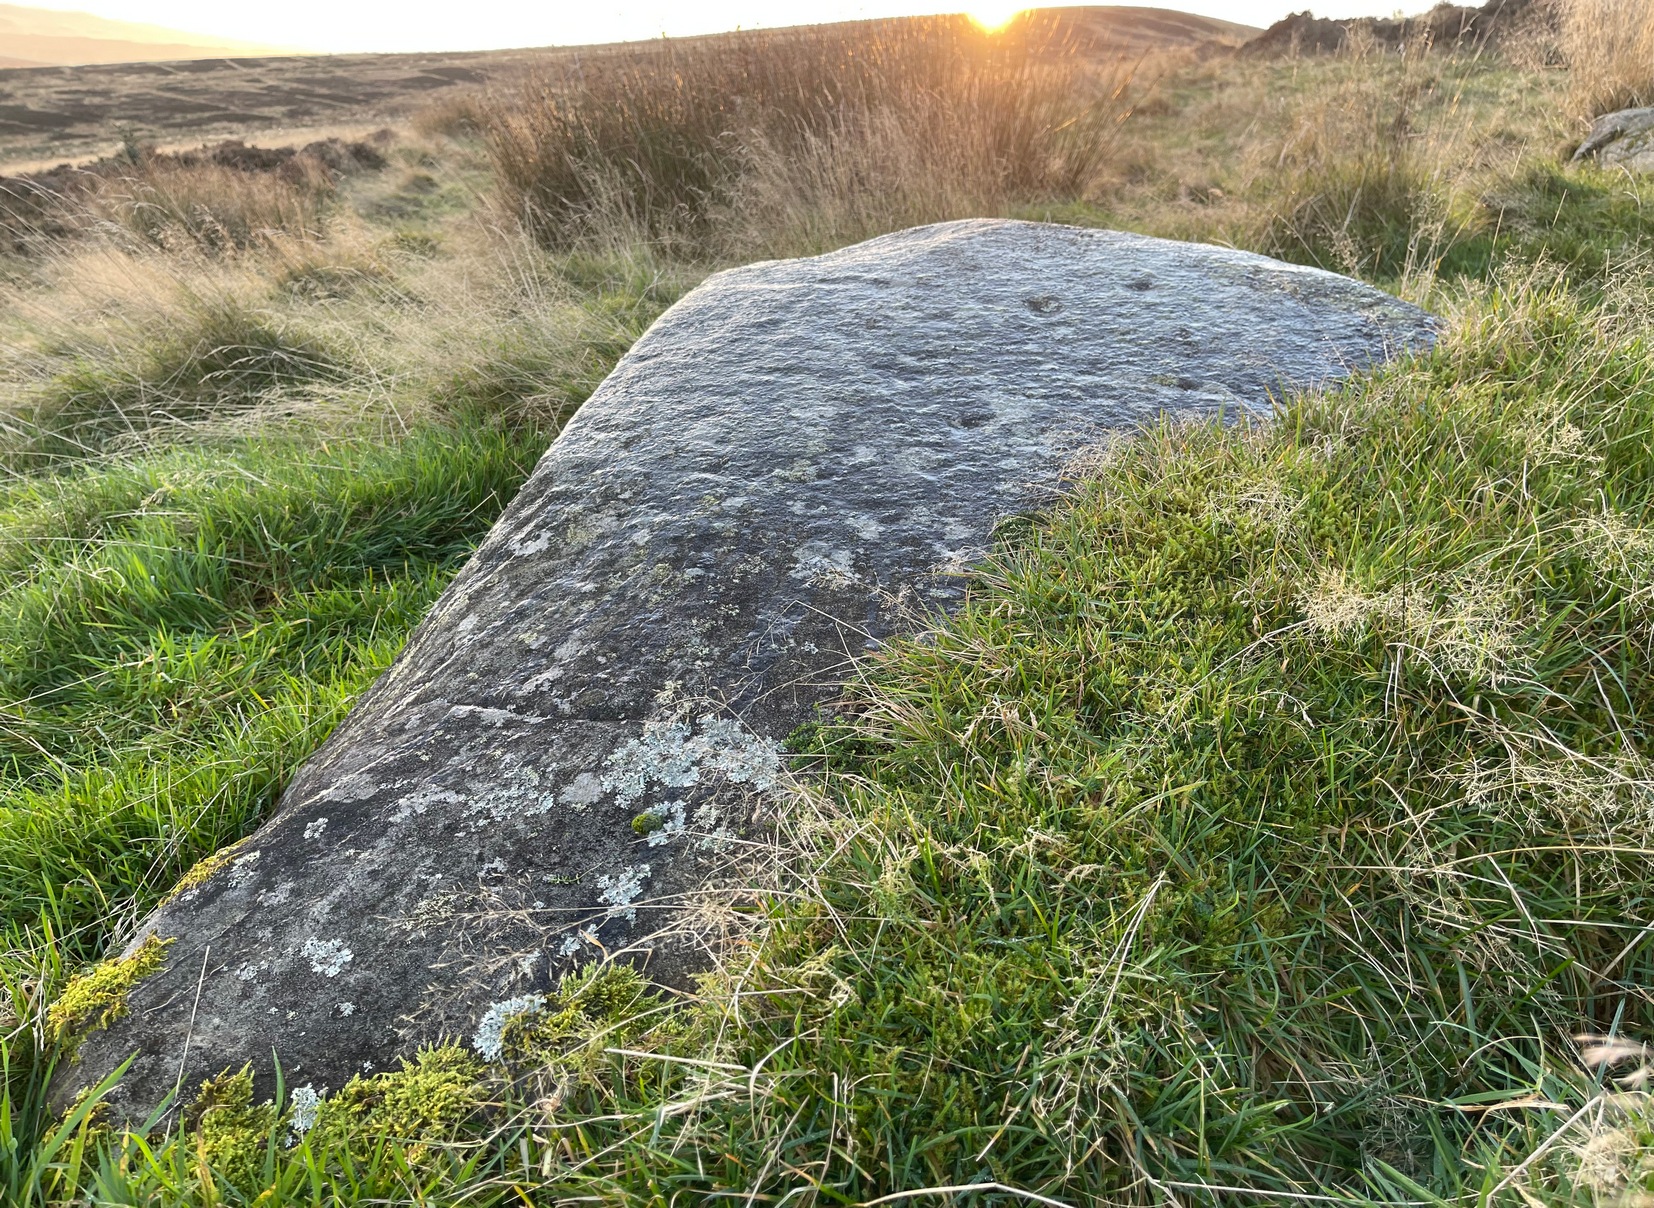
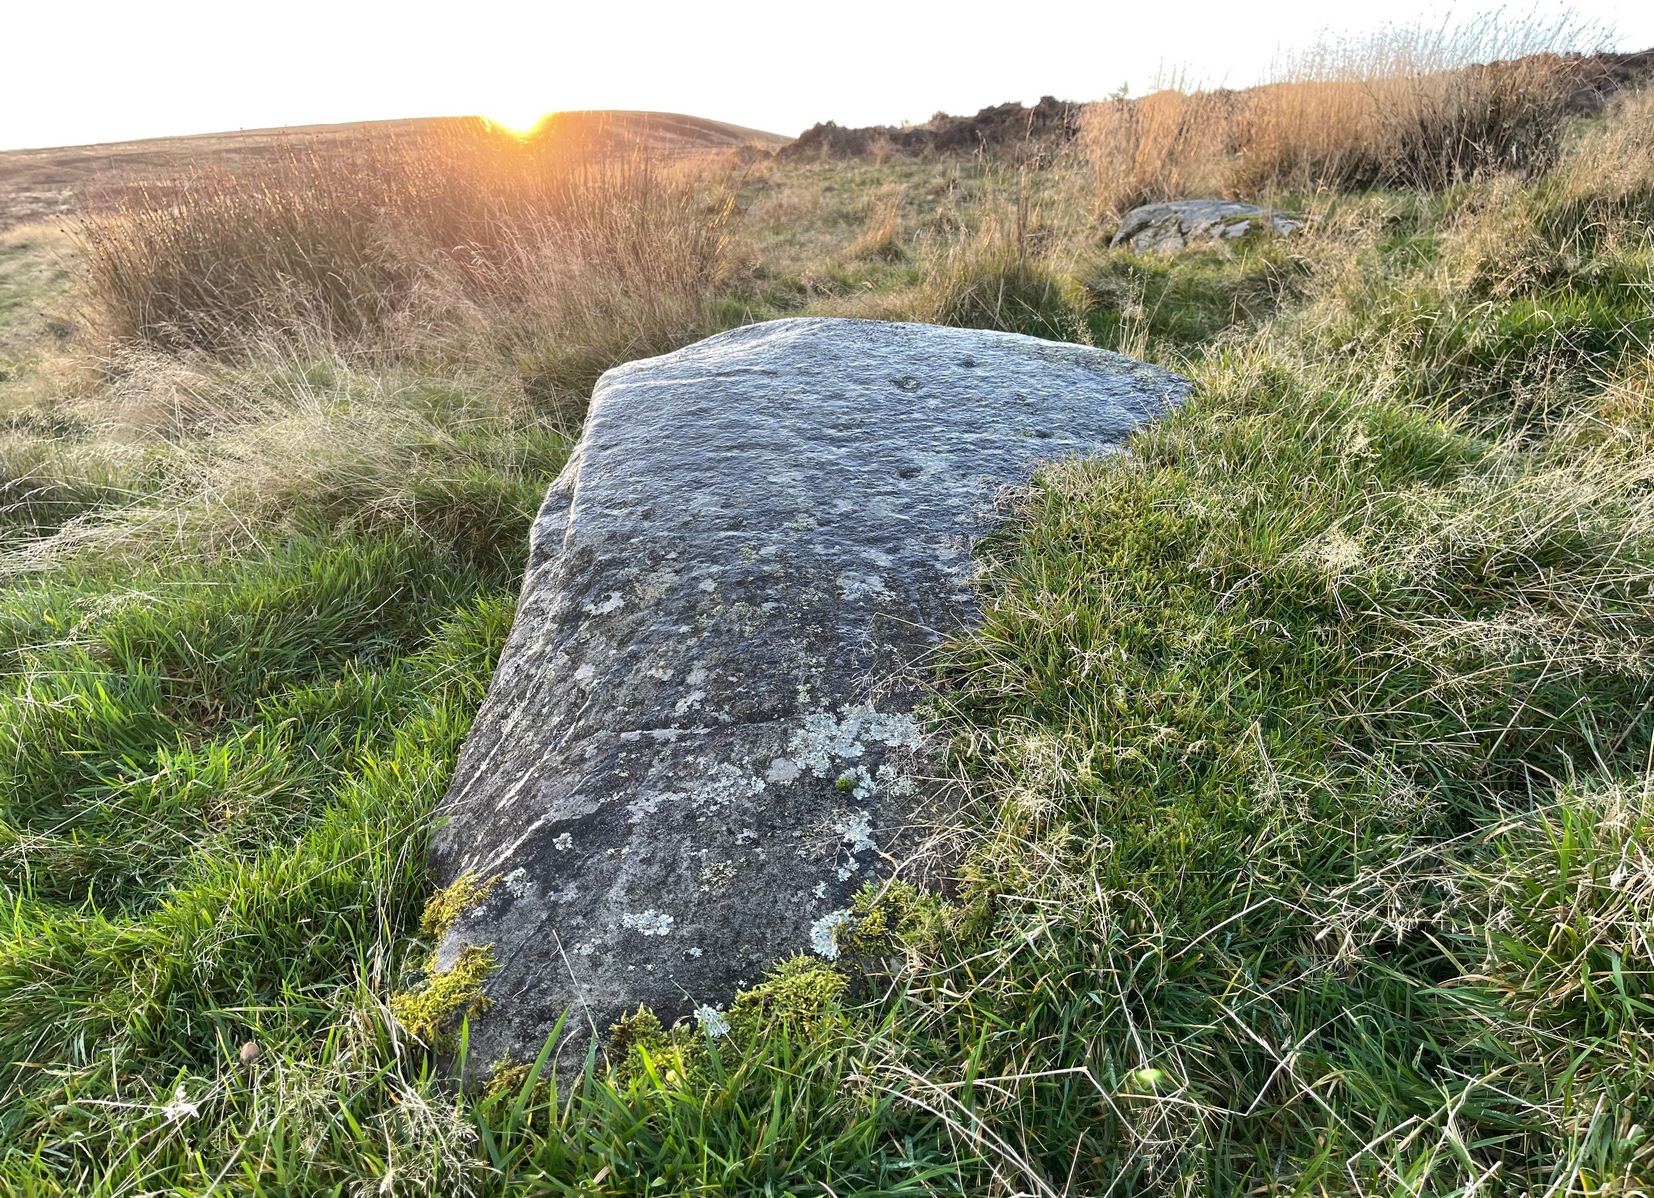
Lower cups & upper cups
Cups on top
When I got to this stone, the evening sun was literally touching the horizon and so the light cutting across half the rock highlighted very little indeed. I was rushing, trying to fondle and see as much as I could before the darkening sky clouded everything, and as I almost frenetically sprayed showers of water across its surface, the two or three cups that I could see near the crown of the stone suddenly doubled in number. Two cups along one edge became three; whilst the sloping surface above these that had one cup suddenly seemed to have a companion. On the highest part of this gently sloping stone, the form of one of the two distinct cup-marks that first caught my eye seemed to slowly morph into one of the carved “footprint” designs, akin to those clustered on the Ardoch (2) carving 1½ miles south-west of here. However, this element needs looking at again, as it may have been a curious playful trick between stone and light showing me something that wasn’t there! Things like that happen with stones.
Altogether there are at least six cup-marks on here, but perhaps as many as eight. Obviously, if we (or you) visit the site when the light is much better, an even larger design might emerge from this old rock.
I spent perhaps just five minutes here, before heading back down to meet my companion 500 yards below in the midst of the boggy moorland. Usually a carving gets my fondles for a an hour or two, but conditions weren’t good for us to form a healthy relationship. And so, as I headed downhill, another unrecorded cup-marked stone appeared beneath my rushing feet (Stroness [3] carving)— and I spoke with that for only a couple of minutes. We need to come back up here and zigzag to find other companions that lay sleeping, forgotten for countless centuries…
References:
Currie, George, ‘Buchanty Hill (Fowlis Wester parish): Cup-marked Rocks’, in Discovery & Excavation Scotland, volume 5, 2004.
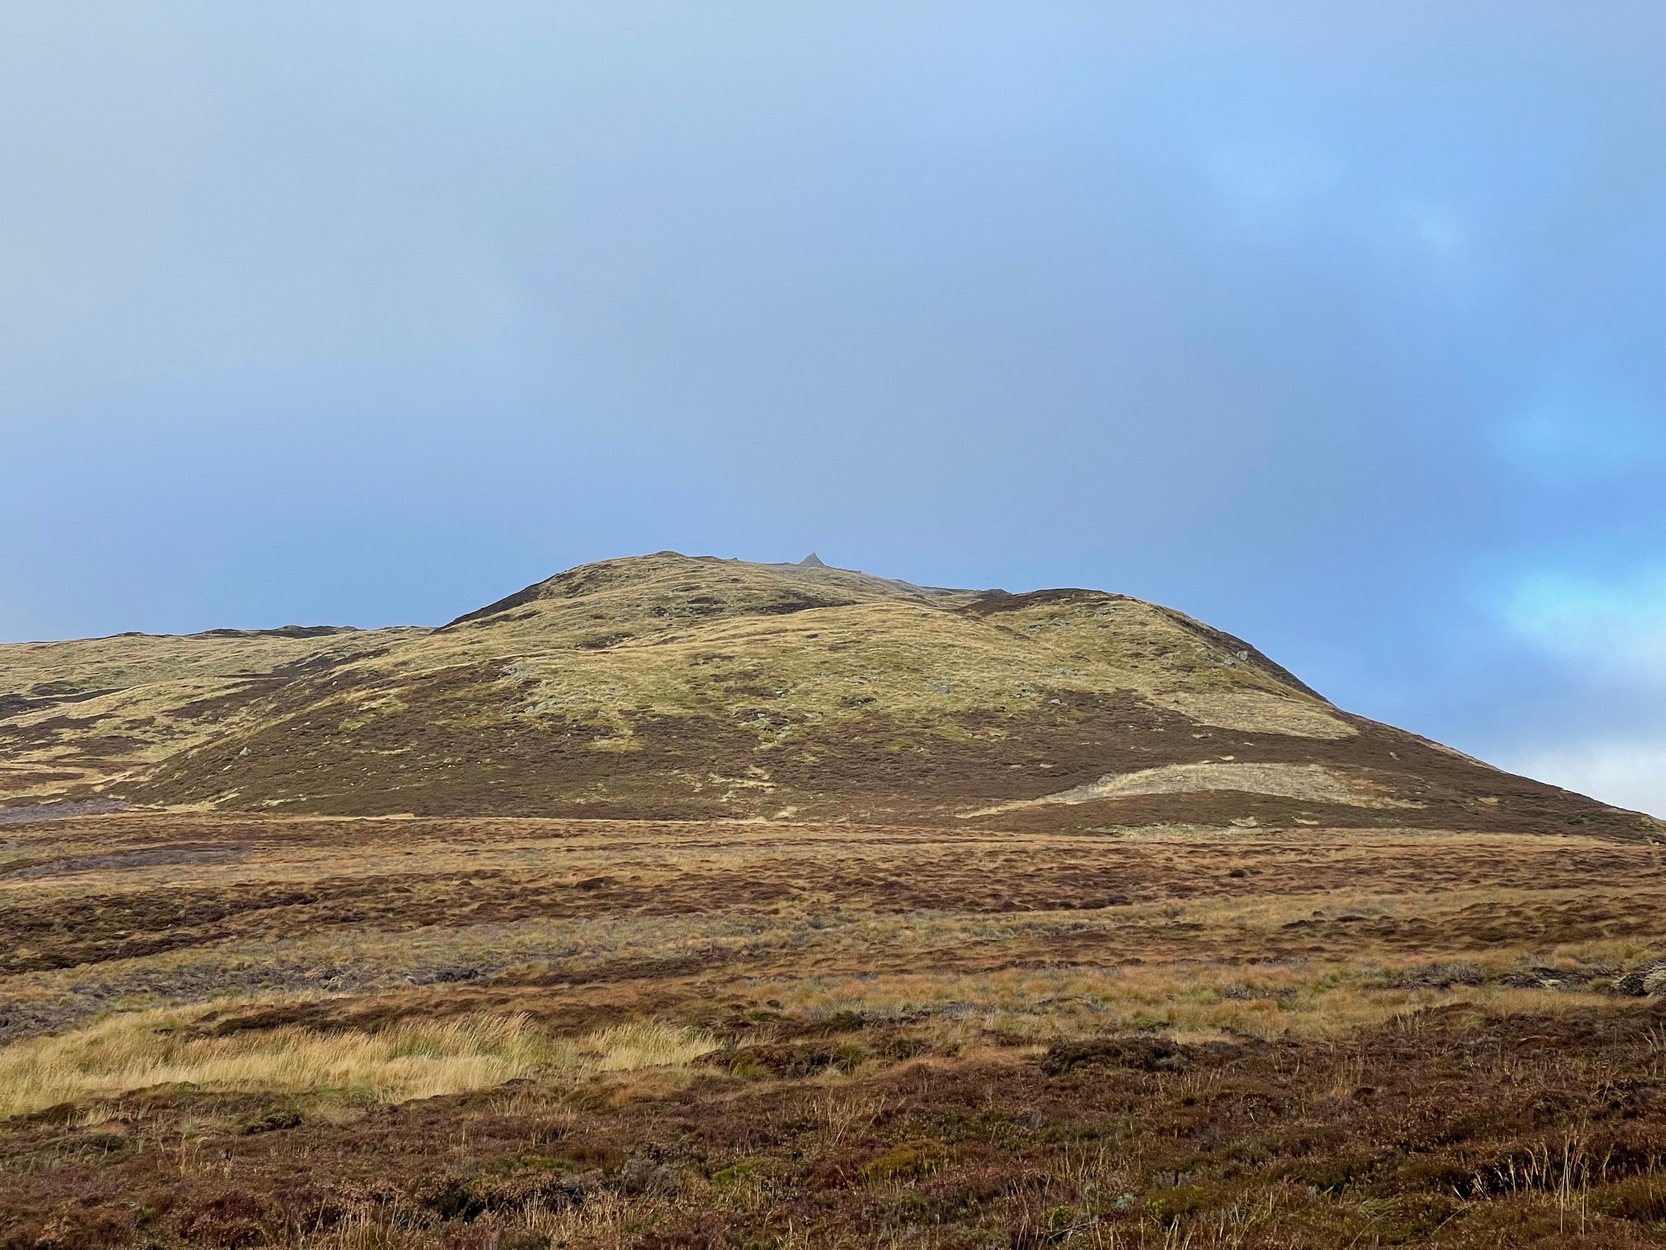
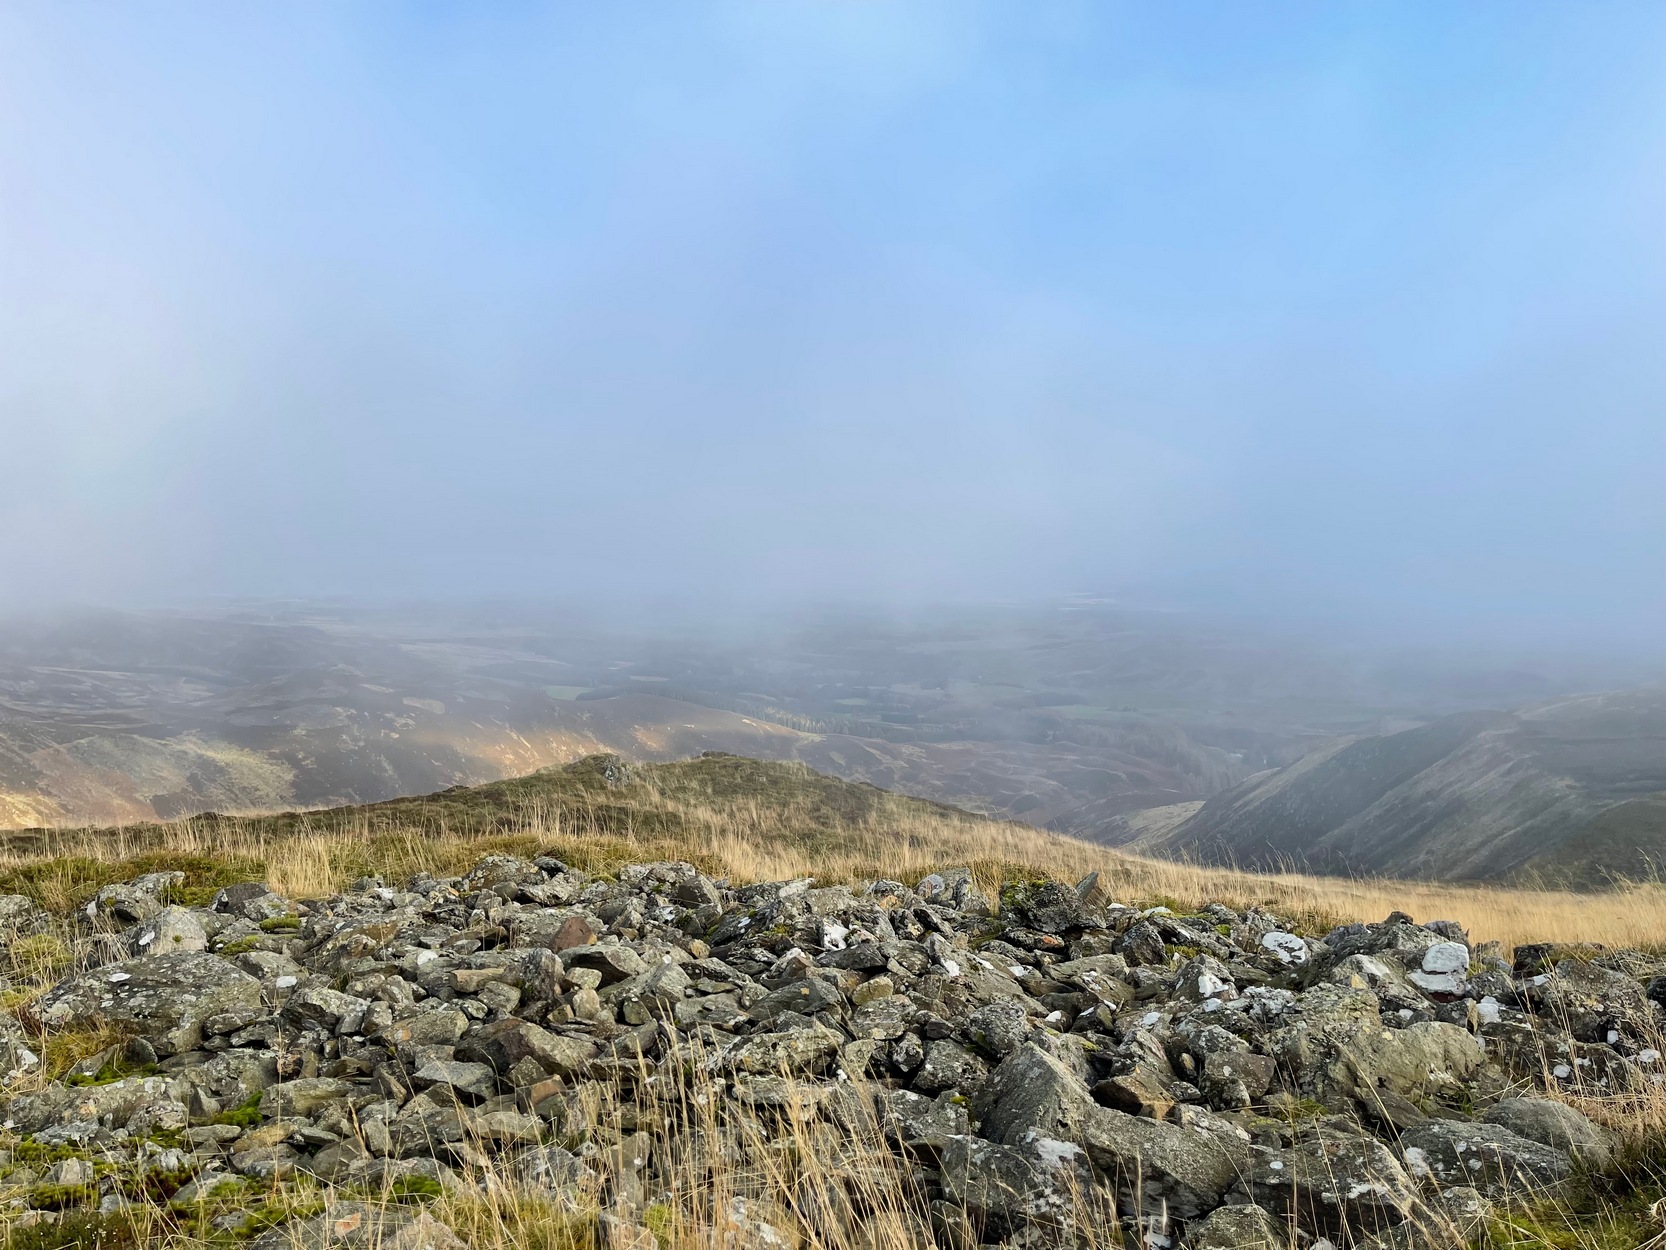
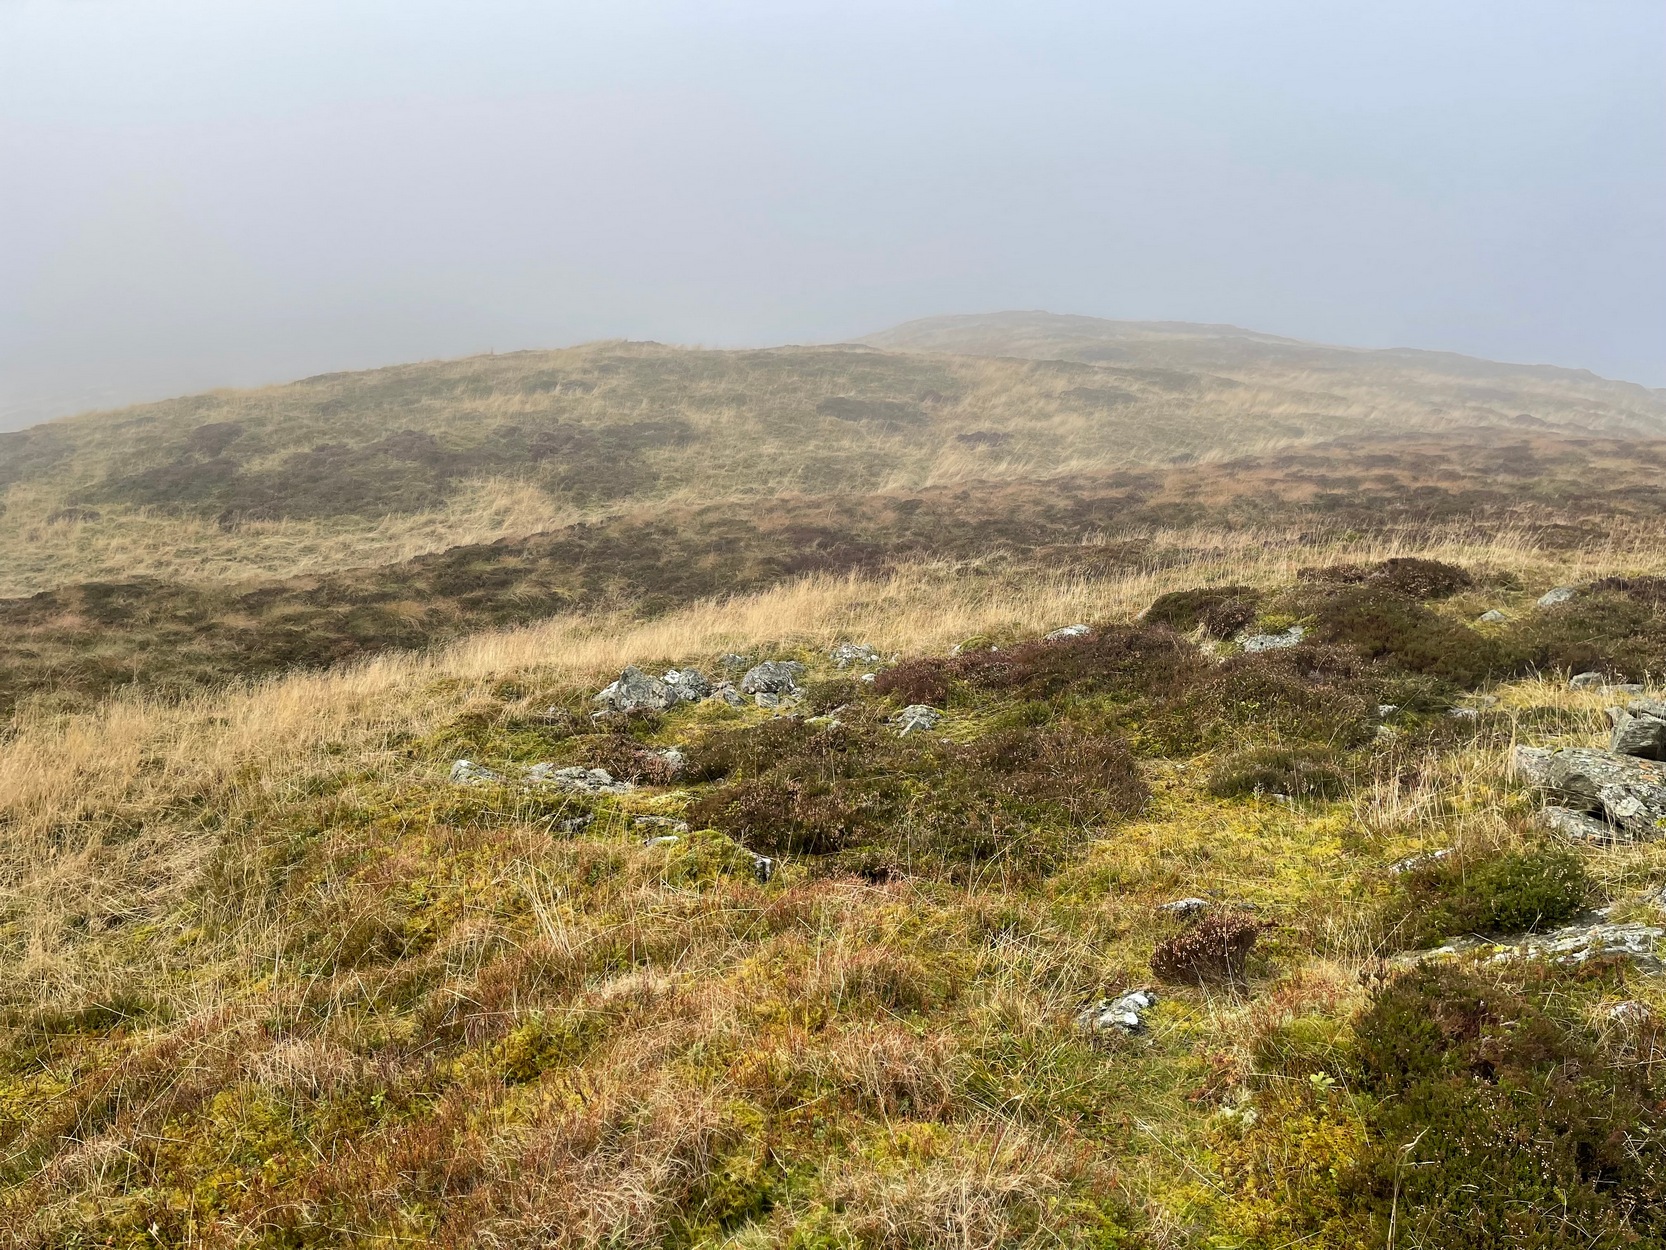
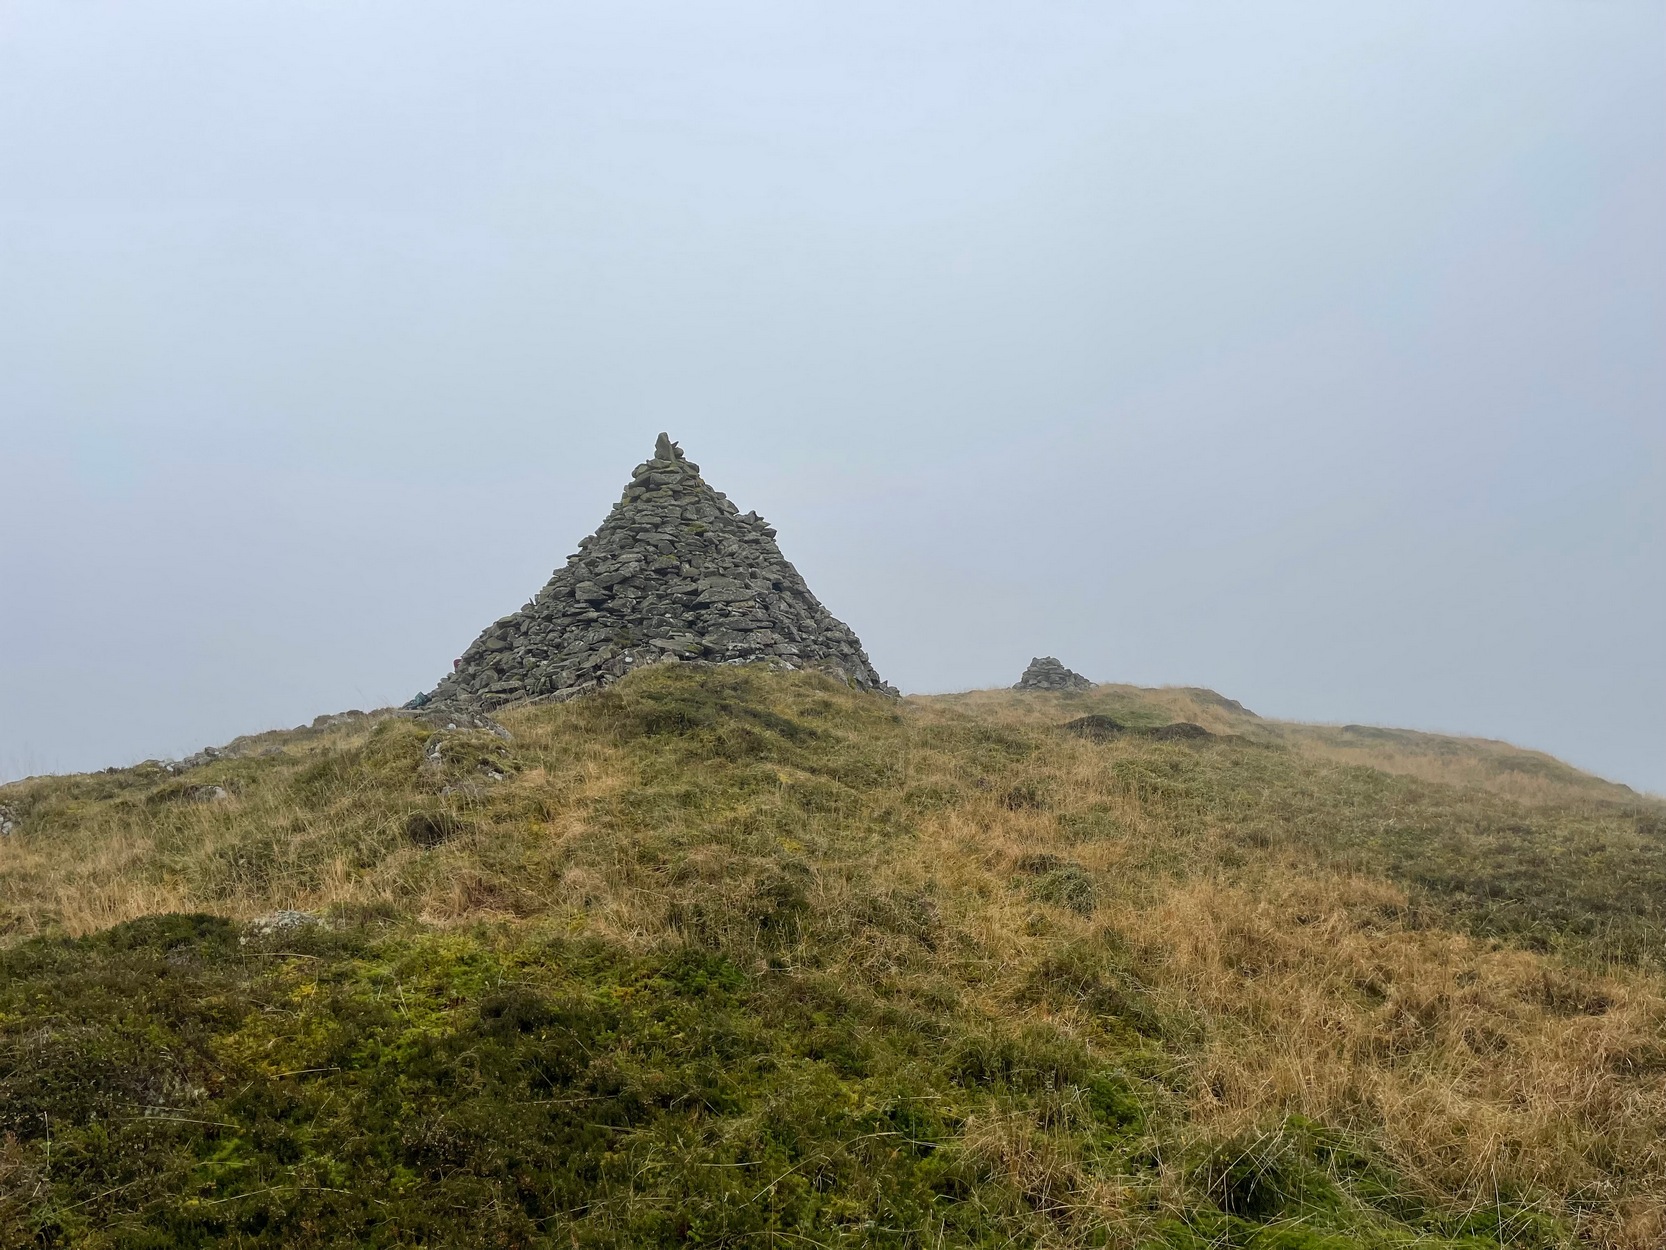
Make a day out for this one! You could, of course, go barely half-a-mile straight up the hill (southwest) from Ossian’s Stone in the Sma’ Glen below – but it’s steep as fuck and I know that most of you wouldn’t do it. So, park-up and take the gradual 3 mile walk into the mountains. Coming via Crieff, along the A85 road east, turn left up the A822 Dunkeld road at Gilmerton. 2½ miles on, you reach the Foulford golf course on the right-hand side of the road, whilst directly across the road a dirt-track leads you into the fields, past the large Foulford cup-and-ring stone. Keep along this track, bearing right just before Connochan Lodge and follow this dirt-track uphill on and on for another 2 miles where you’ll eventually see the cairn-peak in the distance. Another shallow track leads uphill after about 2 miles: we walked up to where the ground levels out, walked across the dodgy swamp-land and up again to the tomb. It’s well worth it!
Archaeology & History
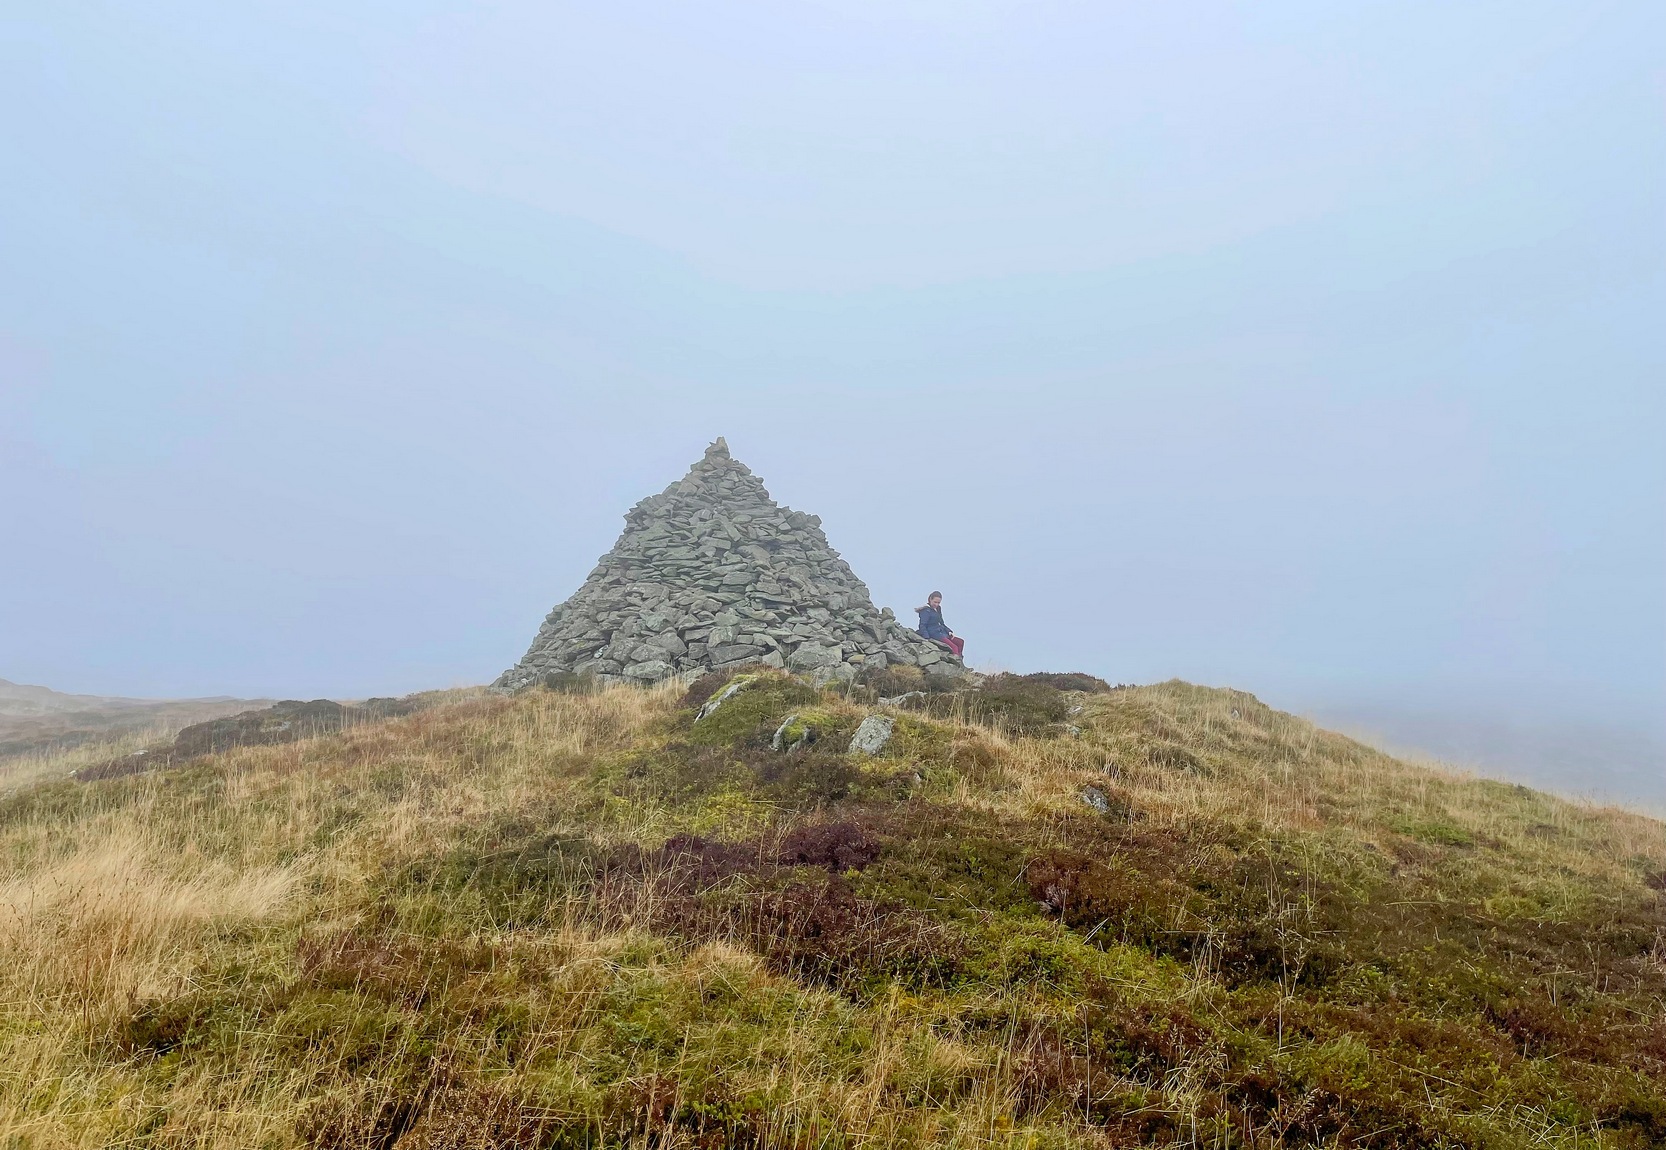
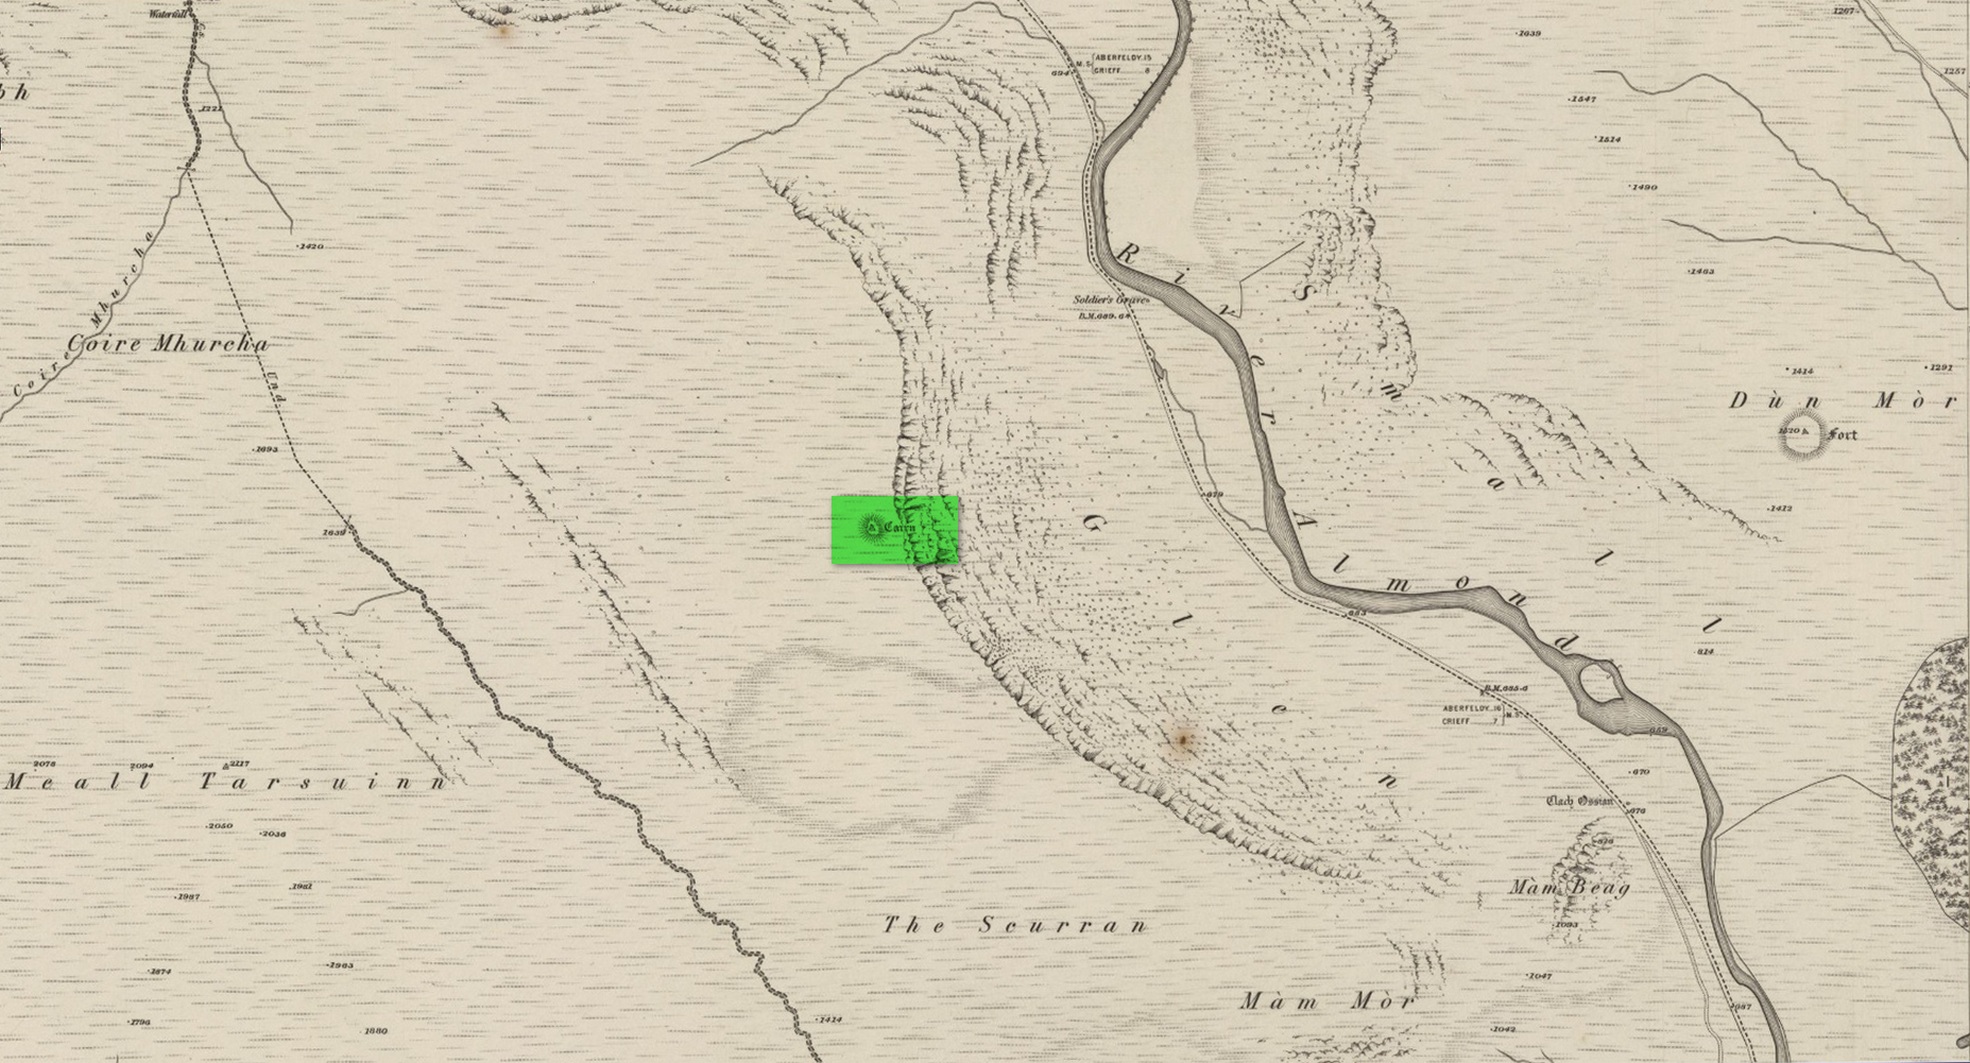
Visible for many miles round here from the surrounding hills, this somewhat mutilated giant cairn, highlighted on the earliest Ordnance Survey map of the area in 1867, hasn’t fared well in archaeology tomes. Apart from a passing note in Margaret Stewart’s (1966) summary article on prehistoric remains in central Perthshire—where she erroneously told it to be 400 feet lower down that it actually is—almost nothing has been said of this place. Most odd.
Cairn spoil, looking SE
New cairn atop of the old
Despite it being ransacked over the centuries, it was obviously of some considerable size in its early days. Today, surmounting it, is a very large walker’s cairn which, no doubt, has accrued some of its own foundations from the prehistoric tomb on which it sits. To the side of this recent cairn, another one is growing, thanks to stones brought from near and not-too-far. But the original creation can still be seen in outline and mass all around. Indeed, as you walk all round the modern cairn, you’re walking over much of the early collapsed stonework sleeping gently beneath the moorland vegetation, and once you walk away and below the cairn mass itself, looking back up at it you’ll notice the very ancient raised plinth of stone on which our modern one now lives.
Low walling on NW side
Its amorphous shape is somewhat amoeboid, measuring more than 22 yards across east-west, by 15 yards north-south, with a curious arc of low walling, very old indeed, on its northwestern side. Whether this walling outlines the original edge of the tomb, only an excavation will tell. The most notable remaining mass of ancient cairn material reaches out on its south-east to eastern edges, where some of it is beginning to fall away down the edge of the mountain slope.
Folklore
Local tradition assigns this cairn to be where the bones of the great hero-figure Ossian was removed to, when they were disturbed by the unruly mob of General Wade and his cohorts in the middle of the 18th century. Notes of the event were written at the time by one of Wade’s mob, a Captain Edward Burt, who told,
“the Highlanders, they assembled from distant parts, and having formed themselves into a body, they carefully gathered up the relics, and marched with them, in solemn procession, to a new place of burial, and there discharged their fire-arms over the grave, as supposing the deceased had been a military officer.”
This was essential, said Burt, as
Site shown on 1867 map
New cairn on old, looking W
“they (the Highlanders) firmly believe that if a dead body should be known to lie above ground, or be disinterred by malice, or the accidents of torrents of water, &c. and care was not immediately taken to perform to it the proper rites, then there would arise such storms and tempests as would destroy their corn, blow away their huts, and all sorts of other mis-fortunes would follow till that duty was performed. You may here recollect what I told you so long ago, of the great regard the Highlanders have for the remains of their dead…”
Oral tradition tells us that this cairn, high above Ossian’s Stone, is where the rites occurred. It makes sense too.
References:
Finlayson, Andrew, The Stones of Strathearn, One Tree Island: Comrie 2010.
Acknowledgements:Huge thanks for use of the Ordnance Survey map in this site profile, reproduced with the kind permission of the National Library of Scotland.
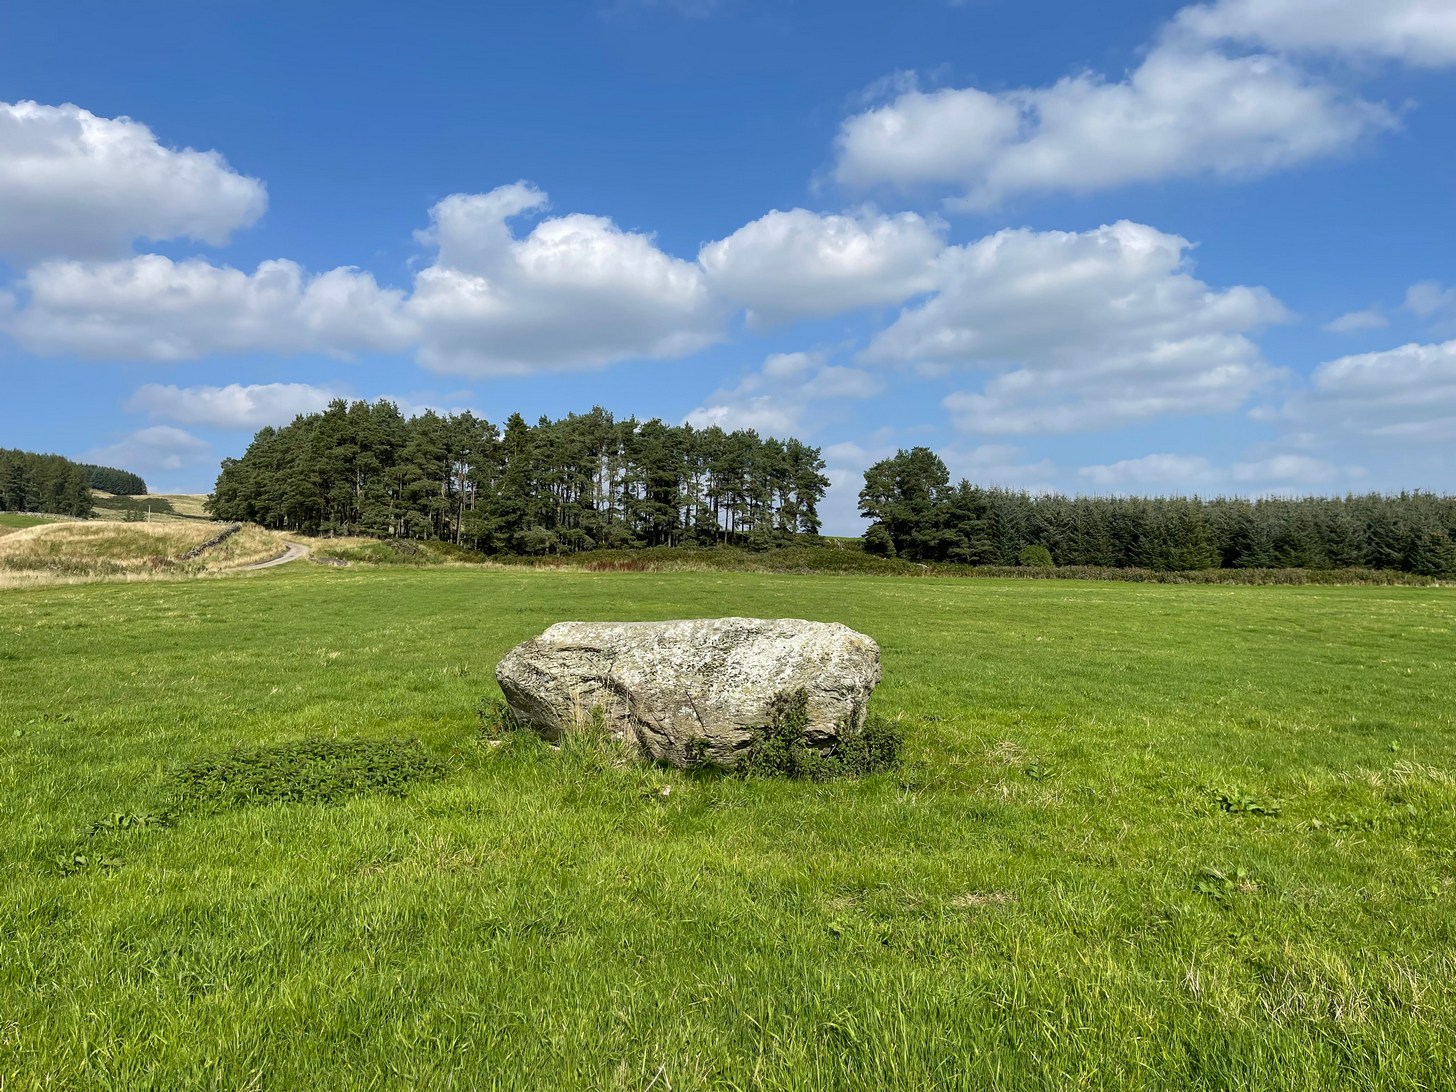
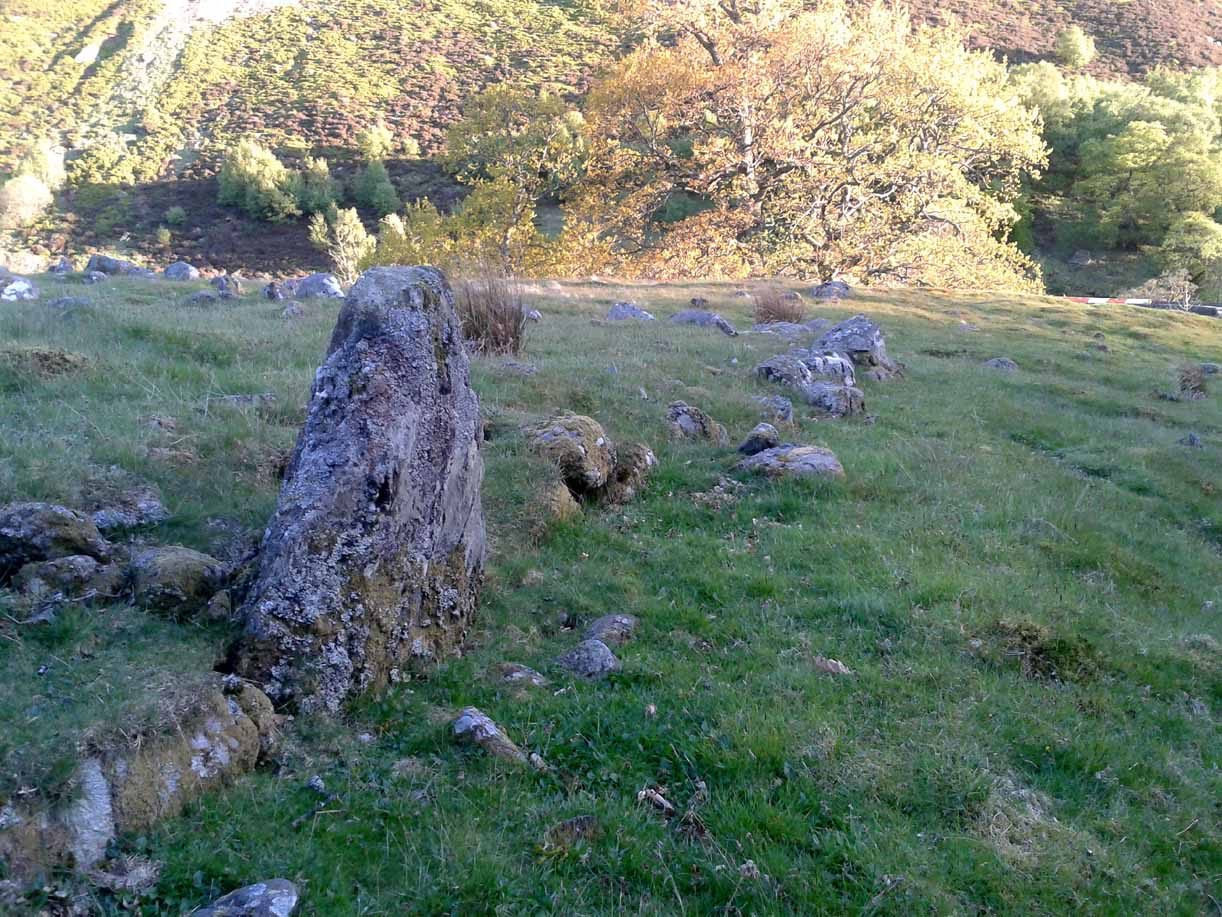
Take the A85 road east out of Crieff and after roughly 2 miles at Gilmerton, turn left up the A822 Dunkeld road. Go along here for nearly 2½ miles, where you’ll reach the Foulford golf course on the right-hand side of the road. Directly opposite the entrance into the golf course, a dirt-track leads you into the fields where, laying alone and standing out like a sore thumb about 300 yards away, you’ll see a large rounded boulder sitting there minding it’s own business. You can see it quite clearly from the roadside. Nice n’ easy.
Archaeology & History
For such a large conspicuous stone, you’d think there’d be quite a lot written about it as well as hope for a good ornate design—but alas!, both hopeful expectations are lacking. Although, as usual, there’s more to it than is described in the official records—although not much more….
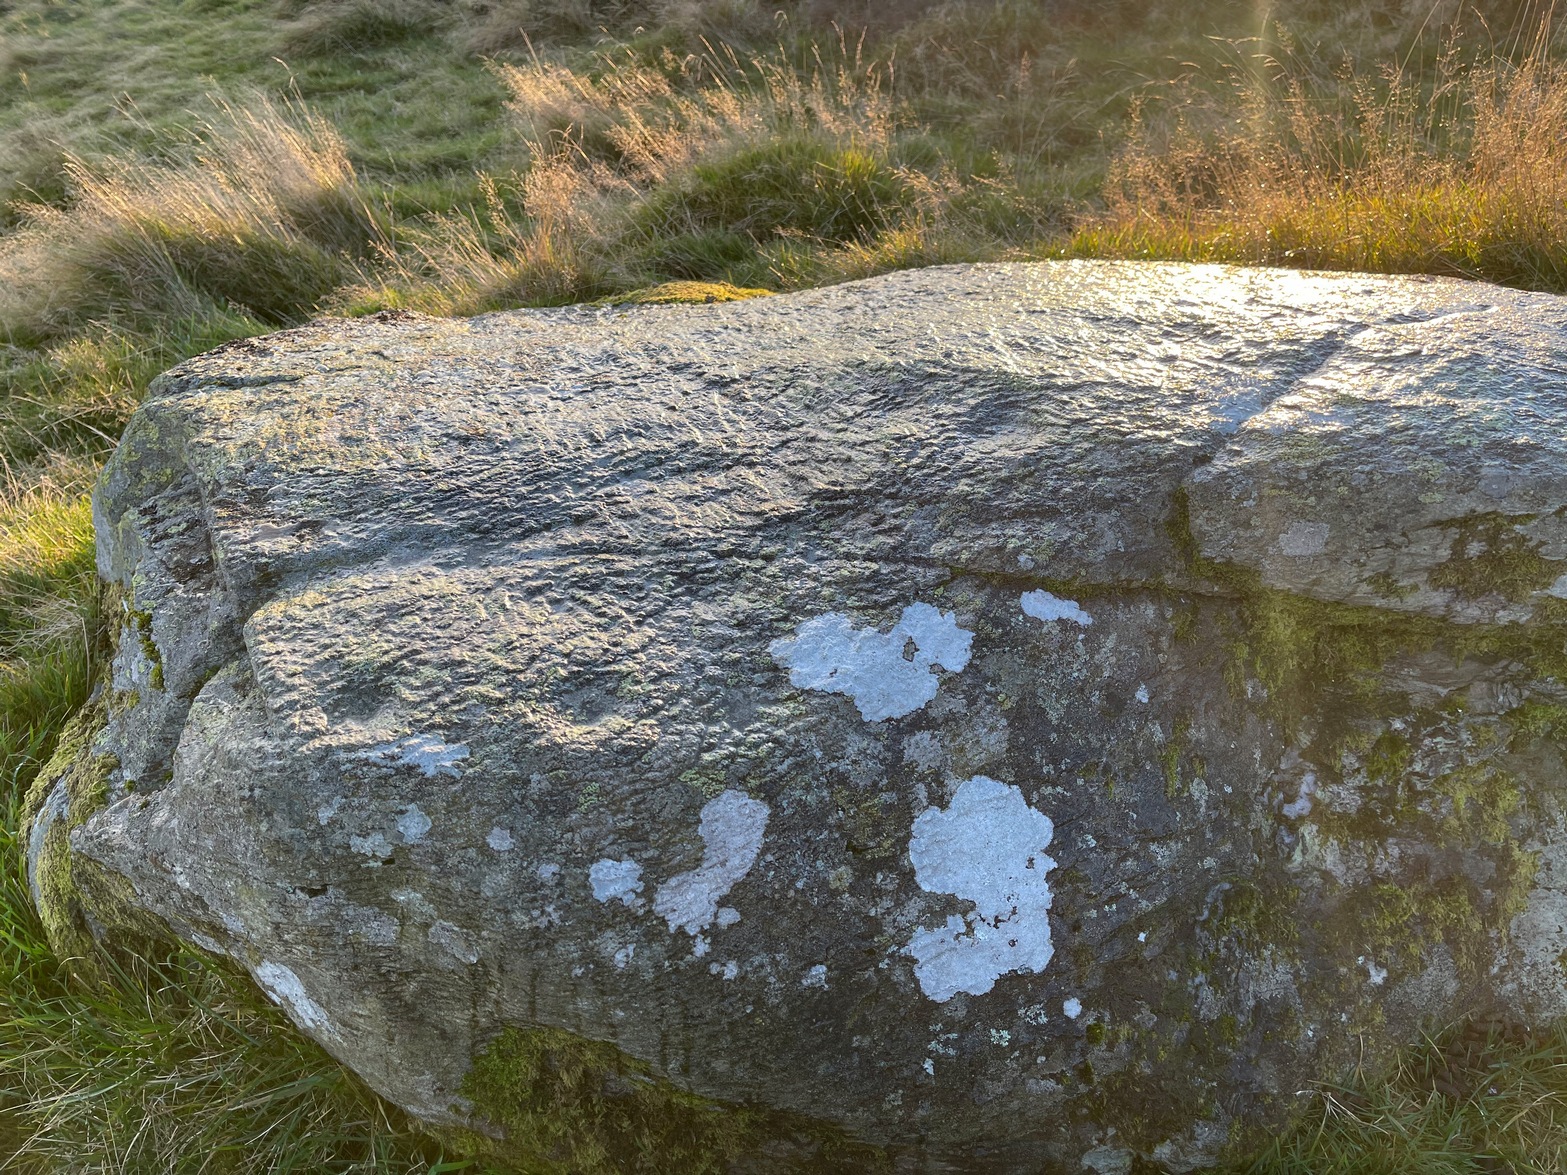
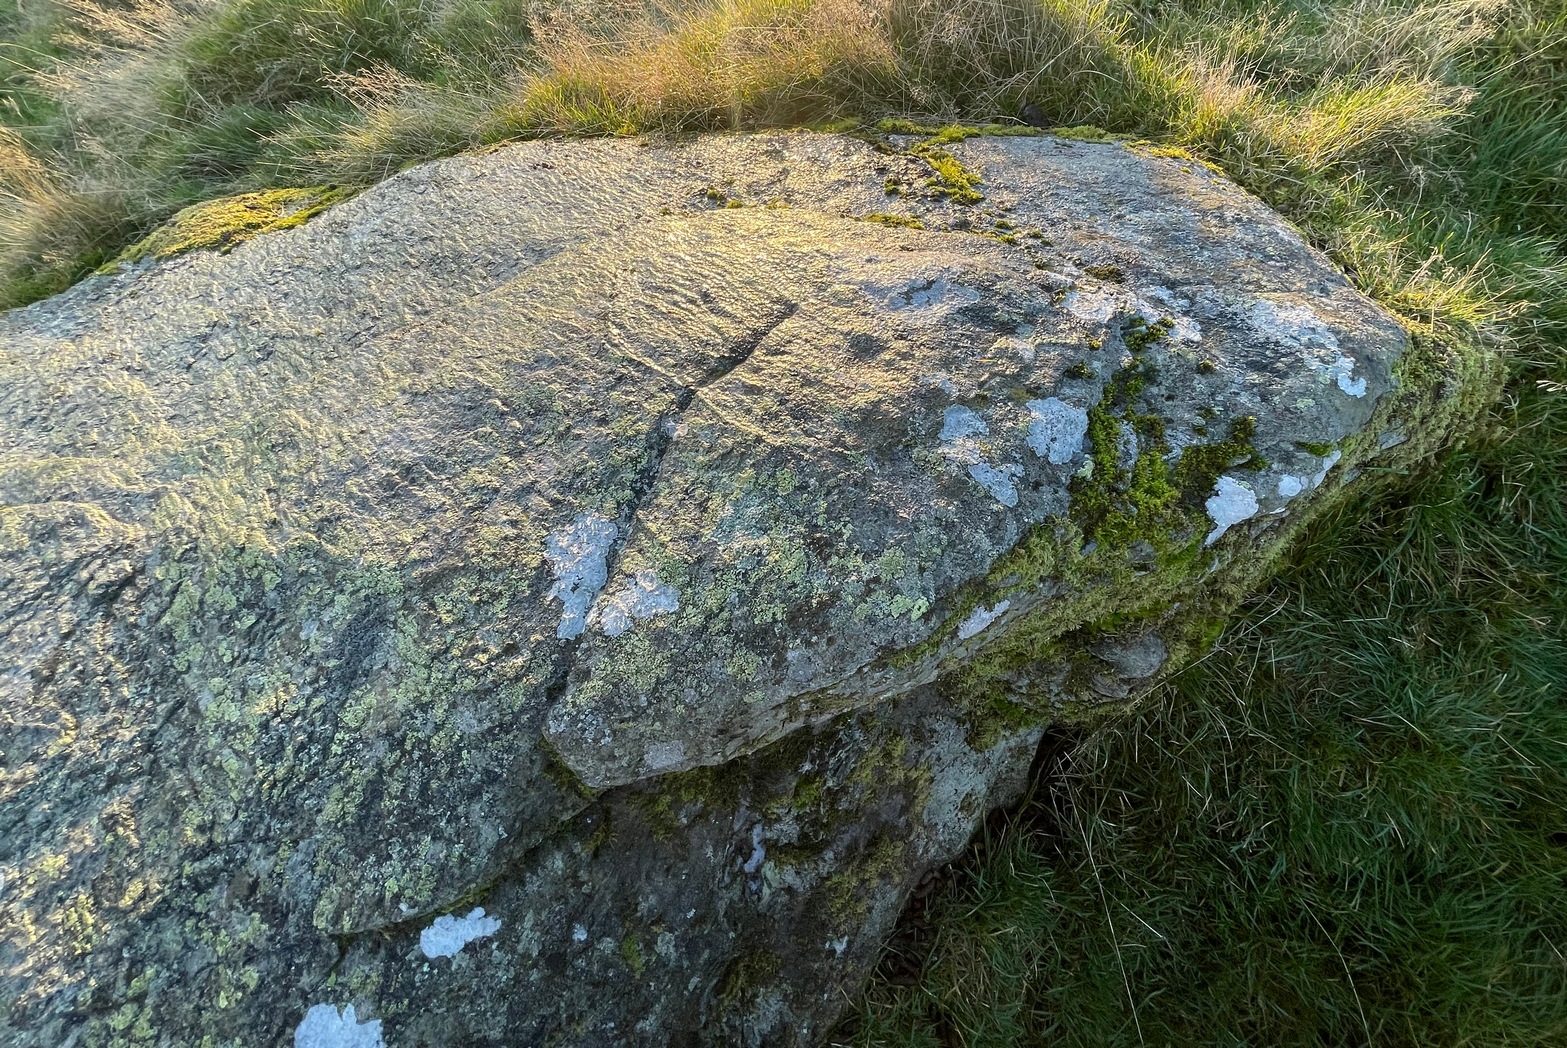
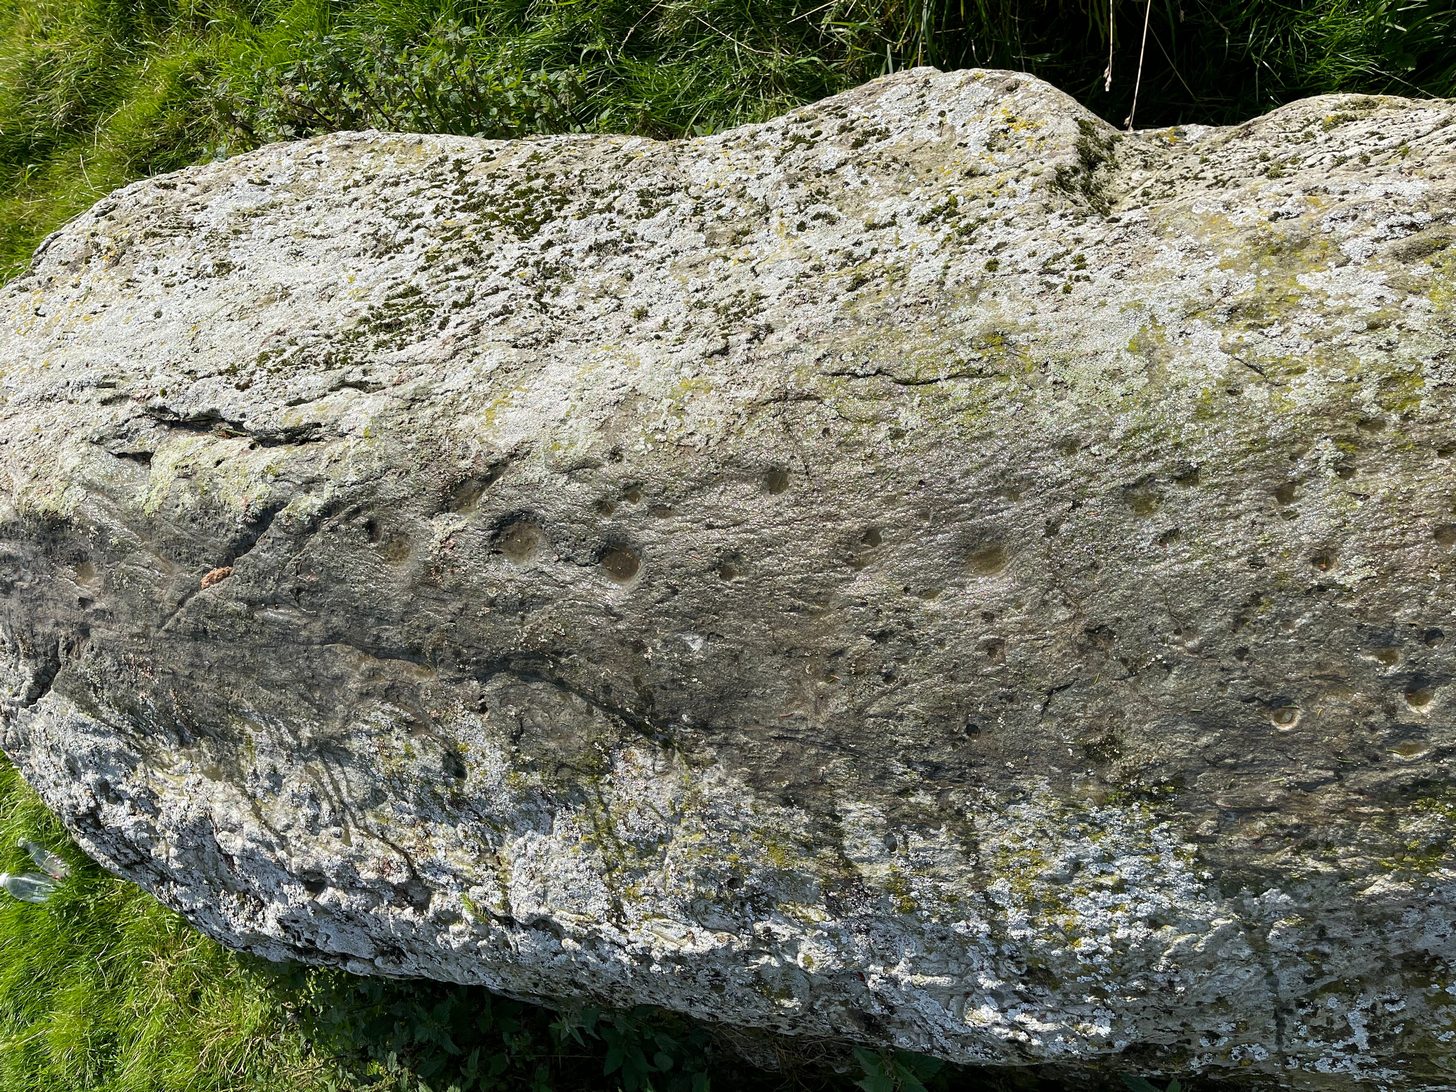
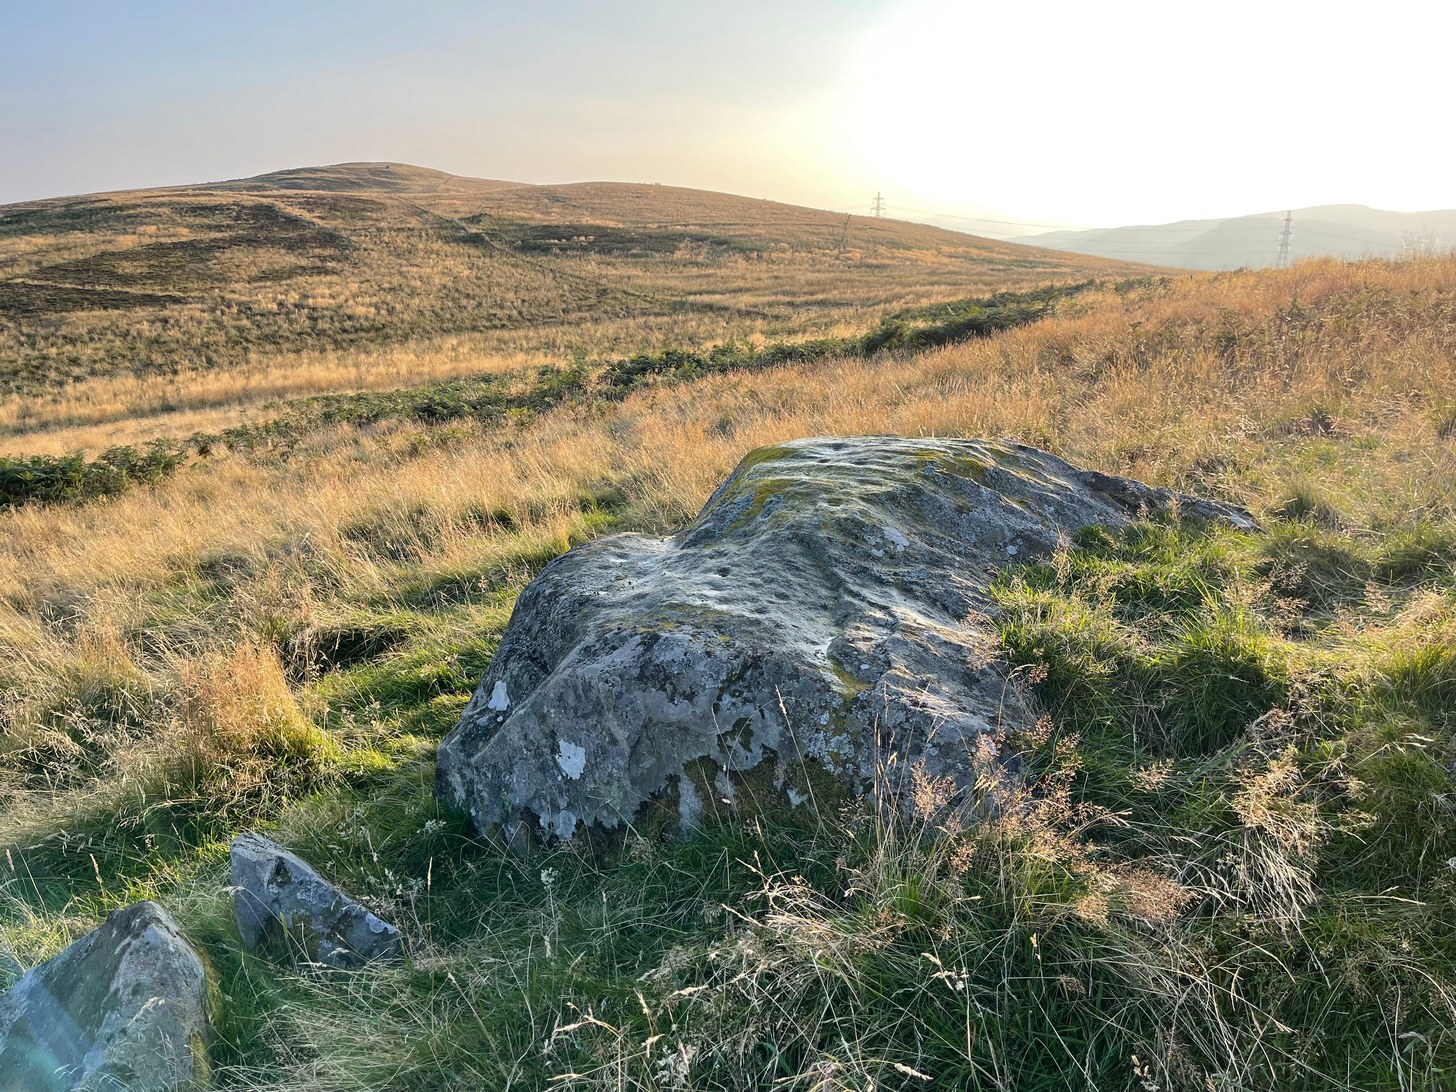
Long stone & its cupmarks
Cups along the spine
As you walk towards it, it seems as if a rounded earthfast boulder is in front of you, but once you reach it you realise that it’s nothing of the sort. Indeed, the more you looked at the stone, the more it seems as if it might have stood upright not too many centuries ago; the prevalence of other standing stones in the area being well known. But, along the spine of this long stone, a number of cup-marks speak out to you: at least seven of them, perhaps eight. There are a number of smaller “cups” roughly along the same length of stone, but these are Nature’s handiwork; but, it looks as if one or two of the man-made cups might have started their lives as Nature’s indentations and been worked into the symbols that still remain to this day.
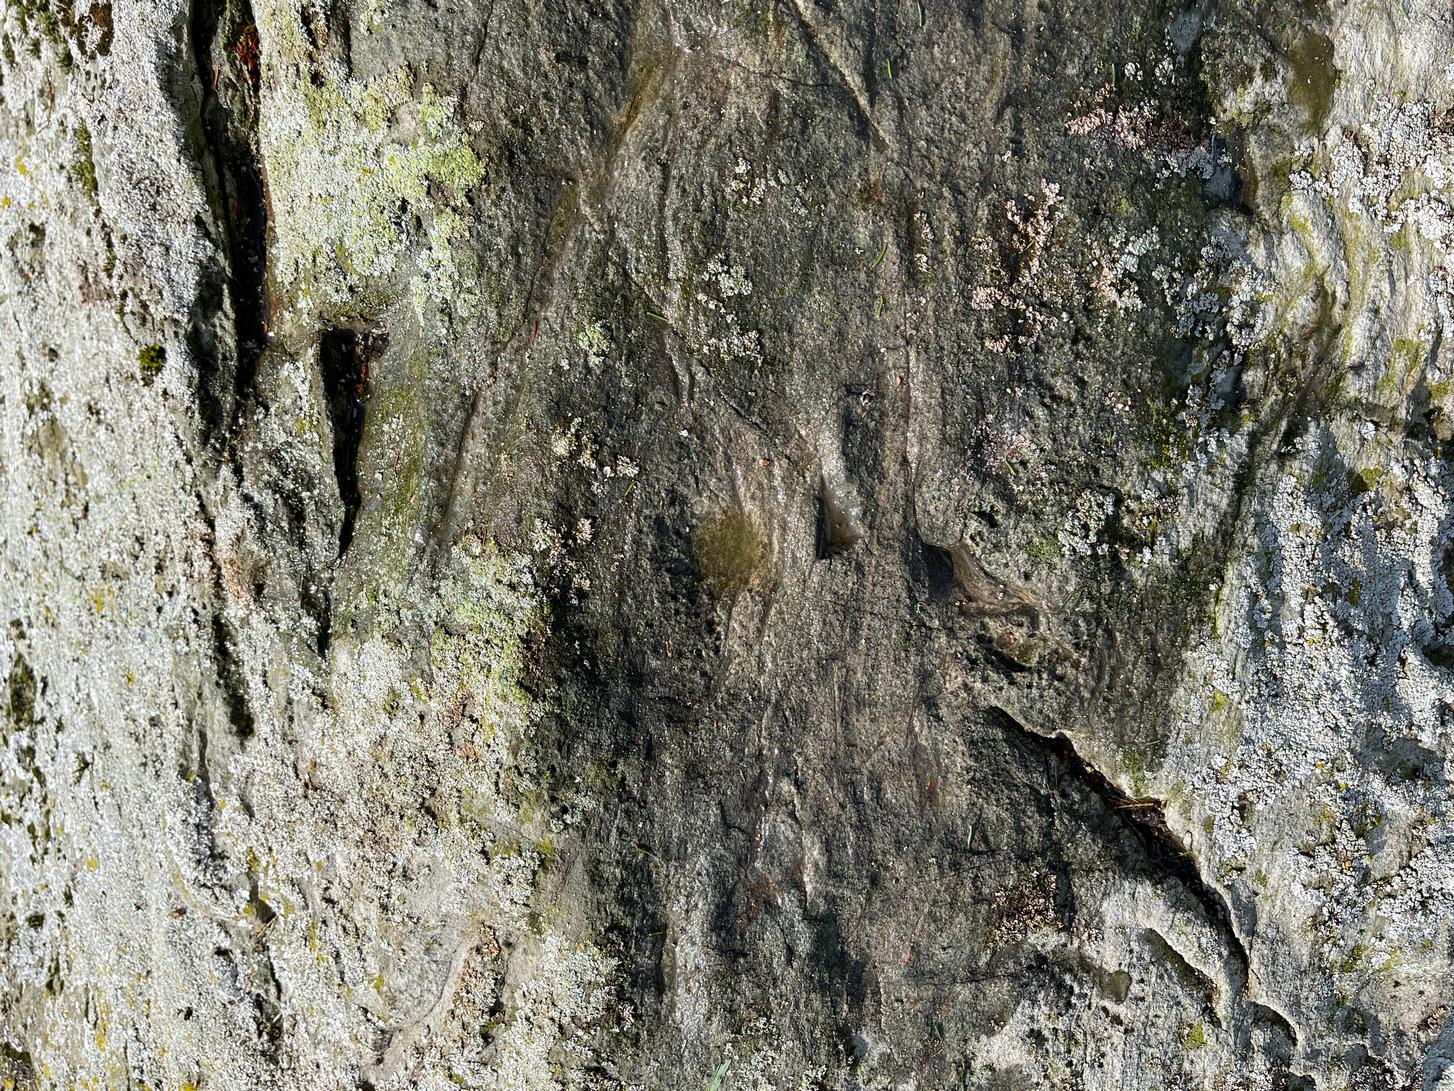
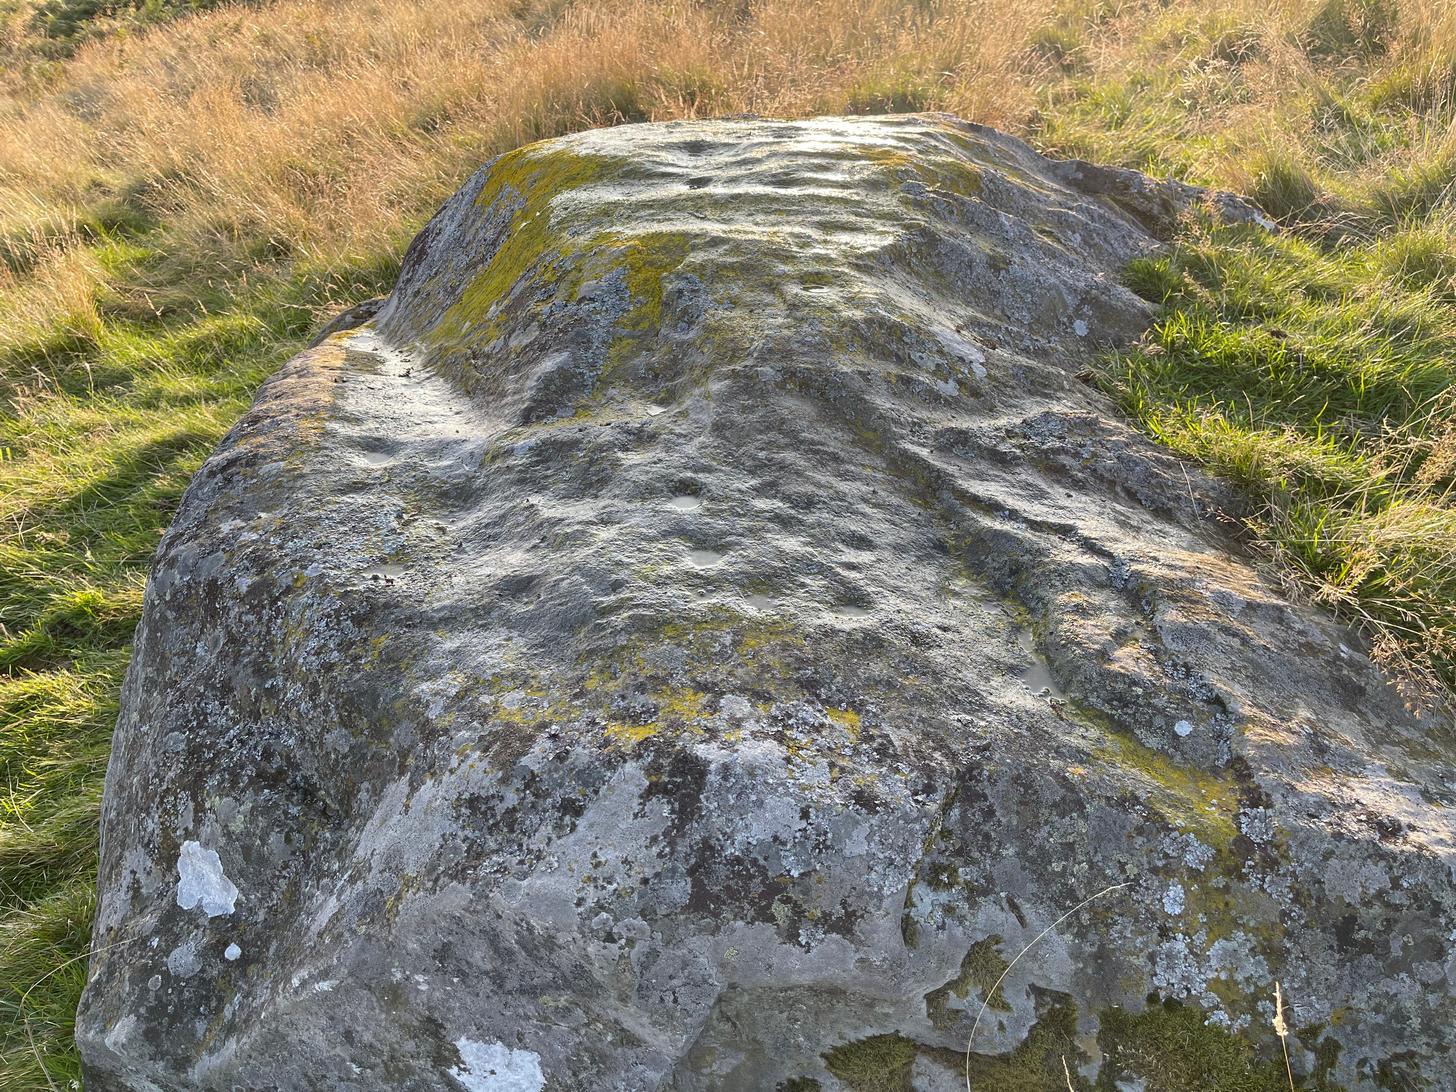
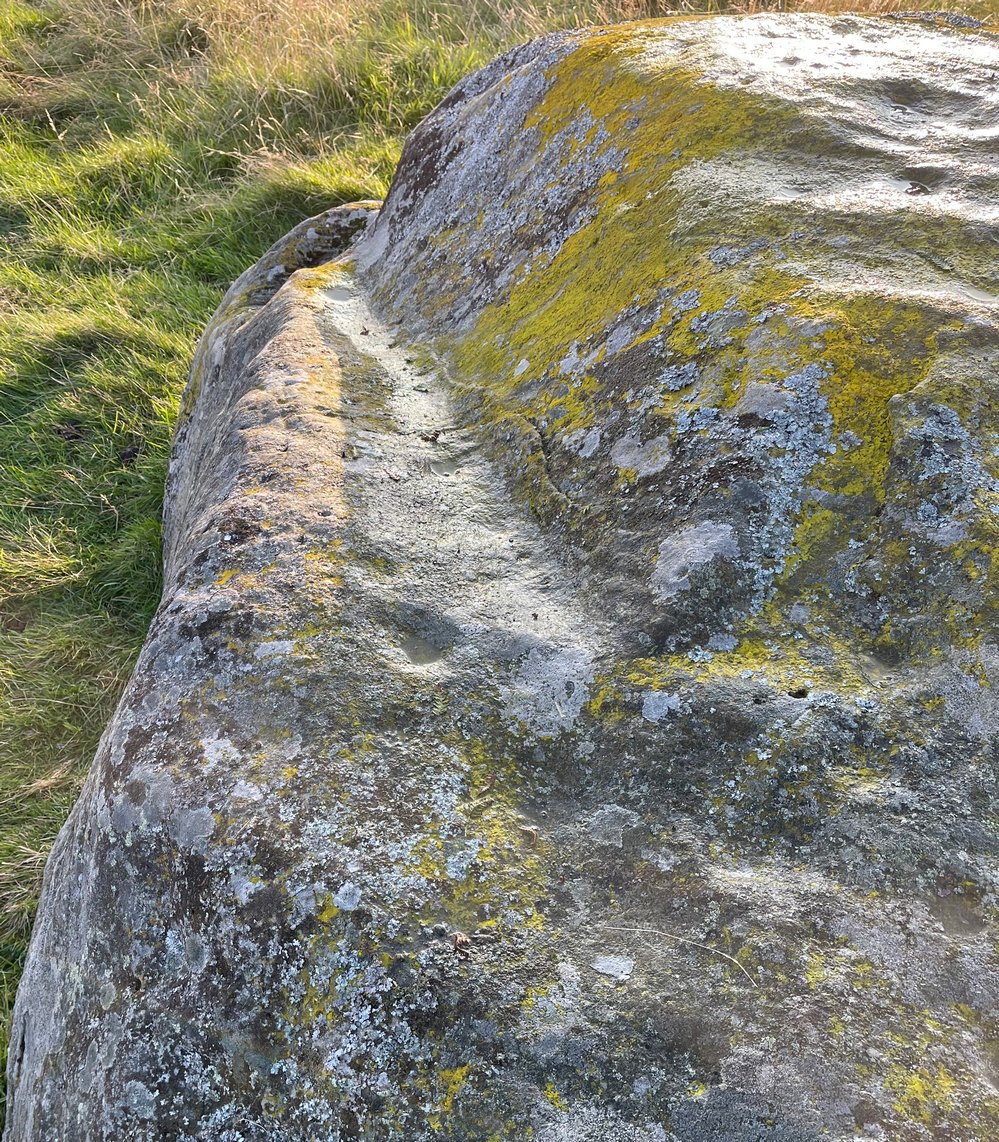
Faint ring around a cup
Nose of stone, looking E
The official records tell us of the cup-marks, but says nothing of the faint but distinct rings around two or three of the cups. The most notable one, albeit faint, is near the southeastern part of the stone, where the ring seems to be an artistic partnership of Nature and man. You can make it out in the photo, albeit not too clearly. Nearer to the middle of the stone at least one of the cups has a semi-circle around it and, just to the side of it, a natural crack in the stone has been enhanced and carved into a short line. On the whole, it’s not a visually impressive carving and the design is troublesome to see if the lighting isn’t right (as usual), but is worth having a look at if you’re in the area. Very little’s been written about it apart from brief notes in the regional megalithic surveys of both Finlayson (2010) and Watson (2006).
References:
Finlayson, Andrew, The Stones of Strathearn, One Tree Island: Comrie 2010.
Watson, David, A Simple Introduction to the Stone Circles and Standing Stones of Perthshire, Photoprint 2006.
Acknowledgements:Huge thanks for use of the Ordnance Survey map in this site profile, reproduced with the kind permission of the National Library of Scotland.
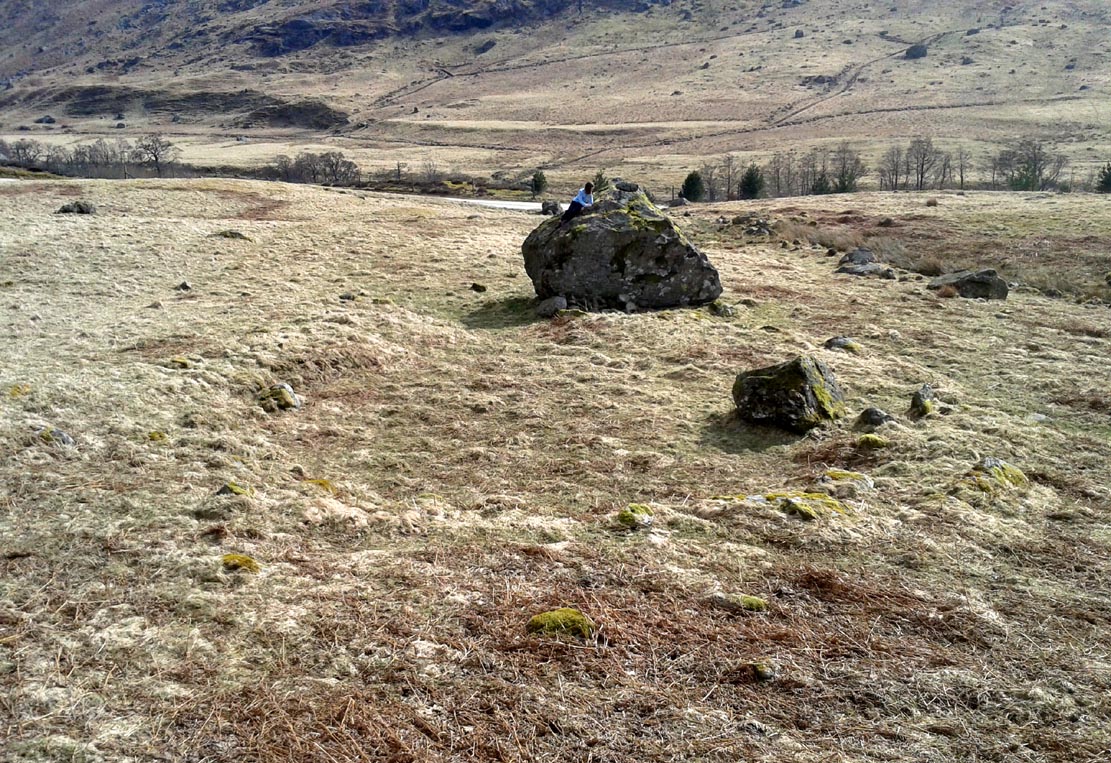
Take the same direction as if you’re visiting the Ardoch (2) carving, starting from the Foulford golf course on the A822, roughly halfway between Gilmerton and the entrance to the Sma’ Glen. From here, take the track eastwards into the hills and literally ¾-mile along you reach the pylon; keep going along the same track for another 200 yards and on your left watch out for the track-cum-footpath going up the slope past Ardoch (2), onto the hilltop, then through the gate and down the path northeast for about ⅔-mile until you reach the burn. Keep going uphill for 80 yards and through the cronky gate, head 70 yards to your left to the large single rounded boulder.
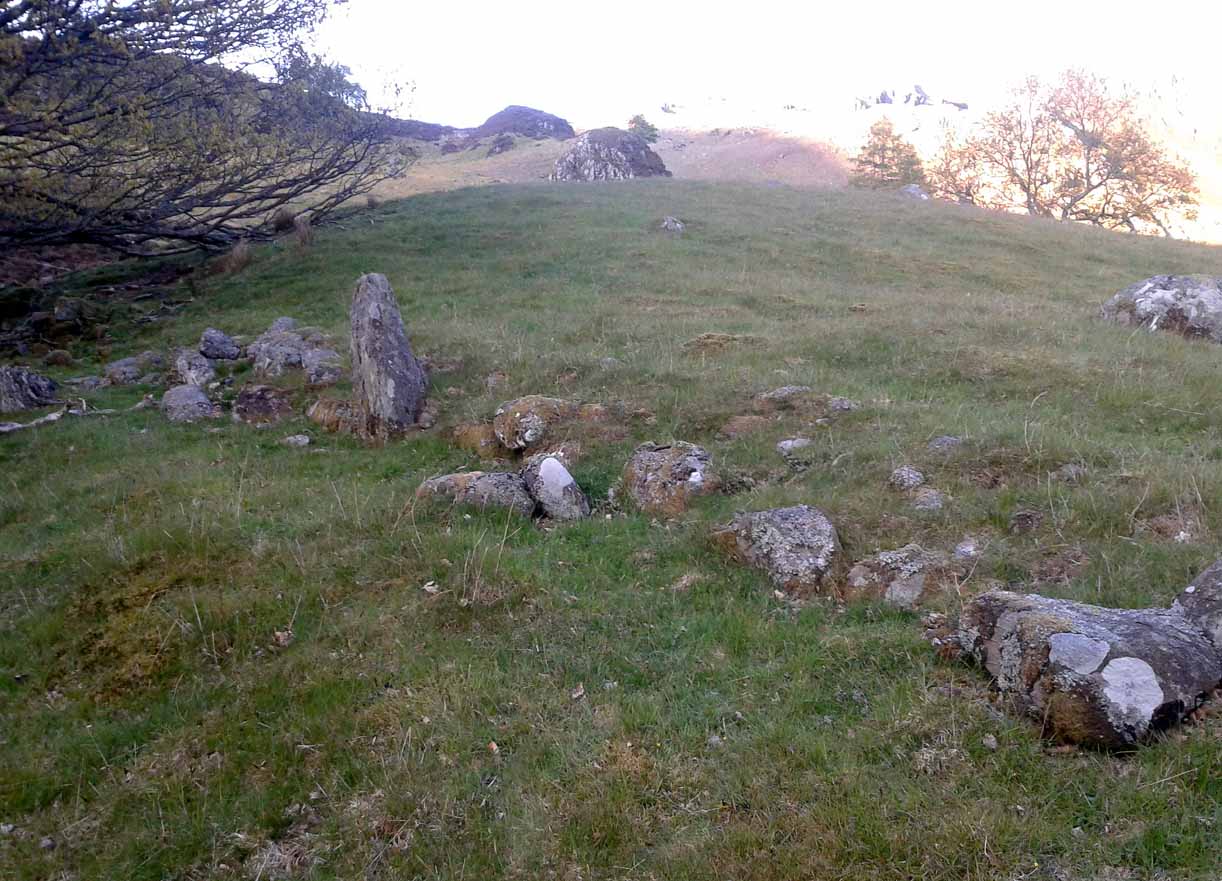
Archaeology & History
Main scatter of cups
One of several petroglyphs in the area, this is the most notable in terms of its size. It rests just below the two Stroness hut circles which sit on the small level piece of ground nearly 100 yards further up the slope. A considerable scatter of cup-marks cover much of the upper surface of the boulder, some faint, some not so faint, with a number of them painted in a slight cover of lichens at the topmost section of the rock. The carving was first described somewhat blandly by George Currie (2004), who simply wrote:
“Large boulder, 2 x 2m, just W of hut circles; 16+ cups, 40–50 x 14–20mm.”
Faint line near the edge
Cups among the lichens
It’s actually south of the hut circles; and there are certainly more than sixteen cup-marks, as the photos here indicate. At the time of my visit here recently, the sun was falling and was just below the level that permitted a perfect highlighting of the cup-marks, but there seemed to be at least 25 of them, scattered in no particular order over much of its upper surface. One curiosity that seemed apparent was a long carved line running along a long slender edge along on the southern side of the stone, from a large cup-mark down to near the southwestern edge, meeting another smaller cupmark. I not 100% certain that it’s actually been carved and it may just be one of Nature’s scratches along the rock, but it does seem to have that “man-made” stamp on it. Another visit in differing light will show us one way or the other.
References:
Currie, George, ‘Buchanty Hill (Fowlis Wester parish): Cup-marked Rocks’, in Discovery & Excavation Scotland, volume 5, 2004.
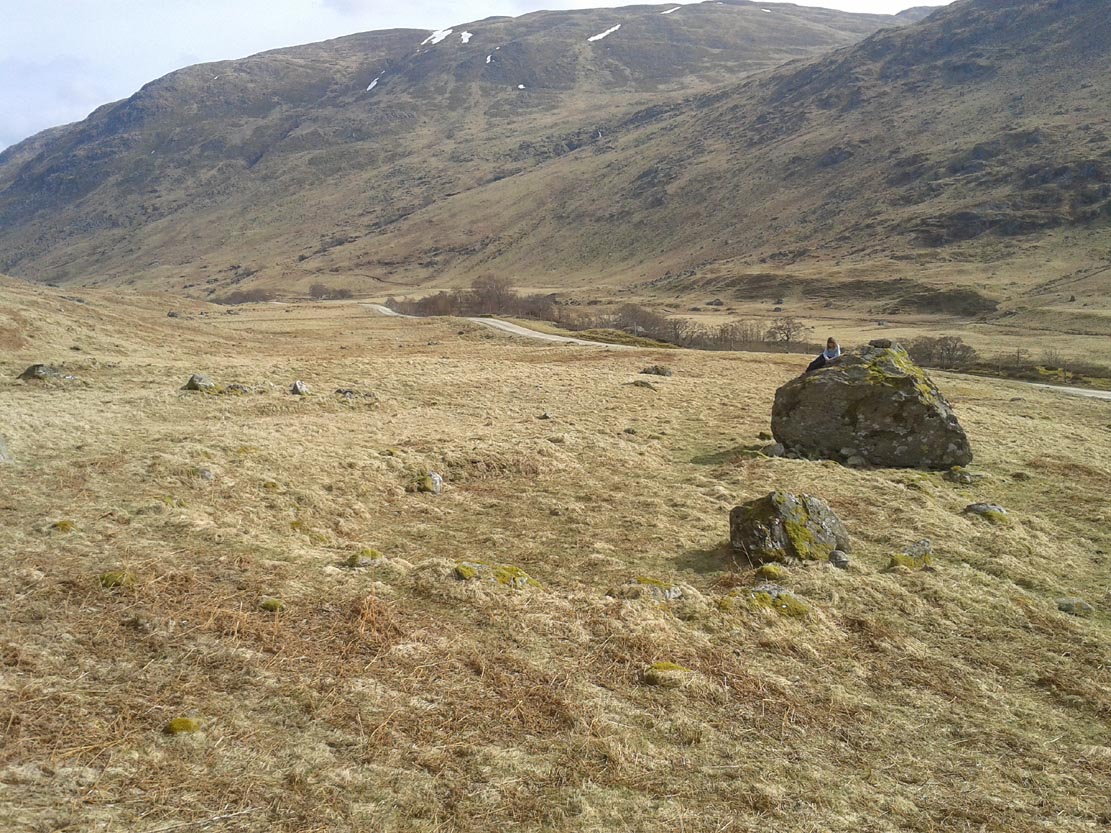
If you’re coming here you’re obviously making a day out of it! You’ll be taking the shortest route to the Ardoch (2) petroglyph, via the Foulford golf course along the A822, roughly halfway between Gilmerton and the entrance to the Sma’ Glen. From here, take the track eastwards into the hills, and literally ¾-mile along you reach the pylon; keep along the same track for another 200 yards and on your left watch out for the track-cum-footpath going up the slope past the petroglyph, onto the hilltop, then through the gate and down the path for about ⅔-mile until you reach the burn. On the other side, go through the gate and 100 yards uphill through another one, walk immediately to your left alongside the fence. About 20 yards from the wall, look at the ground. Zigzag about!
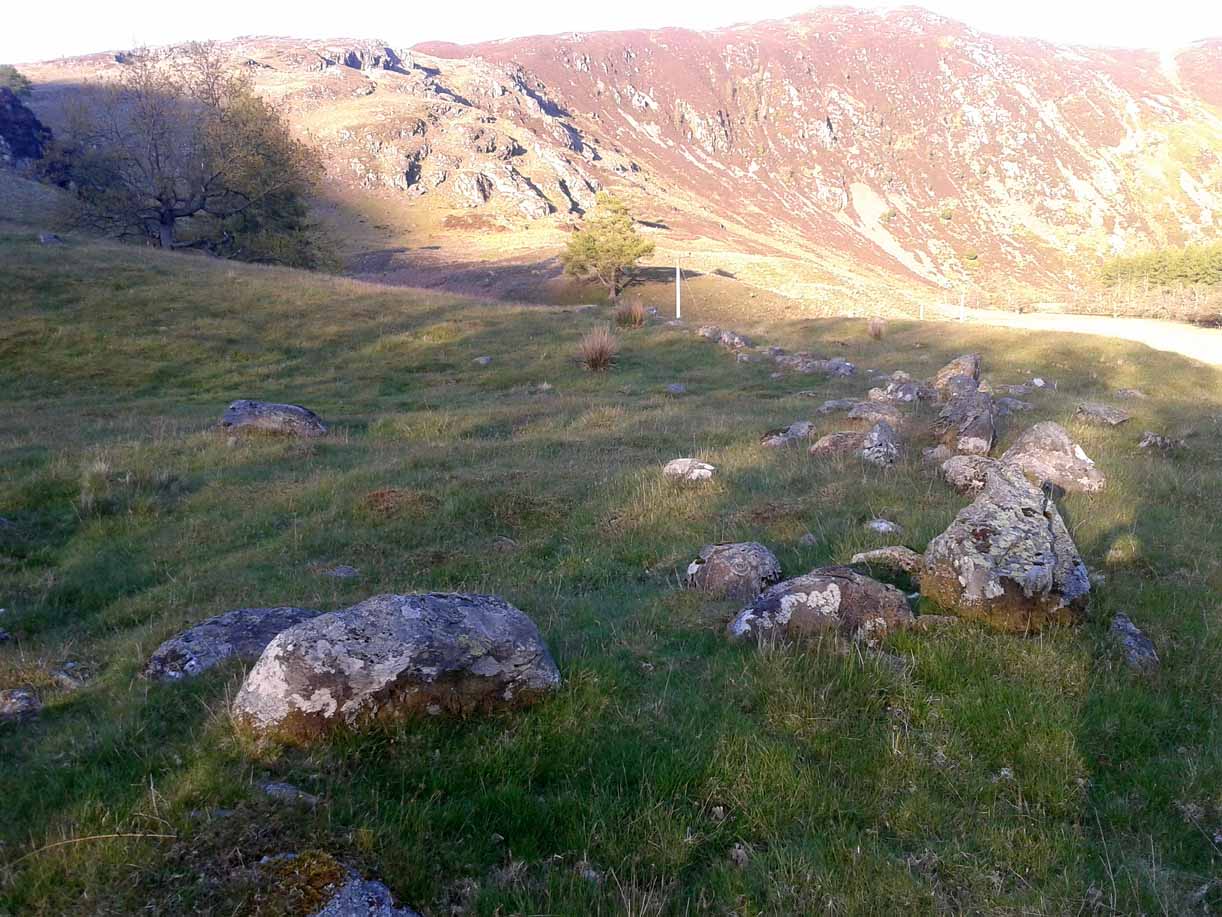
Archaeology & History
Two distinct but very overgrown hut circles sit next to each other on the first ridge above the burn. When they were first built—sometime in the Bronze Age most likely—the landscape here was slightly different to what we see today. Scattered woodland of hazel, birch and Scots pine lived all across these hills and the small burn 100 yards below would have been much faster flowing, with trout and smaller fish in plentiful supply. The large cup-marked stone between the burn and these huts would have had some magico-religious meaning to the people living here. Indeed, it may have been carved by the people who built the huts, or they might have rested here due to its presence. I point out these simple ingredients to give a little more life to a site which, today, seems so isolated, lonely and unimpressive. It’s essential that we paint the history of this and all our ancient monuments with the colourful shades they lived within: of the forests and their animals, so as to give these seemingly bland lifeless remains a feeling in order to rekindle their history.
Apart from the large petroglyph less than 100 yards below, these hut circle are apparently in isolation if we go by the record books. And they’re difficult to make out when the grasses are tall—as they were when I visited recently. They are both roughly the same size—about 11 yards across—and, most likely, each housed a small family. The one closest to the wall is the slightly smaller of the two. It was first reported by Miss Comrie (1972) who initially only noticed one of the two huts—probably due to the long grasses. She told that,
“On an area known as Buchanty Hill at 1000ft is a hut circle with a diameter of 11mand wall width of 2m. Situated in a hollow, sheltered from the north and with an entrance on the downward-side facing south. The walling has no obvious inner or outer facing.”
On my visit to this place, the silence was deafening and the fading daylight painted the hills with a stunning velvet breath all across the veil of Her body. It’s a gorgeous isolated place that you might aswell sit down with after you’ve finished looking at the rock art…
References:
Comrie, J.E.M., “Fowlis Wester Parish: Hut Circle,” in Discovery & Excavation, Scotland, 1972.
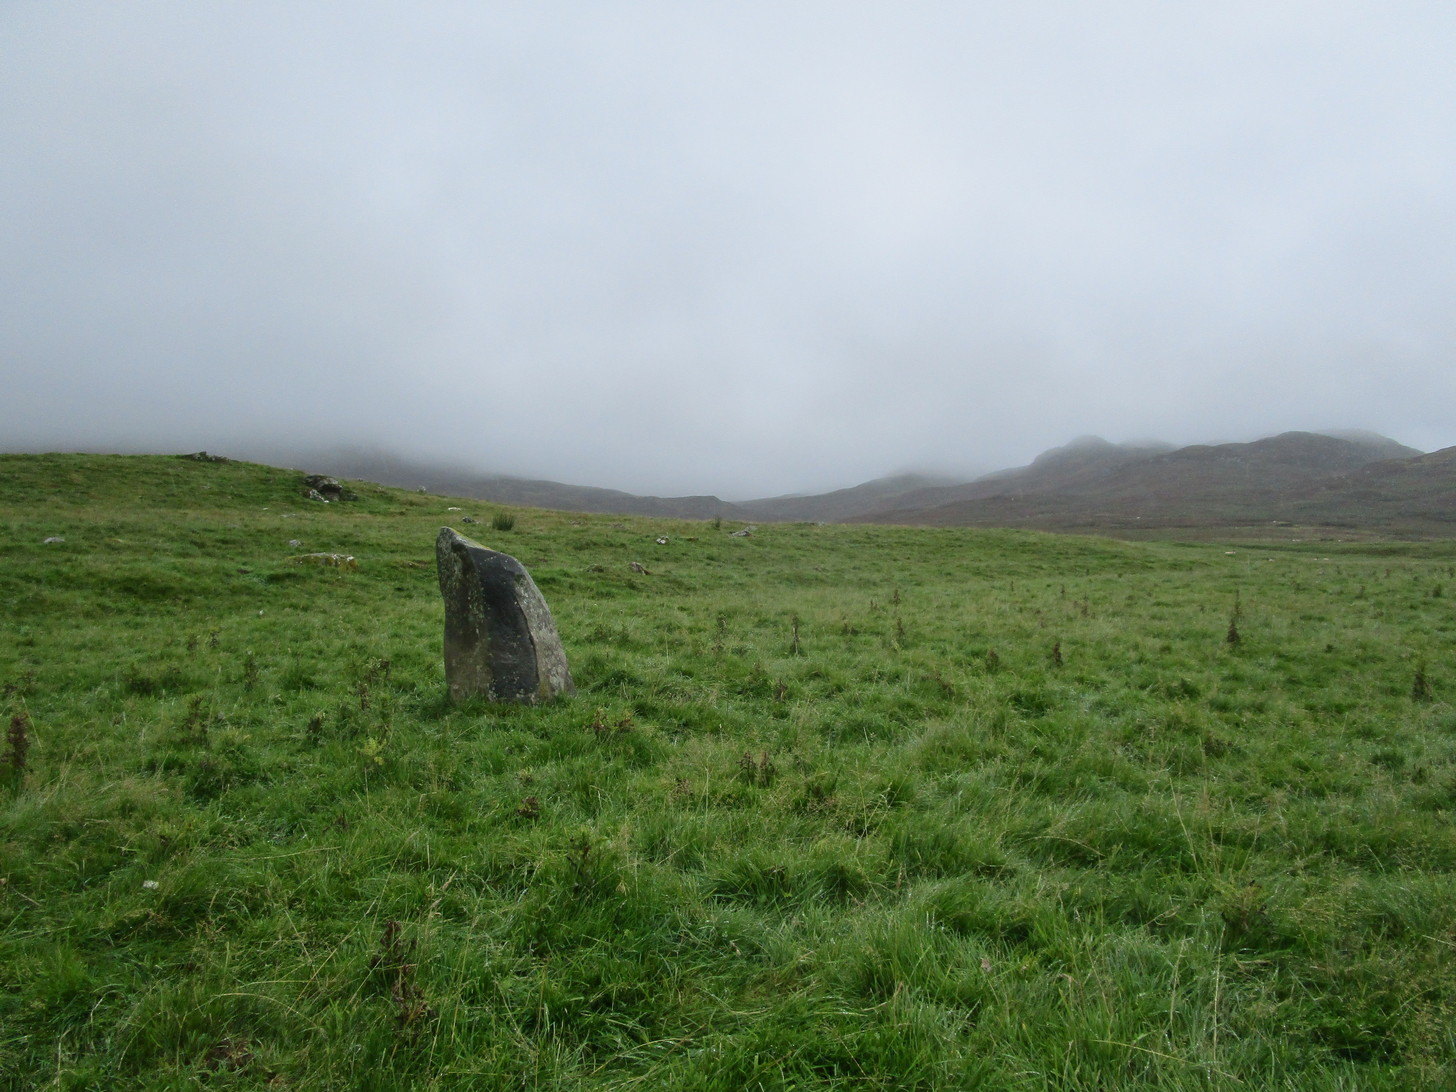
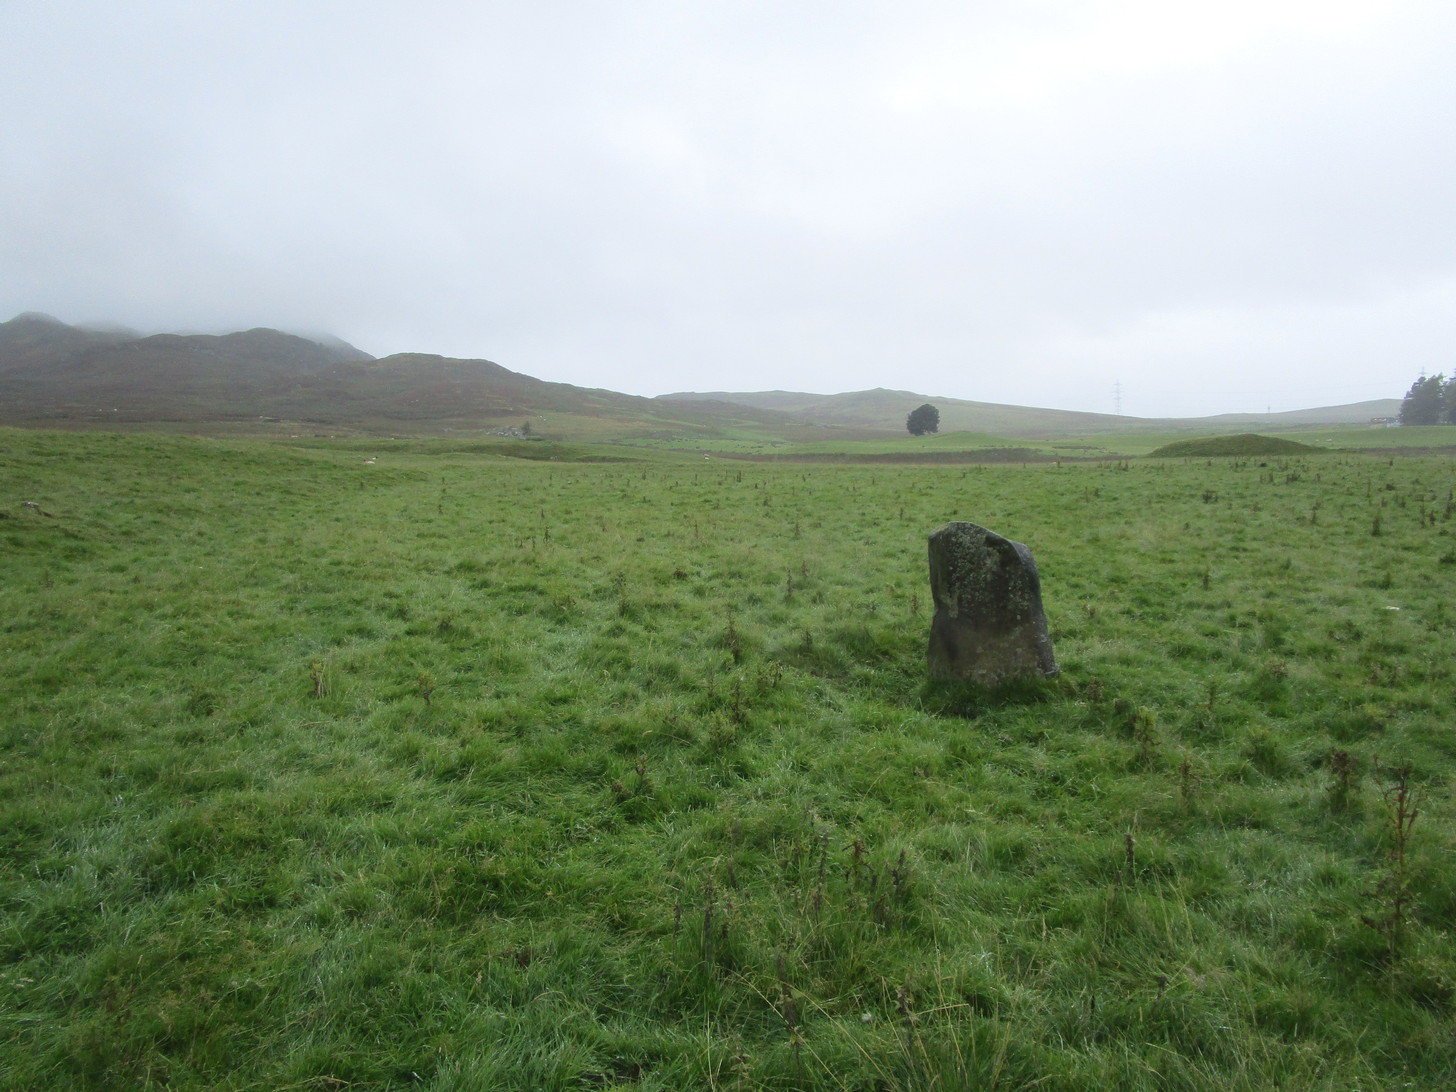
Take the A822 road to the northeast of Crieff and head 4-5 miles along until you enter the Sma’ Glen. You go past Ossian’s Stone and after crossing the river past the Newton Bridge enclosure, the road starts to go uphill. Nearly 2 miles up, the road levels out and at the left-side of the road is a small thin car-parking spot. Keep your eyes peeled out for it! From here, walk back down the road for nearly 250 yards until your reach a gate into the fields on your right. By now you should already be able to see the stone in the field, barely 100 yards away to the southwest.
Archaeology & History
The old stone, looking N
Standing within the impressive landscape of the Perthshire mountains, this 4-foot-tall monolith is a seemingly solitary fella, sliced almost straight down one side—like so many of its regional compatriots—not far from the edge of General Wade’s military road. Not much more can be said of the old thing. The petroglyphic cluster of Corrymuckloch begins less than half-a-mile to the north; and, in all likelihood, other prehistoric sites will exist close by that aren’t yet in the archaeological registers…
Acknowledgments: Thanks to my long-suffering daughter Naomi, for taking me up for a quick break to see this old stone…
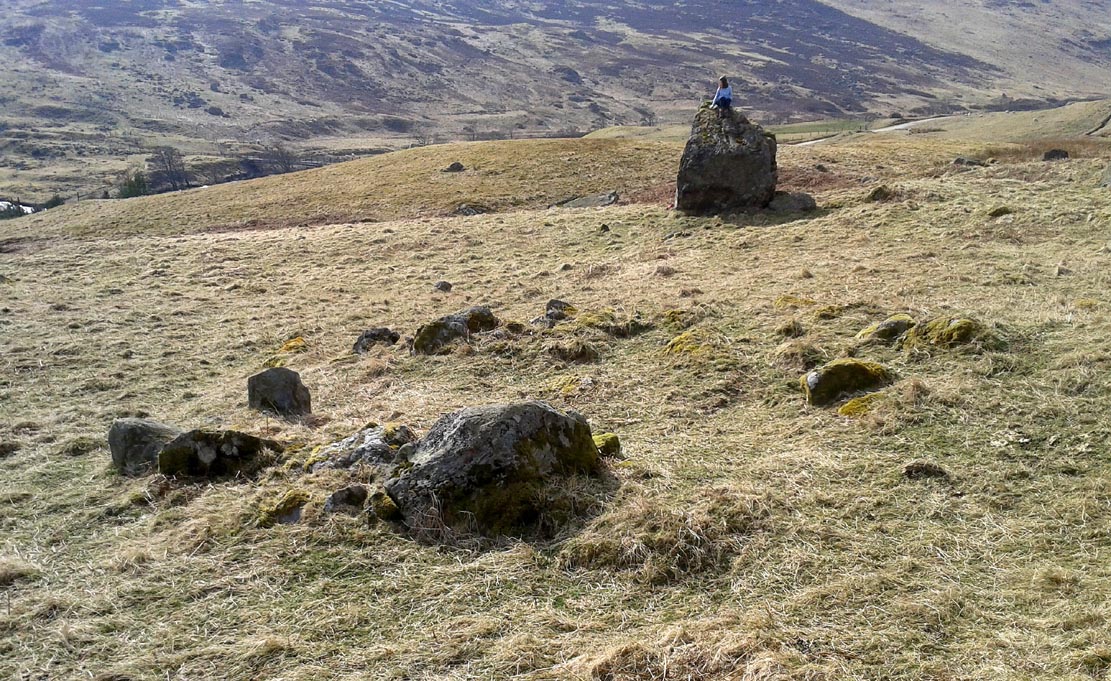
Park up and walk the long estate track up Glen Almond for nearly three miles until, on your left, you’ll see a small pond. From here, walk up the slope and, about 100 yards above you, note the large solitary boulder ahead, above the dyke of a small walled stream, where the land levels out. Just past the rock itself is the first of several remains.
Archaeology & History
First things first: the grid-reference cited here is centred upon the largest of several rings of stone found on this small grassy plateau, 150 yards north above the River Almond, just past the huge boulder. It’s an impressive site – and a previously unrecorded one.
The raised ring of Conichan
Looking southeast
At least three large hut circles can be clearly seen on this small ridge, amidst a sea of prehistoric sites scattered all down this lonely Scottish glen. When Paul Hornby, Lara Domleo and I meandered up here the other day (to visit the Clach na Tiompan megaliths), extensive prehistoric walling called my nose up the slopes to see if anything was hiding away—and a large prehistoric ring, more reminiscent of the Derbyshire stone circles and ring cairns than any hut circle, appeared before me.
The first and largest that I came across is the one immediately north of the huge boulder (which may have slight traces of ancient walling running up to it). The large ring is clearly raised onto a flat level platform, with an entrance on its southern edge. The ring itself measures, from outer-wall to outer-wall some 12 yards wide (E-W) and 11 yards N-S. The northernmost section of the walling or stone embanked structure is built into the sloping hill to the rear, with the east and western walls constructed simply onto the flat land. The walling itself is typical of prehistoric structures, comprising the usual mass of small stones packed within a number of larger upright stones; although much of it is very overgrown with centuries of vegetation. The walling that constitutes the ring itself is between 1-2 yards across and about two-feet high above the present ground-level.
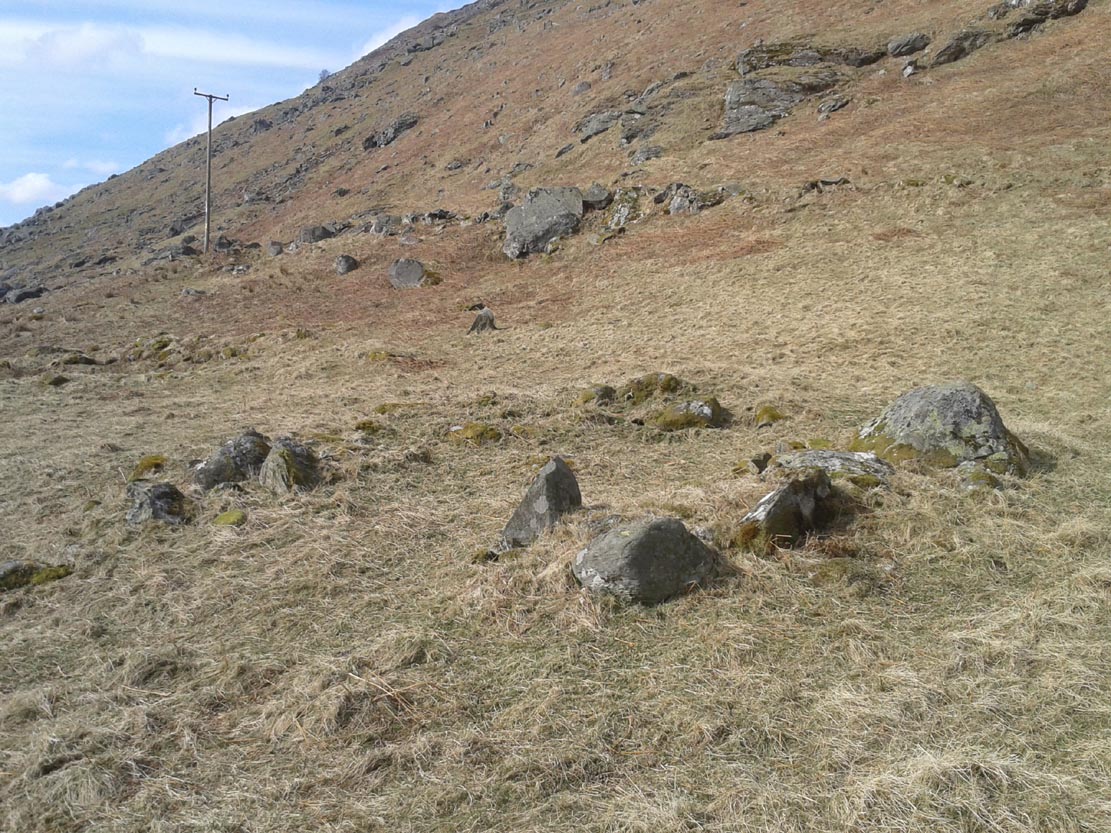
Second circular remains
…and from another angle
To the east of this is a smaller, roughly circular construction of similar form. The rocks that make up this site are much more visible and may have been robbed and used in the more extensive walling above and the dykes below. It is unclear whether the nature of this site is the same as that of the more defined circular enclosure we have just described.
The remains of a third structure was clearly evident a short distance to the east of this, but I didn’t have much time here and another visit is needed to make further assessments. Iron Age walling and other undocumented prehistoric remains were also found close by.
Acknowledgements: Many thanks to the noses of little Lara Domleo and Prof. Paul Hornby for their bimbling aid to relocate this site – and one or two others that have been off the radar for many-a-century.
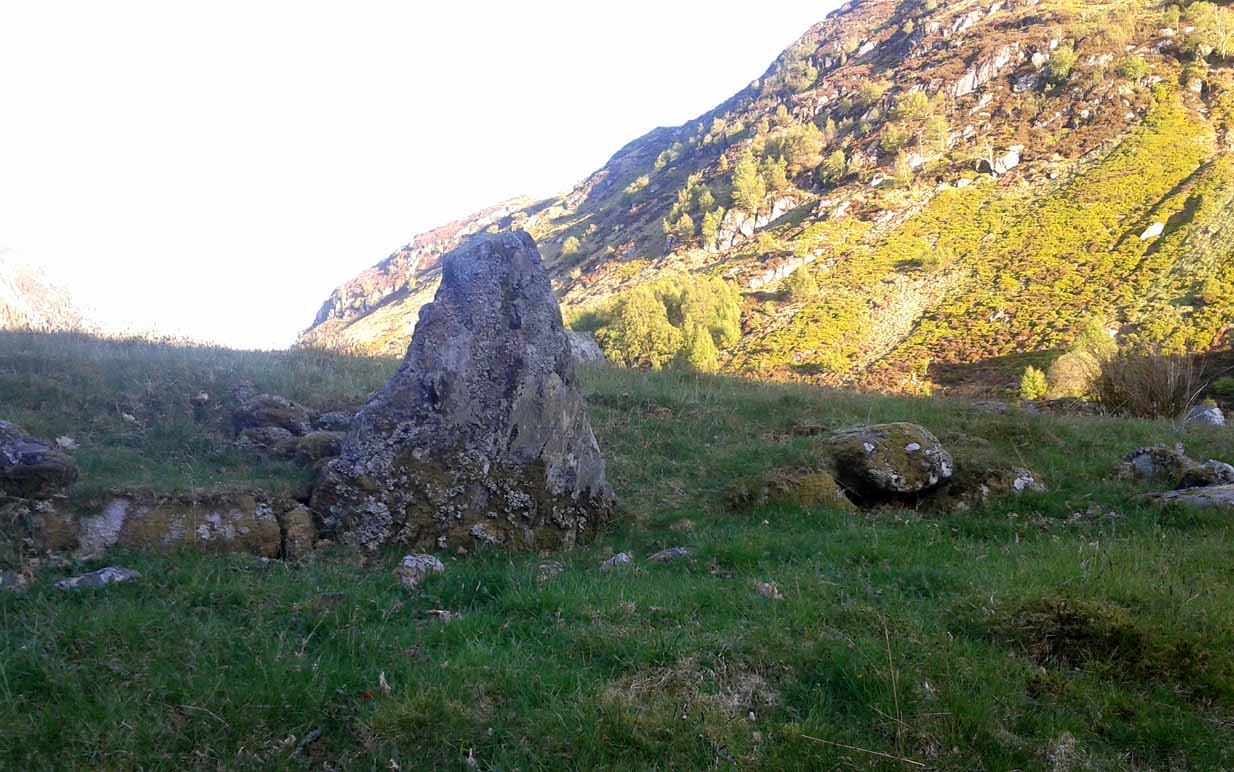
Walk up the long track of beautiful Glen Almond, past the East Conichan circle and past the giant tomb of Clach na Tiompan. After about 4.2 miles (6.8km), the track diverges: take the one directly west, over the old bridge, and less than 100 yards past here, note the gate on your right. Go into the field and start walking uphill until you’re at the highest point a few hundred yards up. You’ll find the stones in front of you.
Archaeology & History
Auchnafree Stones, looking NW
Somewhat reminiscent in style and form to the standing stones at Dumgoyach, north of Glasgow, this one upright monolith and its seemingly fallen companion have not previously been recorded by archaeologists—but it is quite a distance away from anywhere. The upright stone is about one metre tall and its lumbered companion about four feet long. The remains of a small stone, probably broken from the larger mass, extended beyond the long stone. Another unrecorded standing stone can be found on another hillock a few hundred yards from here.
Venture along the A822 Crieff to Dunkeld road, turning down into the gorgeous Sma’ Glen. Nearly 1 mile past Ossian’s Stone, just past where the road crosses the River Almond, walk along the track on your right where the big boulder sits. Past the boulder, walk up the grassy slope to the left. A standing stone will catch your attention, which sits in the walling. Y’ can’t really miss it!
Archaeology & History
Rediscovered by Paul Hornby in 2015 at the end of a day’s excursion to the neolithic sites a few miles west of here, I can find no references at all to the denuded remains of what seems to be a typical prehistoric enclosure.
Looking down the west wall
The southwestern walls
Constructed around a natural rise in the land 60-70 yards above the River Almond, the enclosure has that ‘Iron Age’ look about it (it may be earlier). Shaped like a giant ‘D’ (and clearly visible on GoogleEarth), the extensive walling that makes up the site—about a yard wide all the way round—is far from small, measuring some 60 yards (54.8m) at its greater longer axis roughly north-south, by 54 yards (49.5m) east to west, with a circumference of about 170 yards (155.5m). The much-denuded walling that defines the perimeter is comprised of a number of large stones with thousands of smaller packing stones that are mainly overgrown. A large ‘standing stone’ about 3 feet tall is the most notable feature nearly halfway along the western wall.
Small standing stone in wall
In all probability this enclosure would have been in use since its construction in the Iron Age period all the way through to the coming of Fuadach nan Gàidheal (the Highland Clearances) in the 19th century, as the people here were pragmatists who made best use of what was around them. It is likely to have ended its days as an area where cattle was contained.
Acknowledgements: Huge thanks to Paul Hornby for his assistance with site inspection, and additional use of his photos.